In this section, you will execute the complete GitLab CI/CD pipeline with all stages including validation, planning, deployment, testing, and notifications to deploy the expanded Nexus fabric configuration.
Step 1 - Apply the fabric configuration
It is time to add these files with Git in preparation for committing them to the repo. You perform the action of adding files with git add. You will add your .gitlab-ci.yml file and add your data directory.
Perform a git add of the files created. Copy and paste the below command in the VS Code Server terminal window to add the files.
git add .gitlab-ci.yml
git add data/
Next, you will perform a git commit and push the configuration files from local to the remote repository in GitLab. This will trigger the pipeline to apply the fabric configuration changes.
git commit -m "Final Fabric Deployment"
Finally, perform a git push of the files to the remote repository. This will automatically trigger the pipeline to apply the configuration changes to the nexus fabric. Copy and paste the below command in the VS Code Server terminal window to push the files.
git push -u origin fabric-expansion
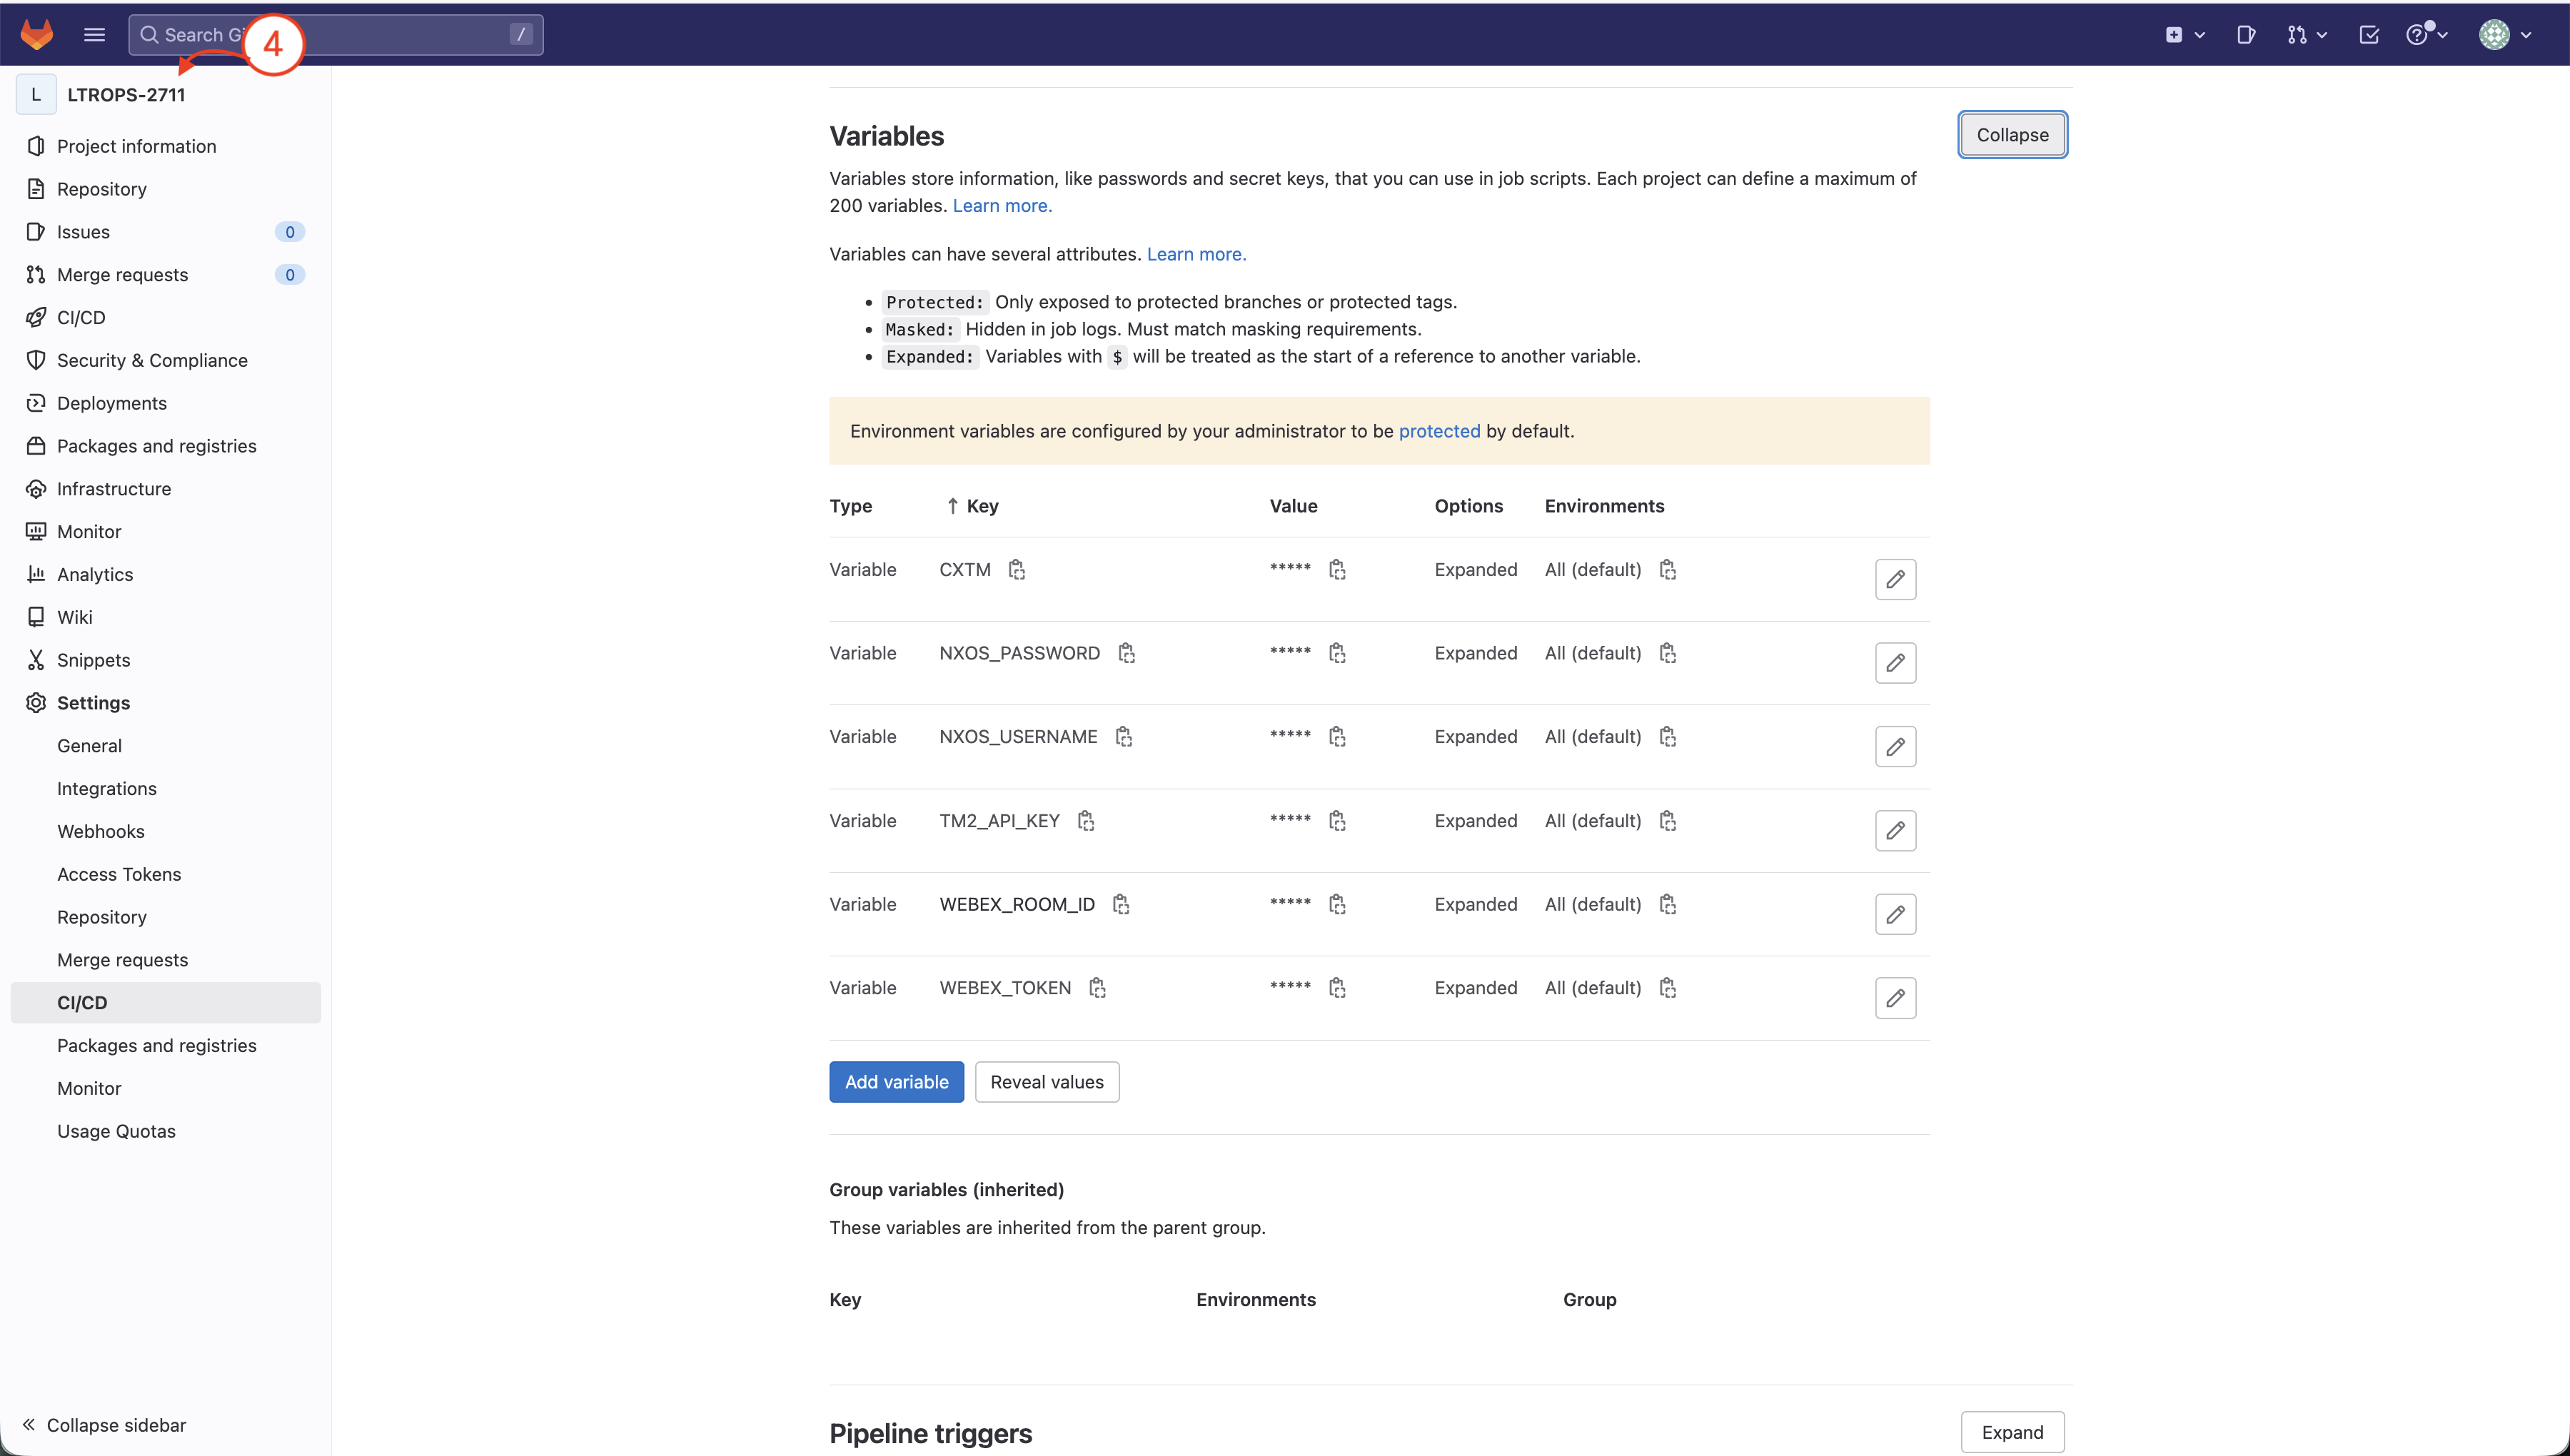
Return to GitLab repo by clicking on the LTROPS-2711 project name on the left side menu.
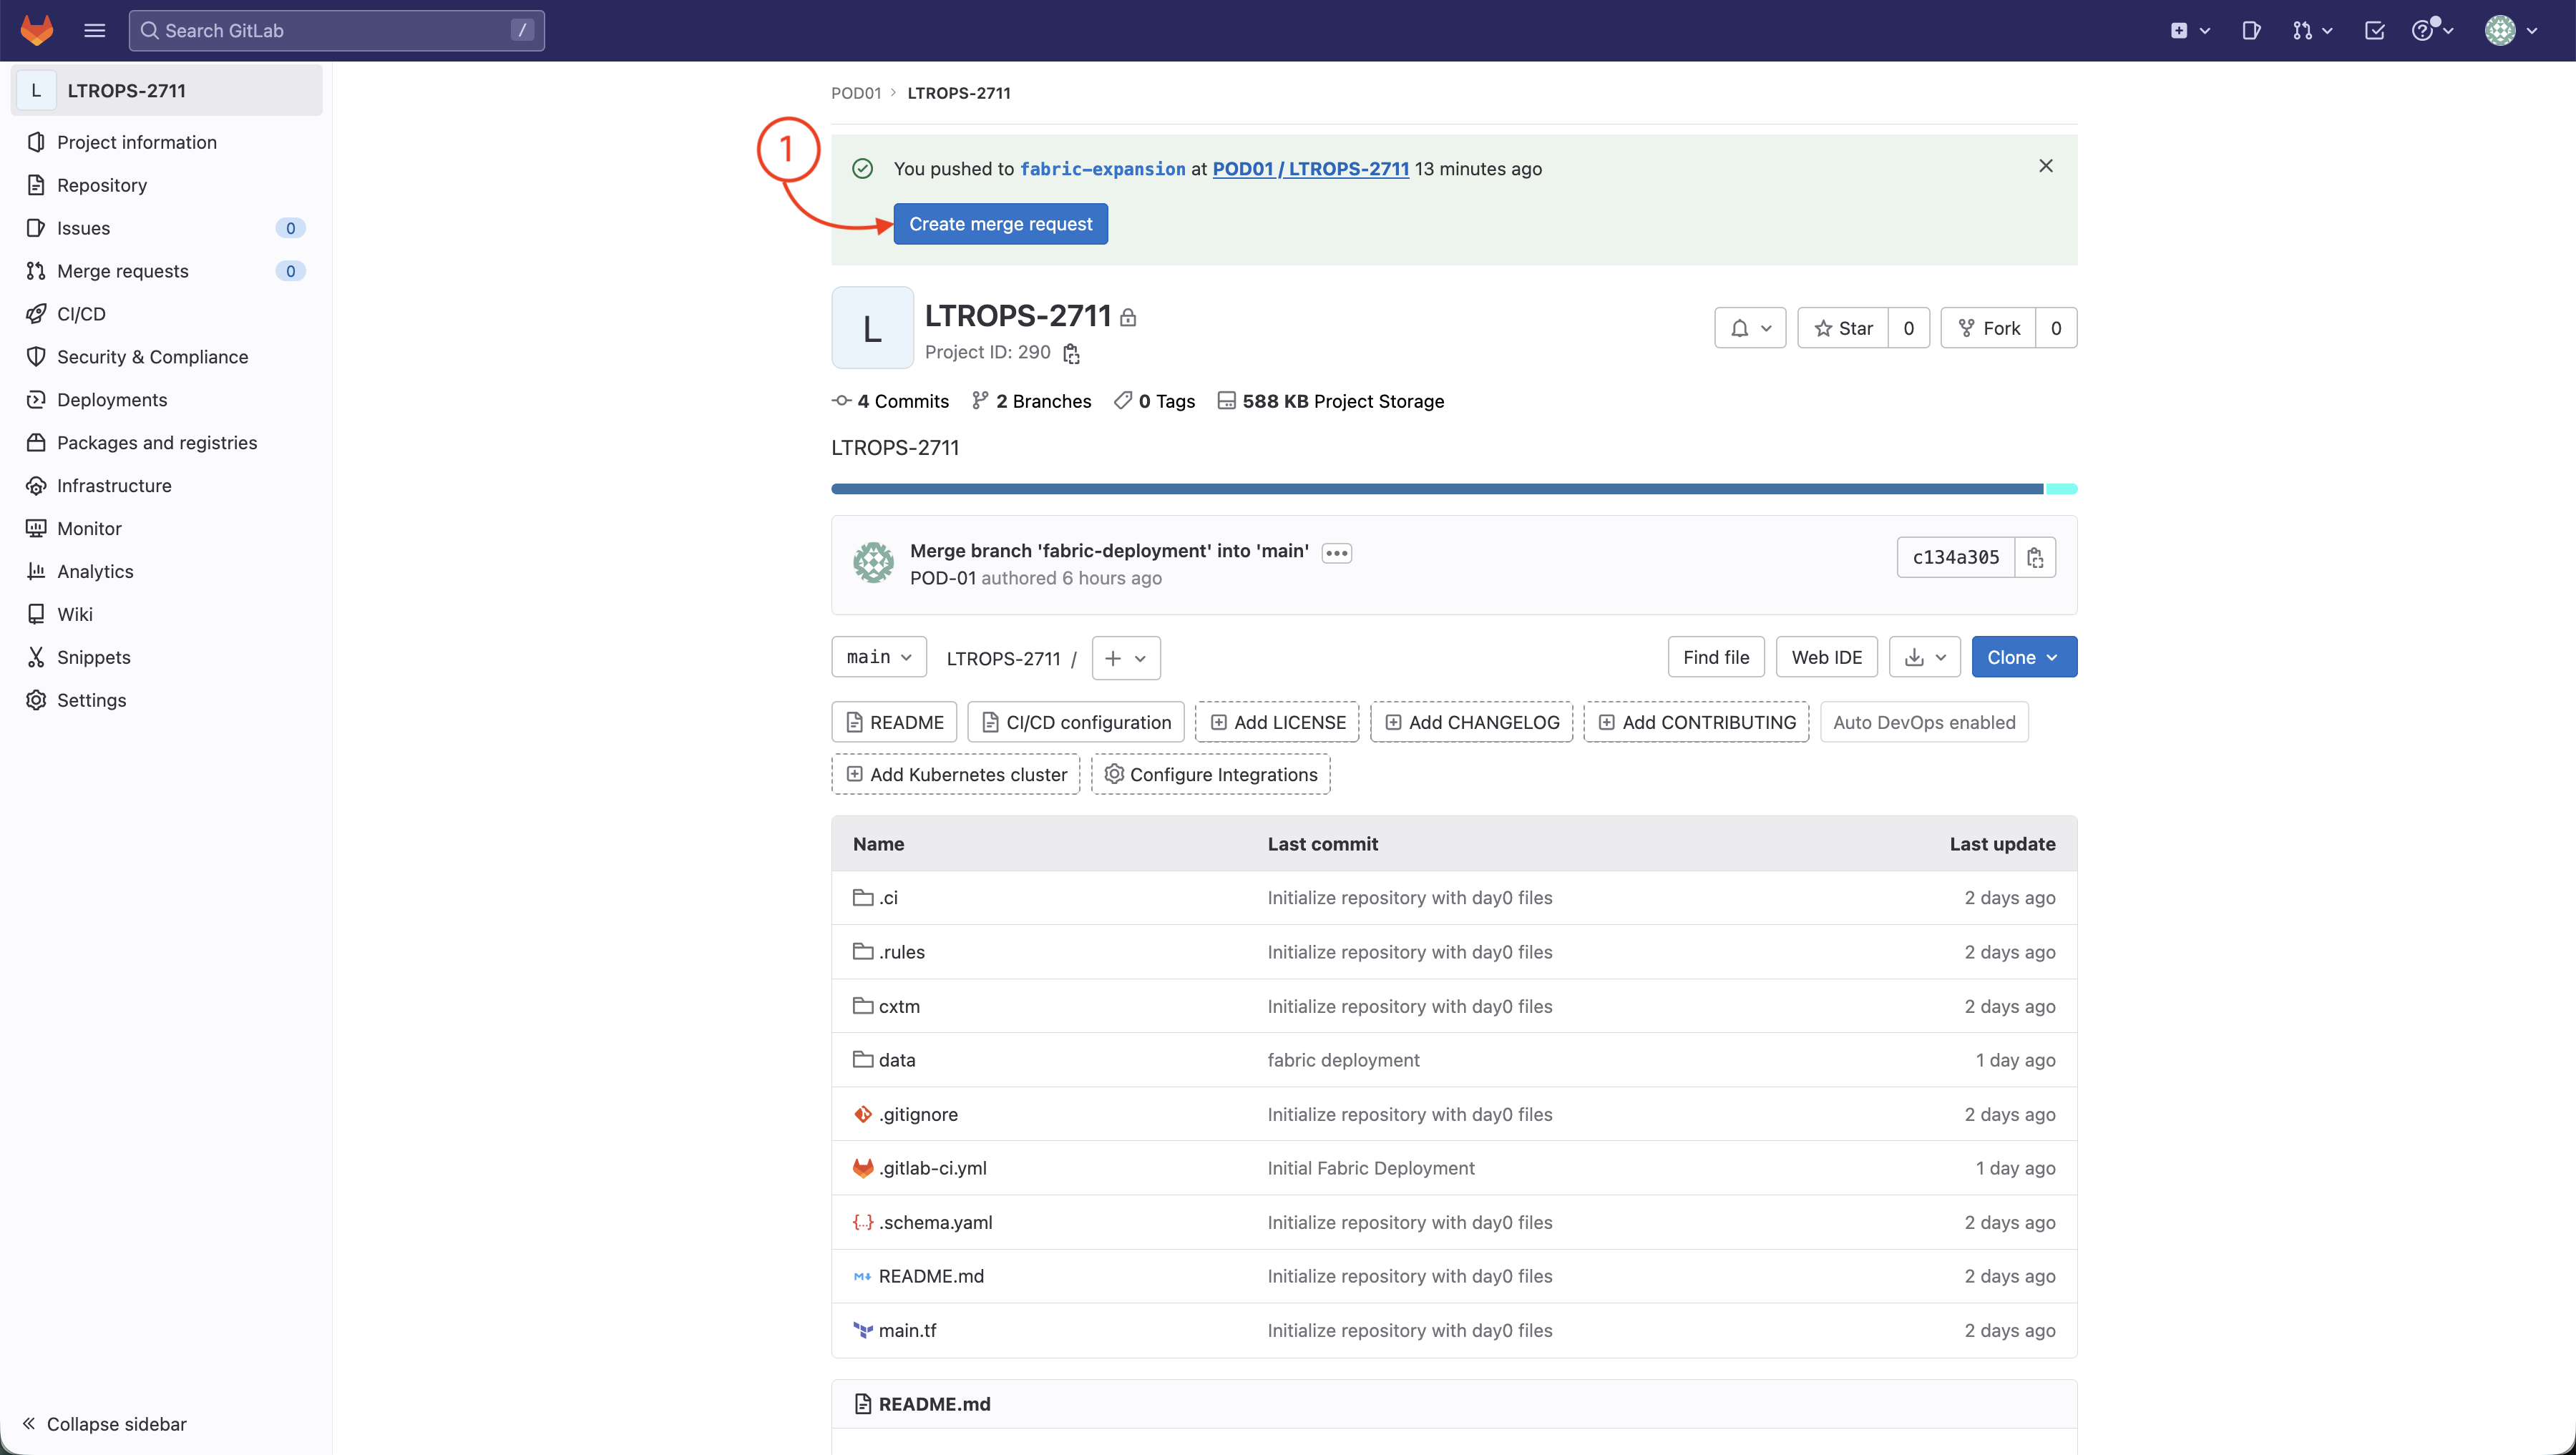
Step 2 - Create a Merge Request
From your GitLab project page:
Click Create merge request
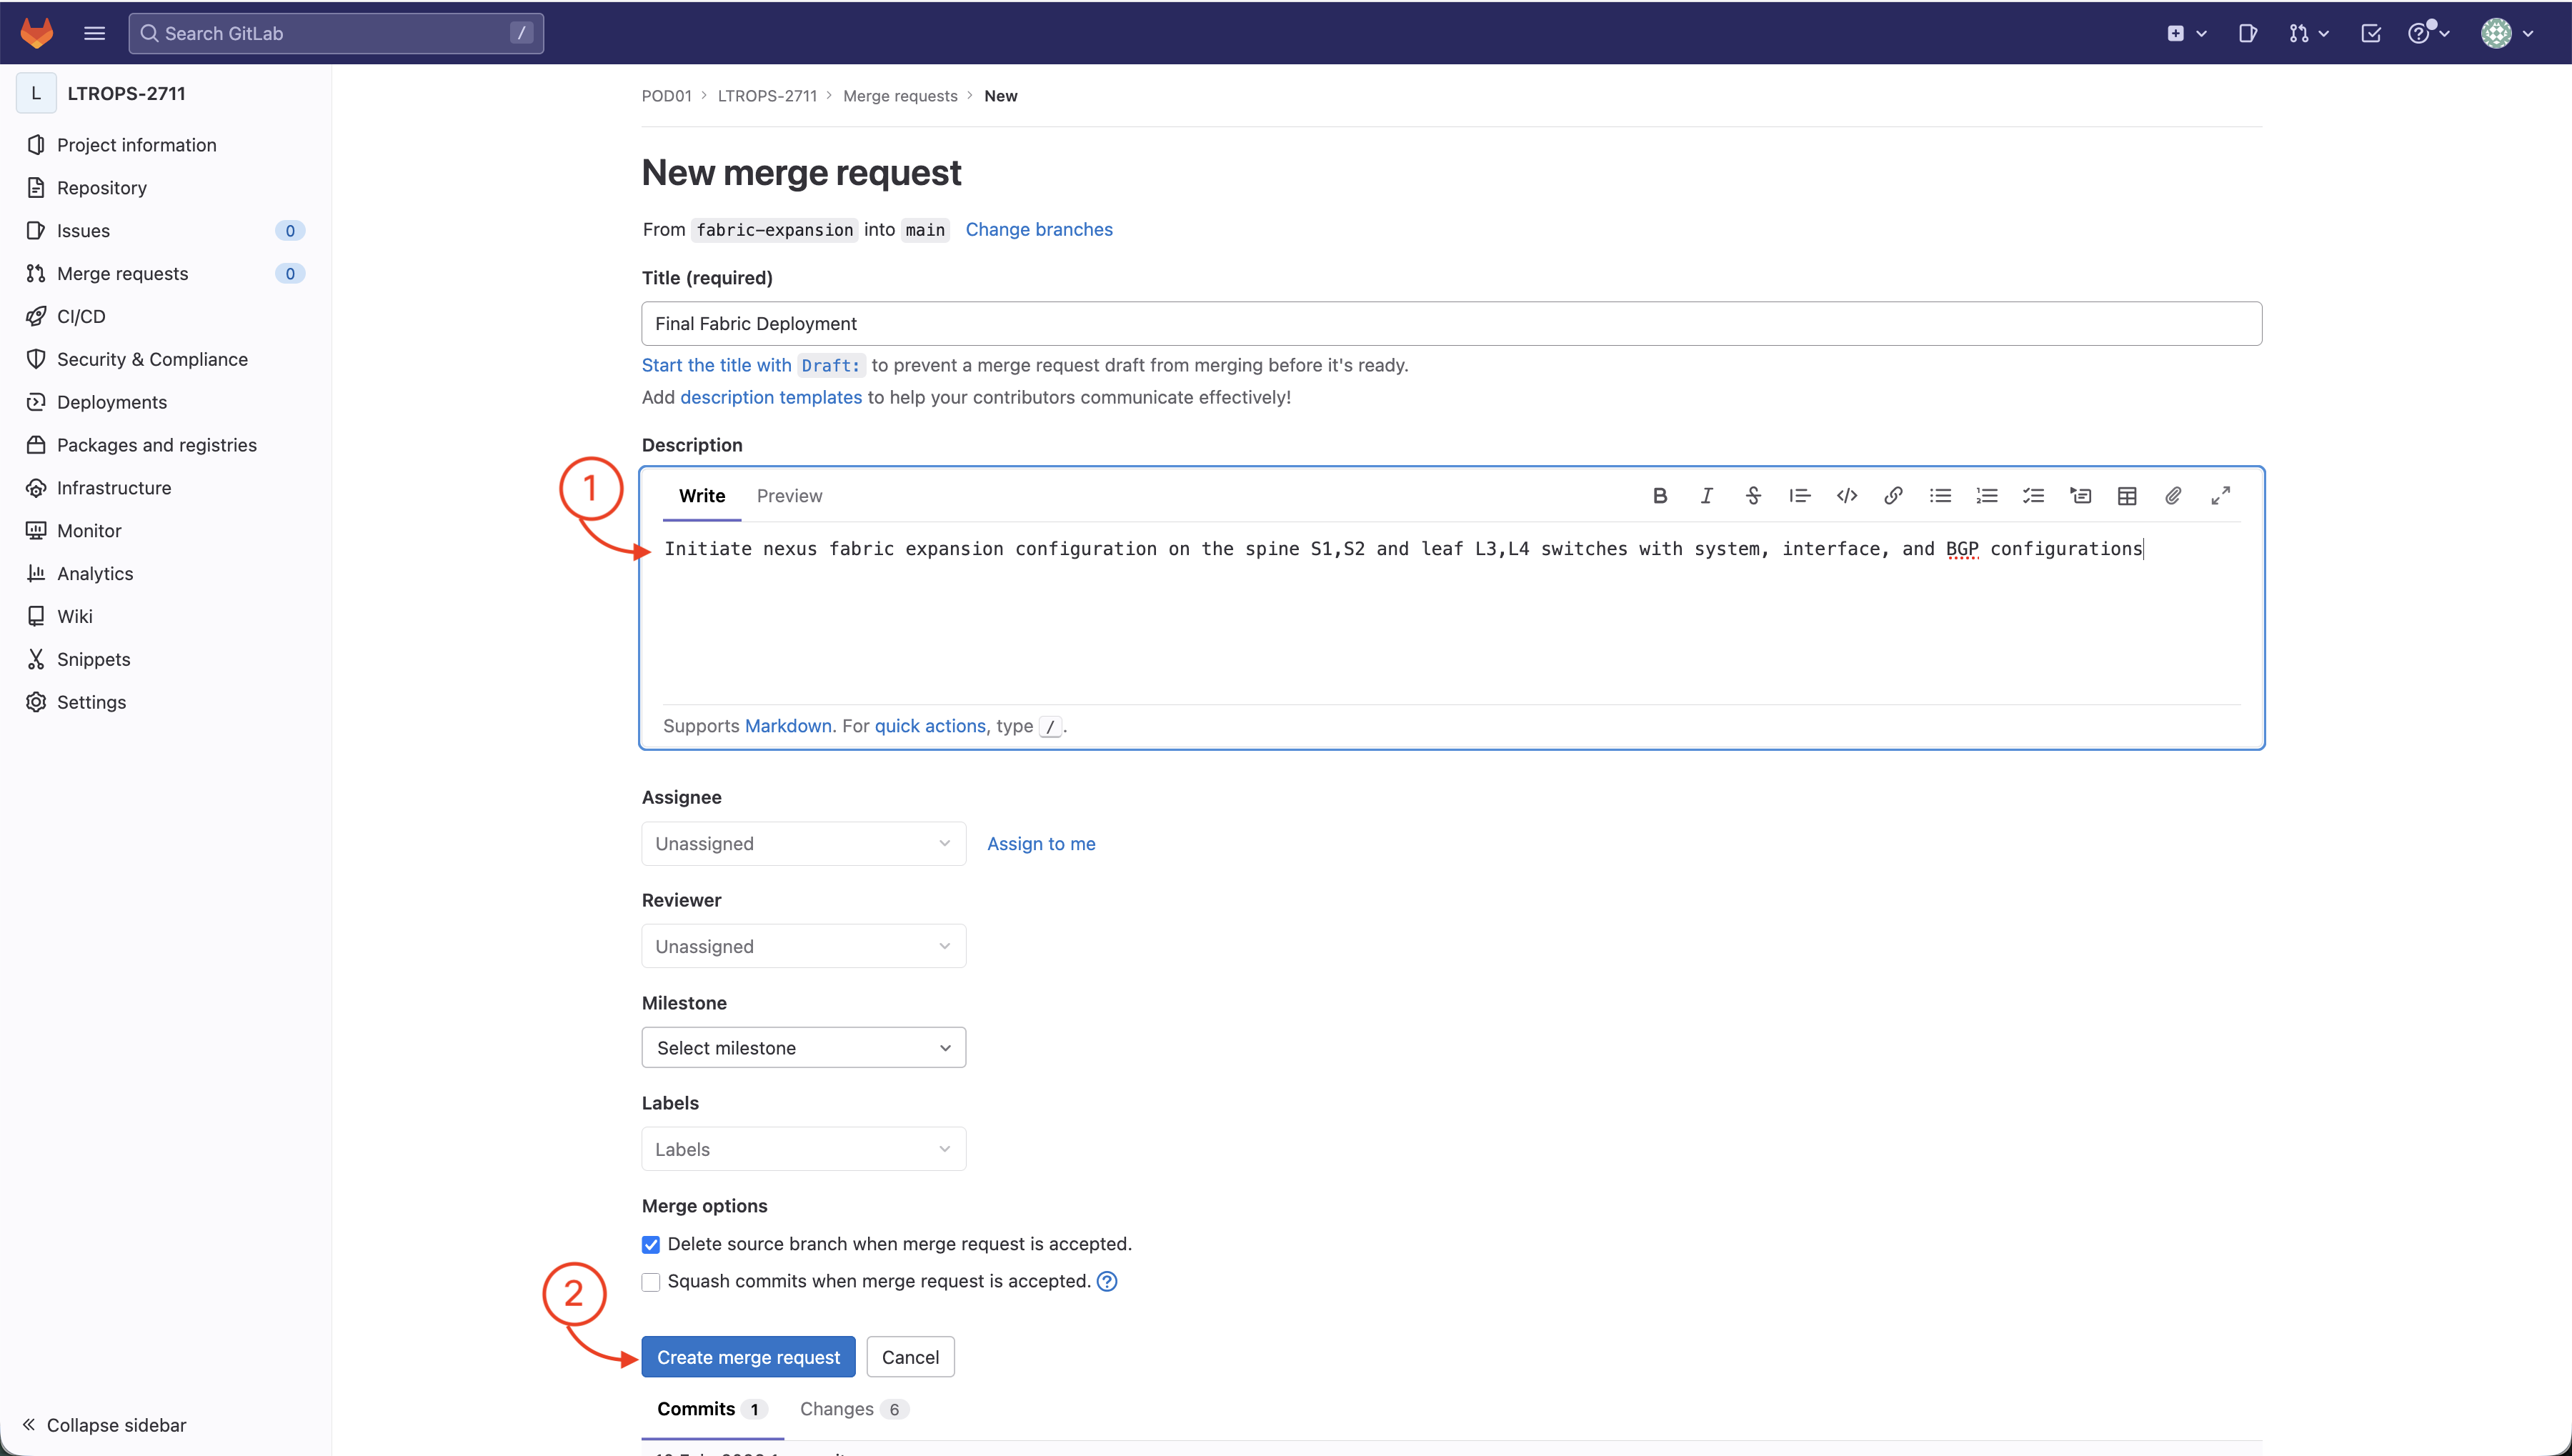
Step 3 - Open Merge Request
In the New merge request window, perform the following:
Insert a description: Initiate nexus fabric expansion configuration on the spine S1,S2 and leaf L3,L4 switches with system, interface, and BGP configurations
Click Create merge request
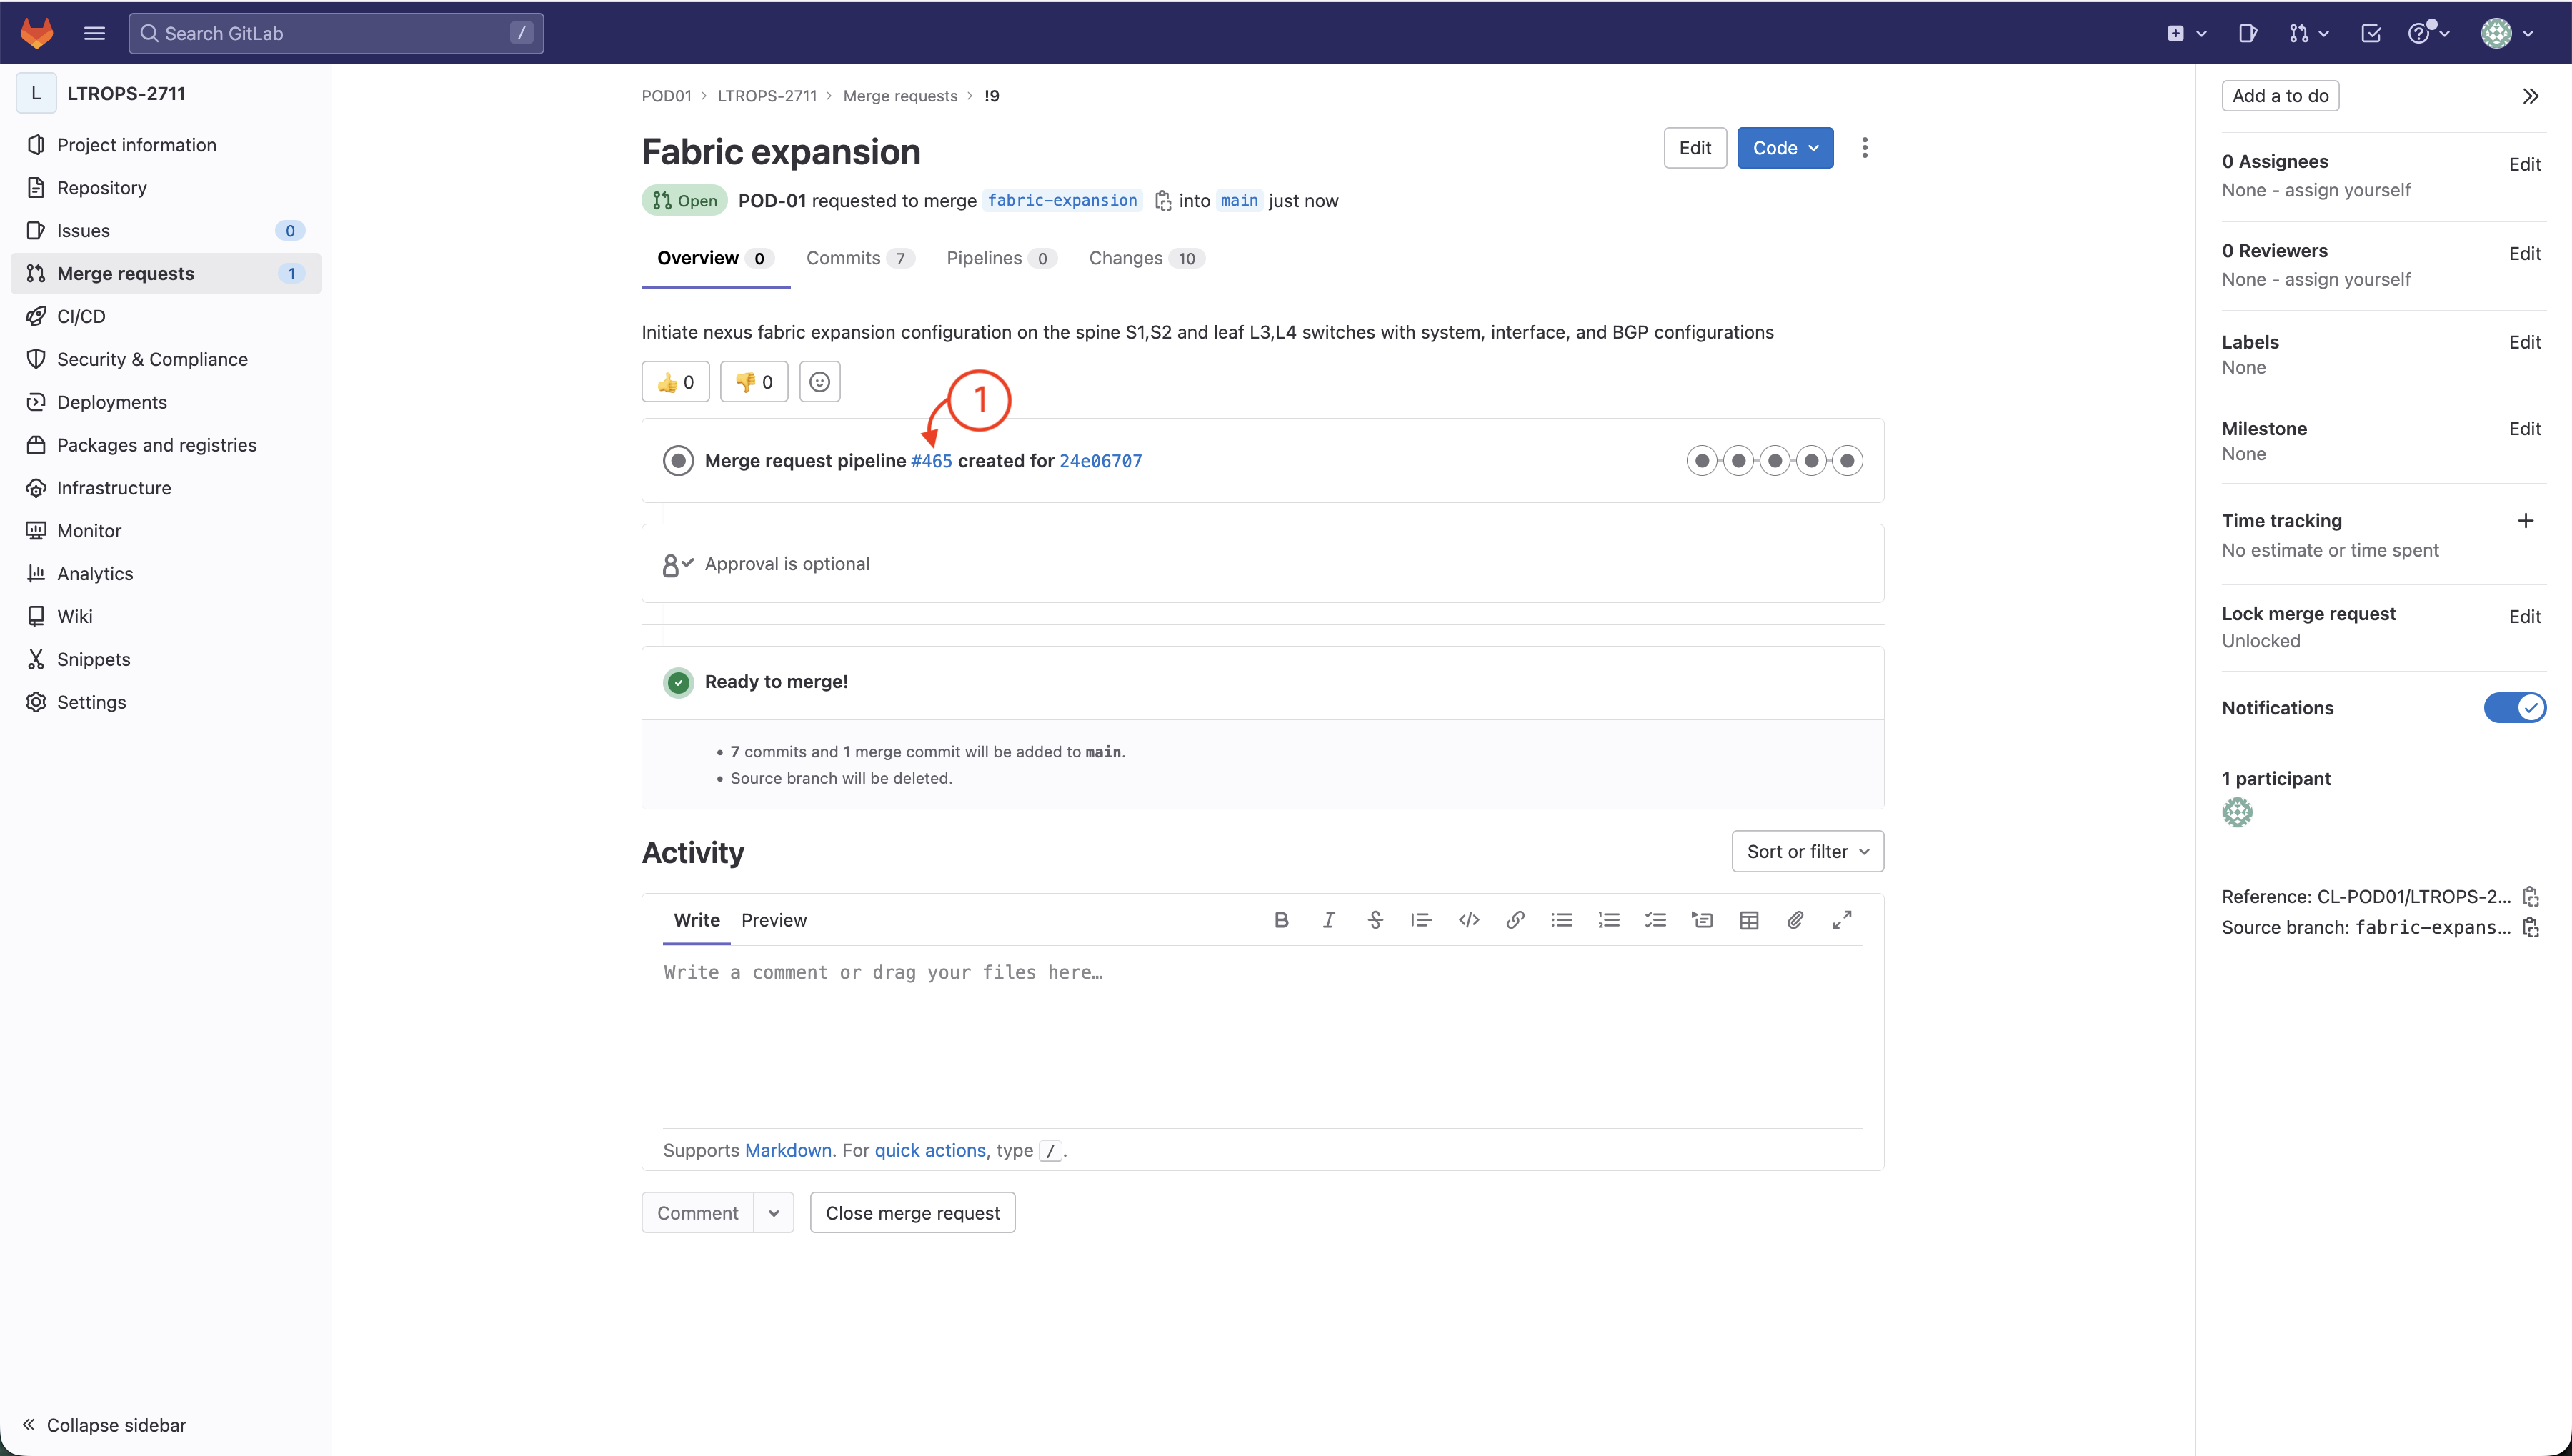
Step 4 - Navigate to Pipeline
Navigate to the pipeline that was launched when you opened your merge request:
Click the number for the merge request pipeline number that comes after Merge request pipeline
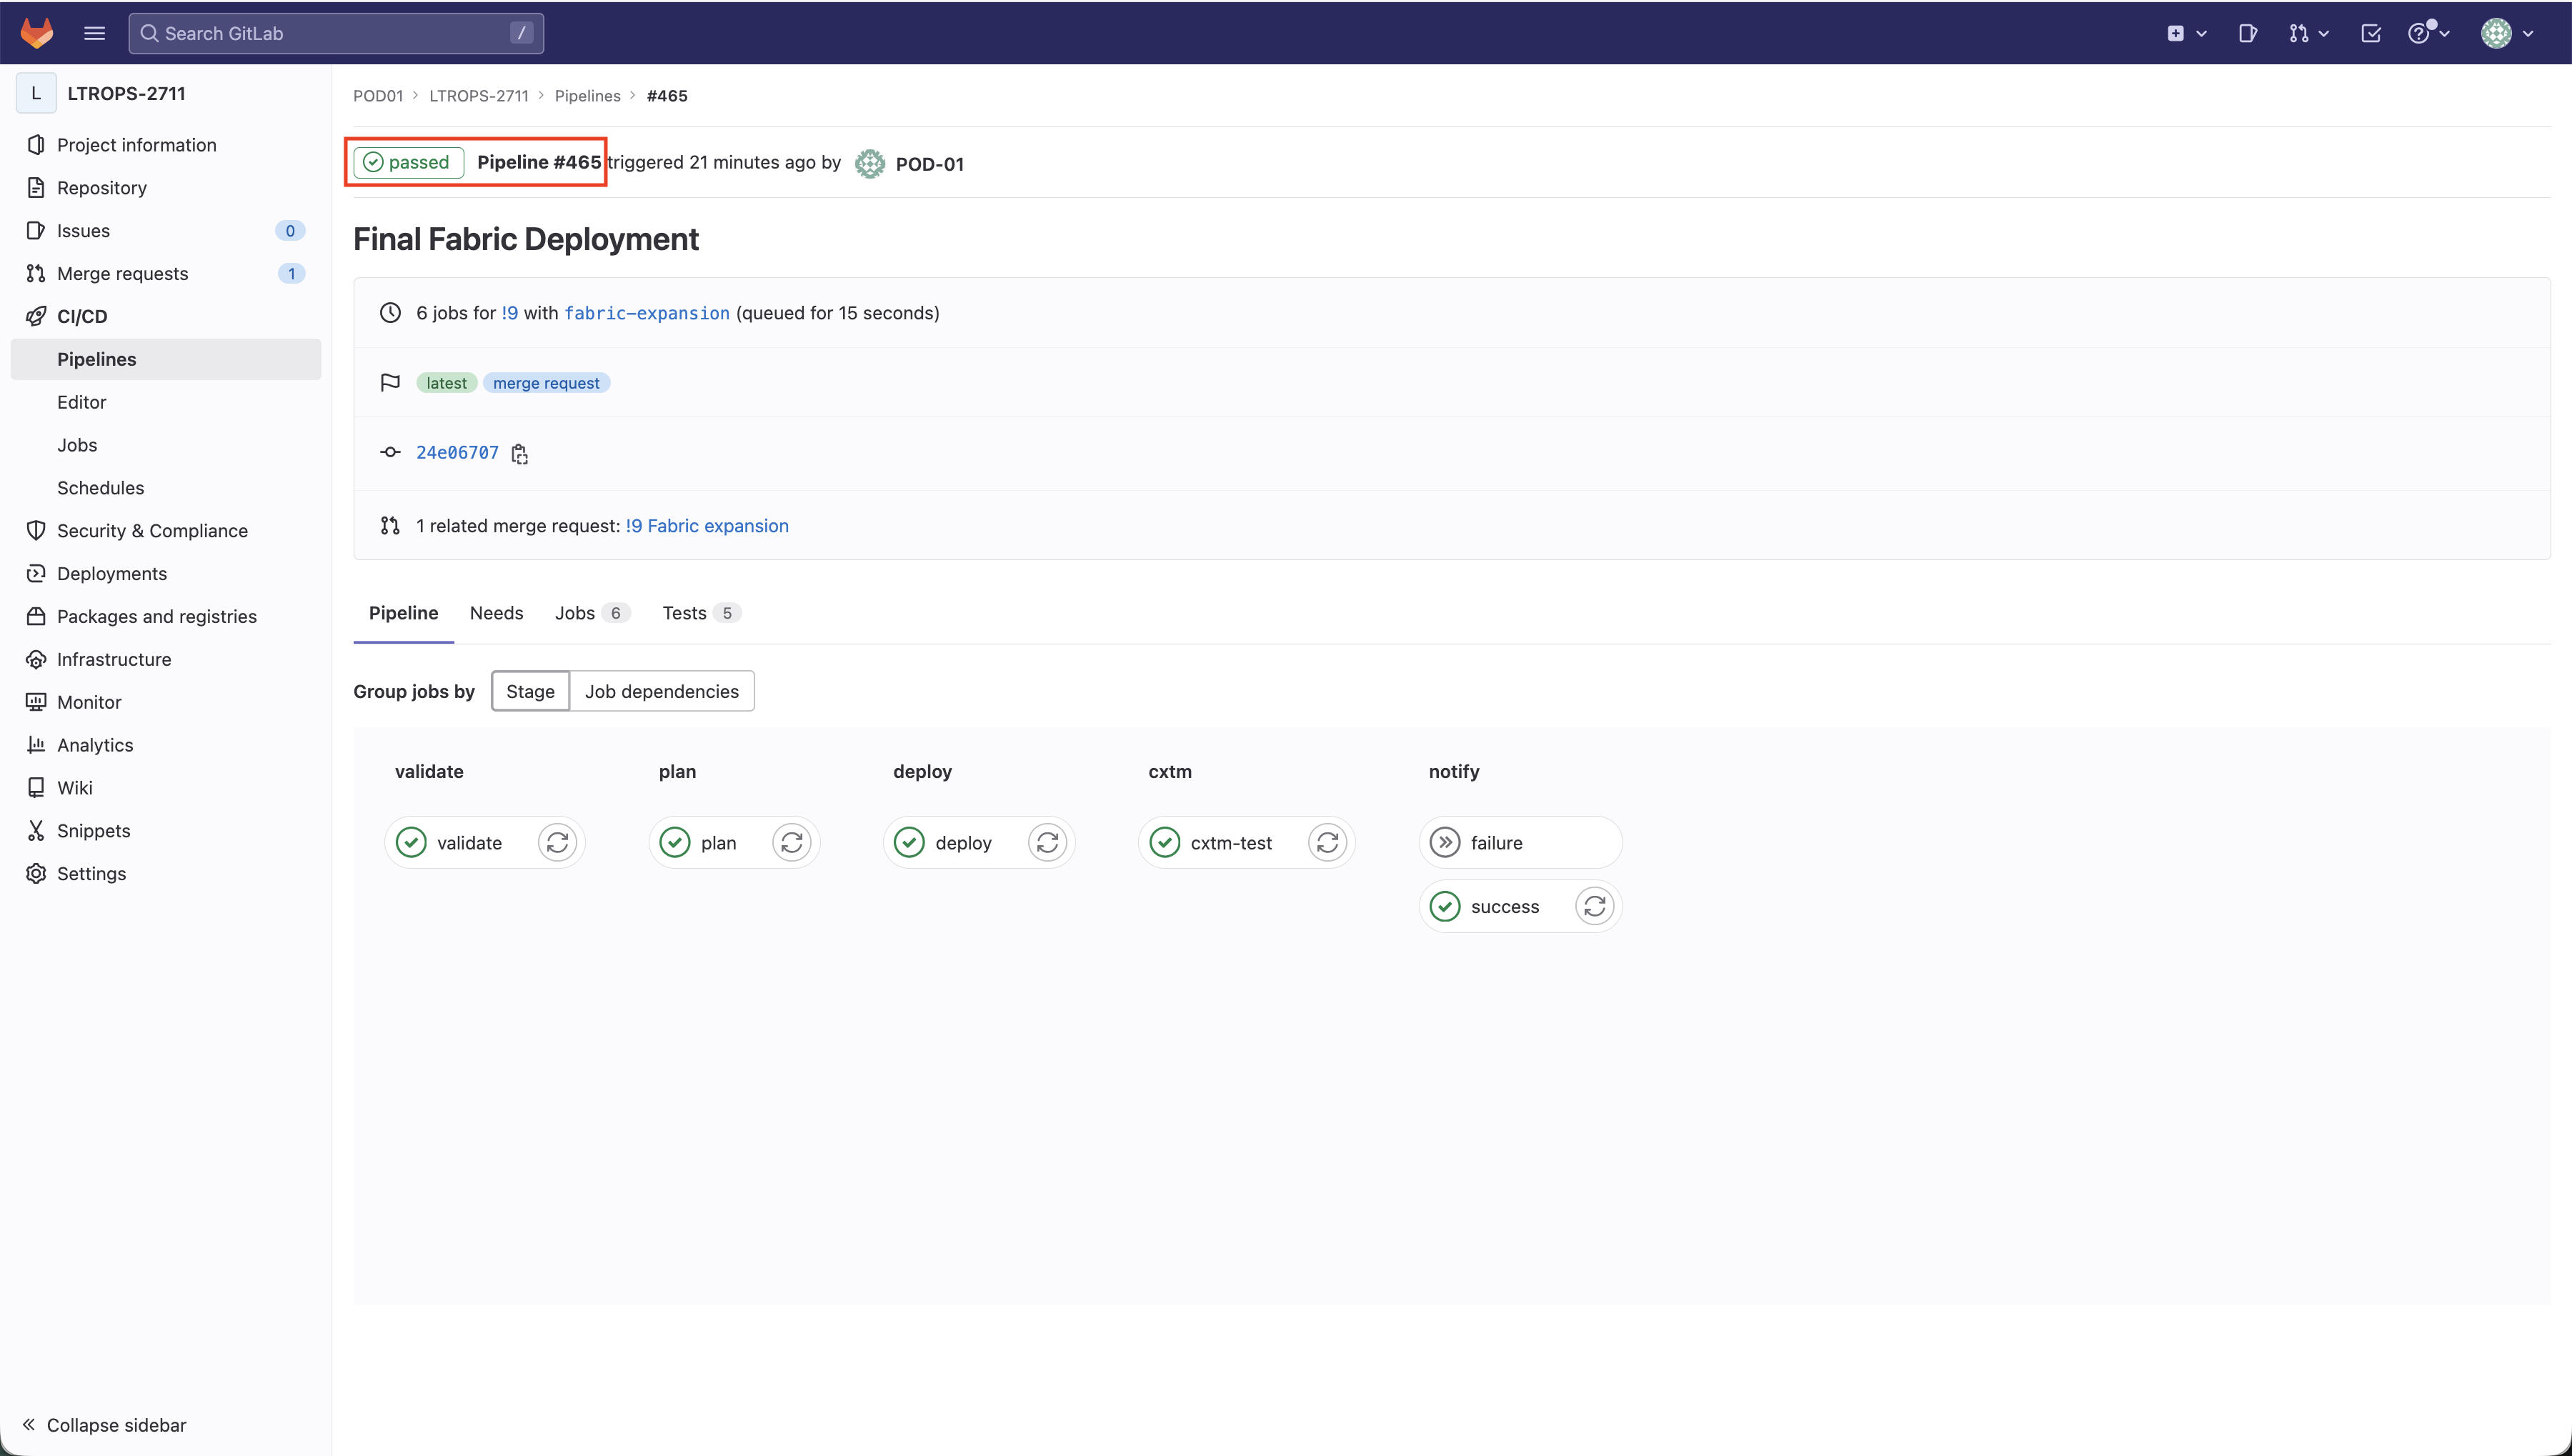
Step 5 - Review Overall Pipeline
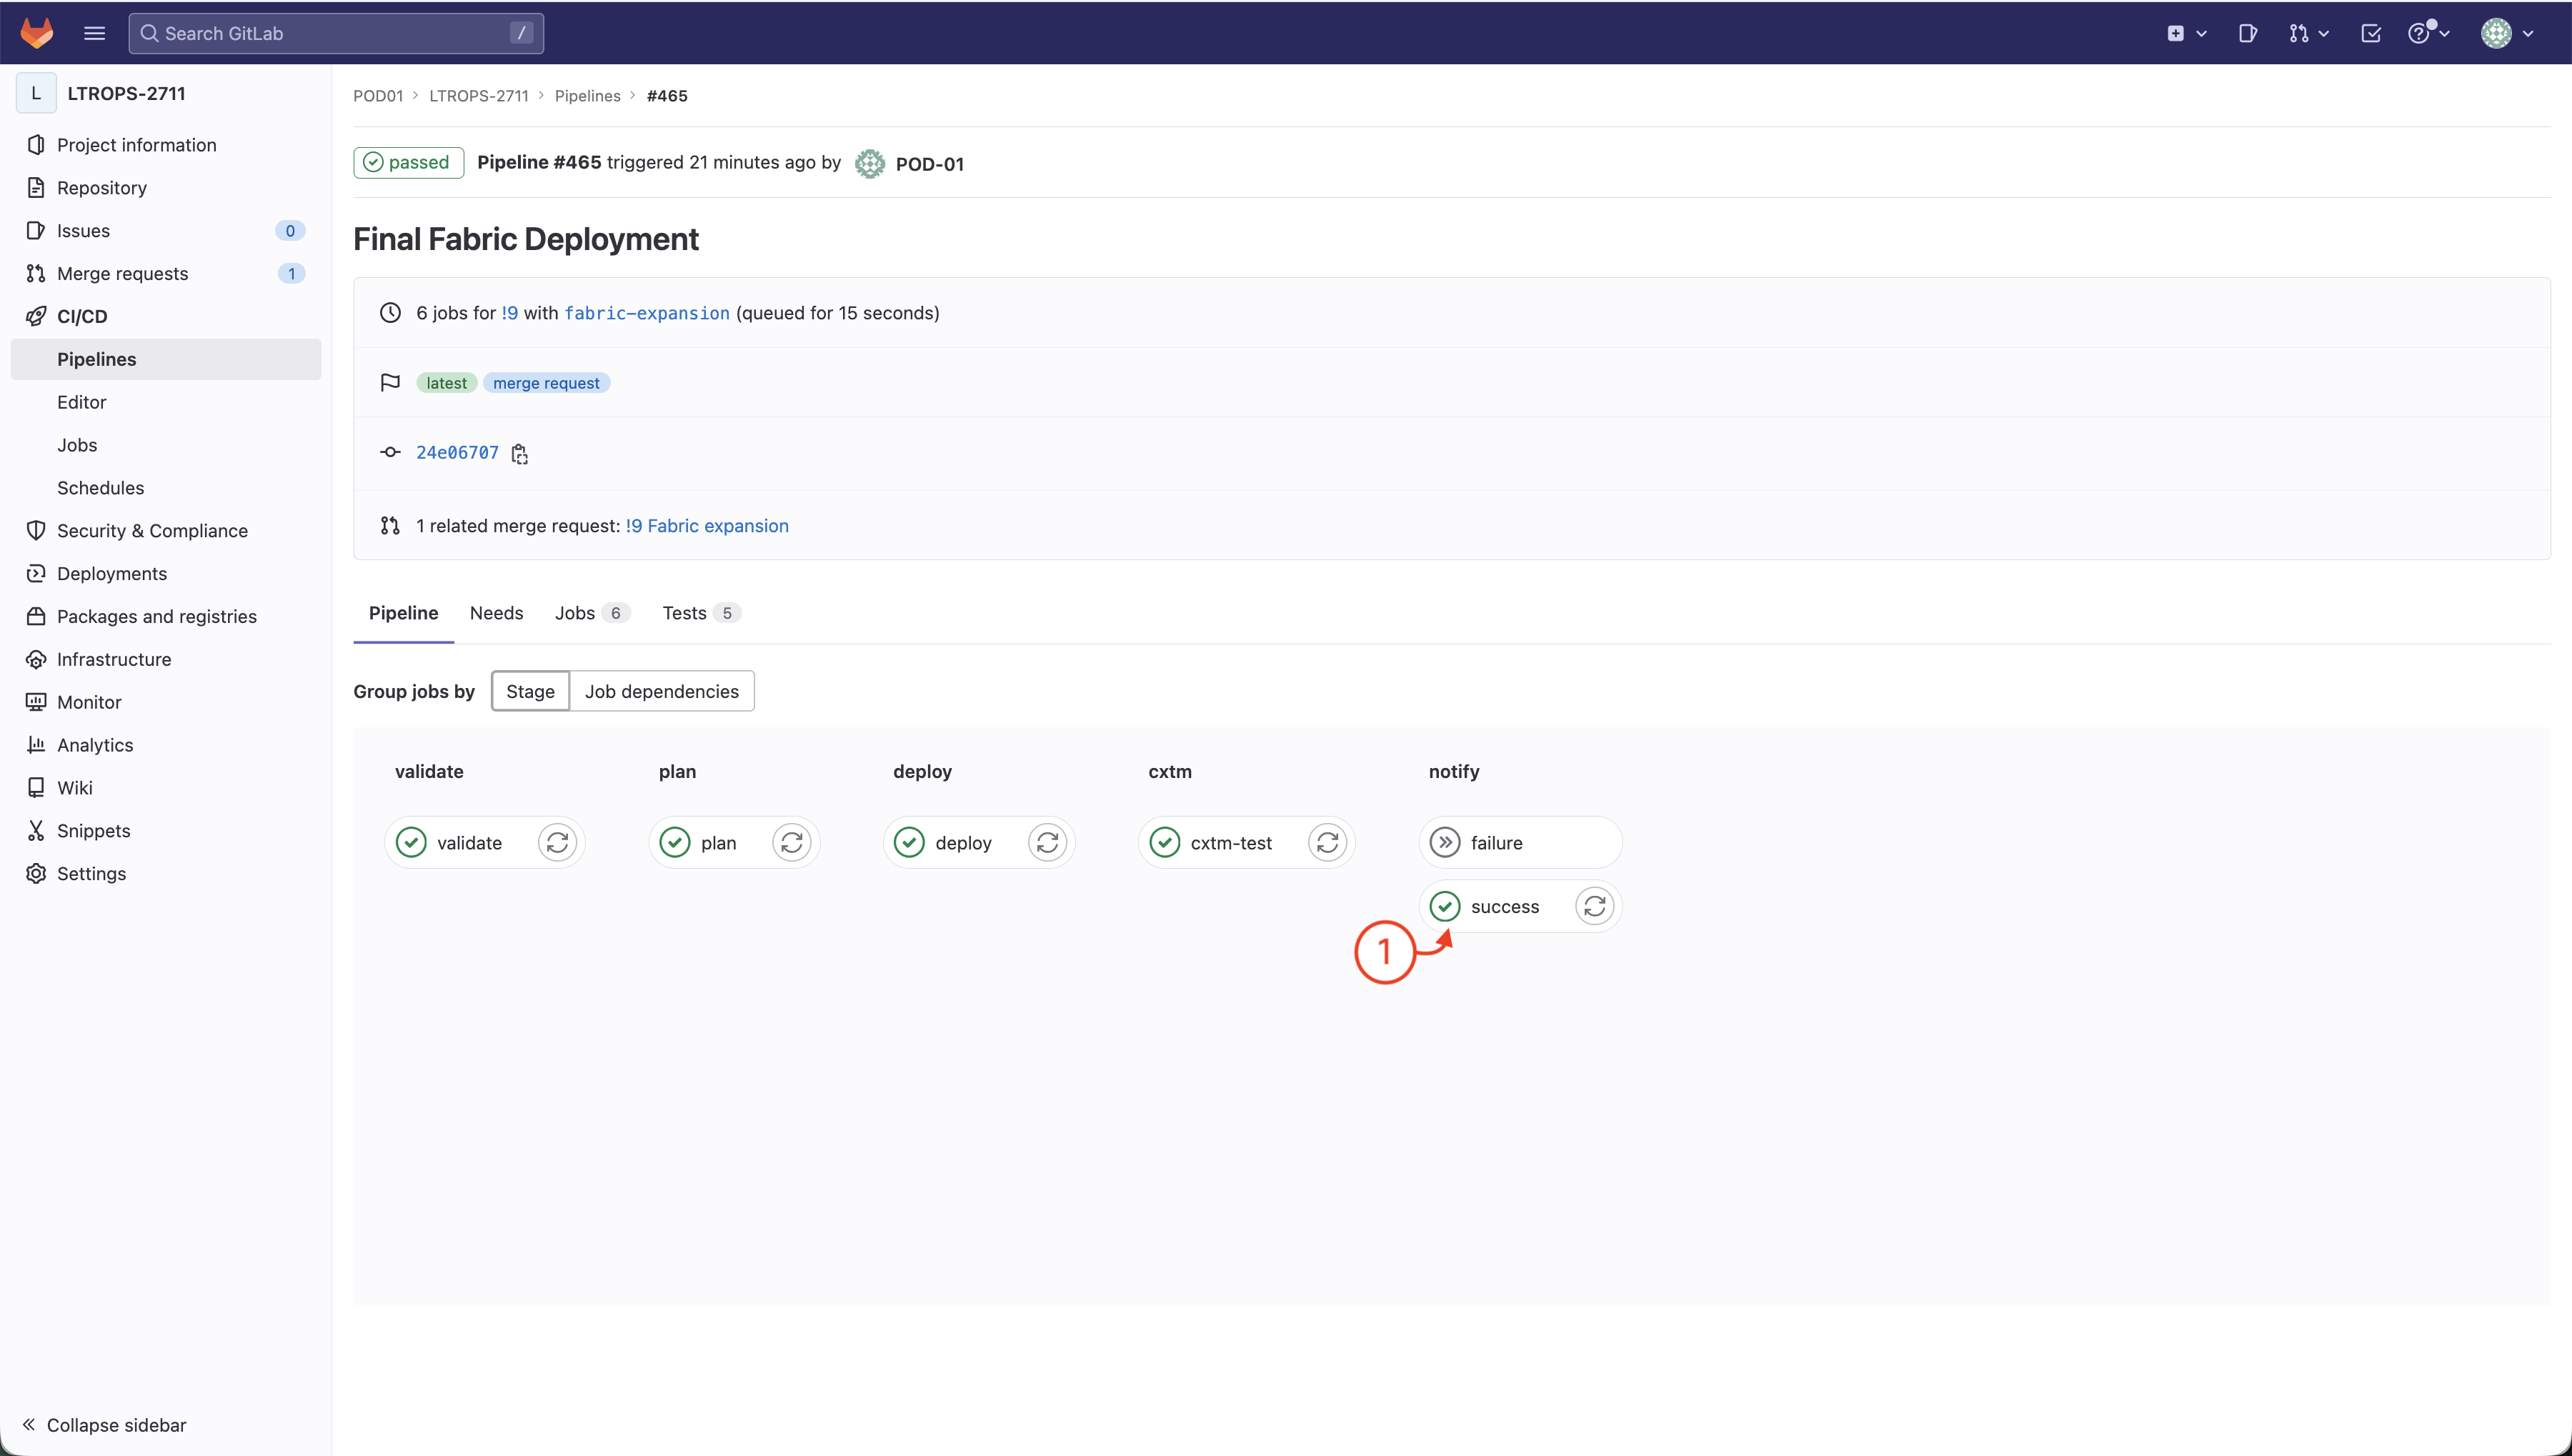
At this point, you should have successfully triggered the CI pipeline for your proposed fabric expansion deployment configuration. The screenshots below show a completed and Passed pipeline. If your own pipeline is still running, please wait until all your pipeline stages have completed before proceeding.
Alert
Notify your proctor if any stages of your pipeline have Failed before moving on.
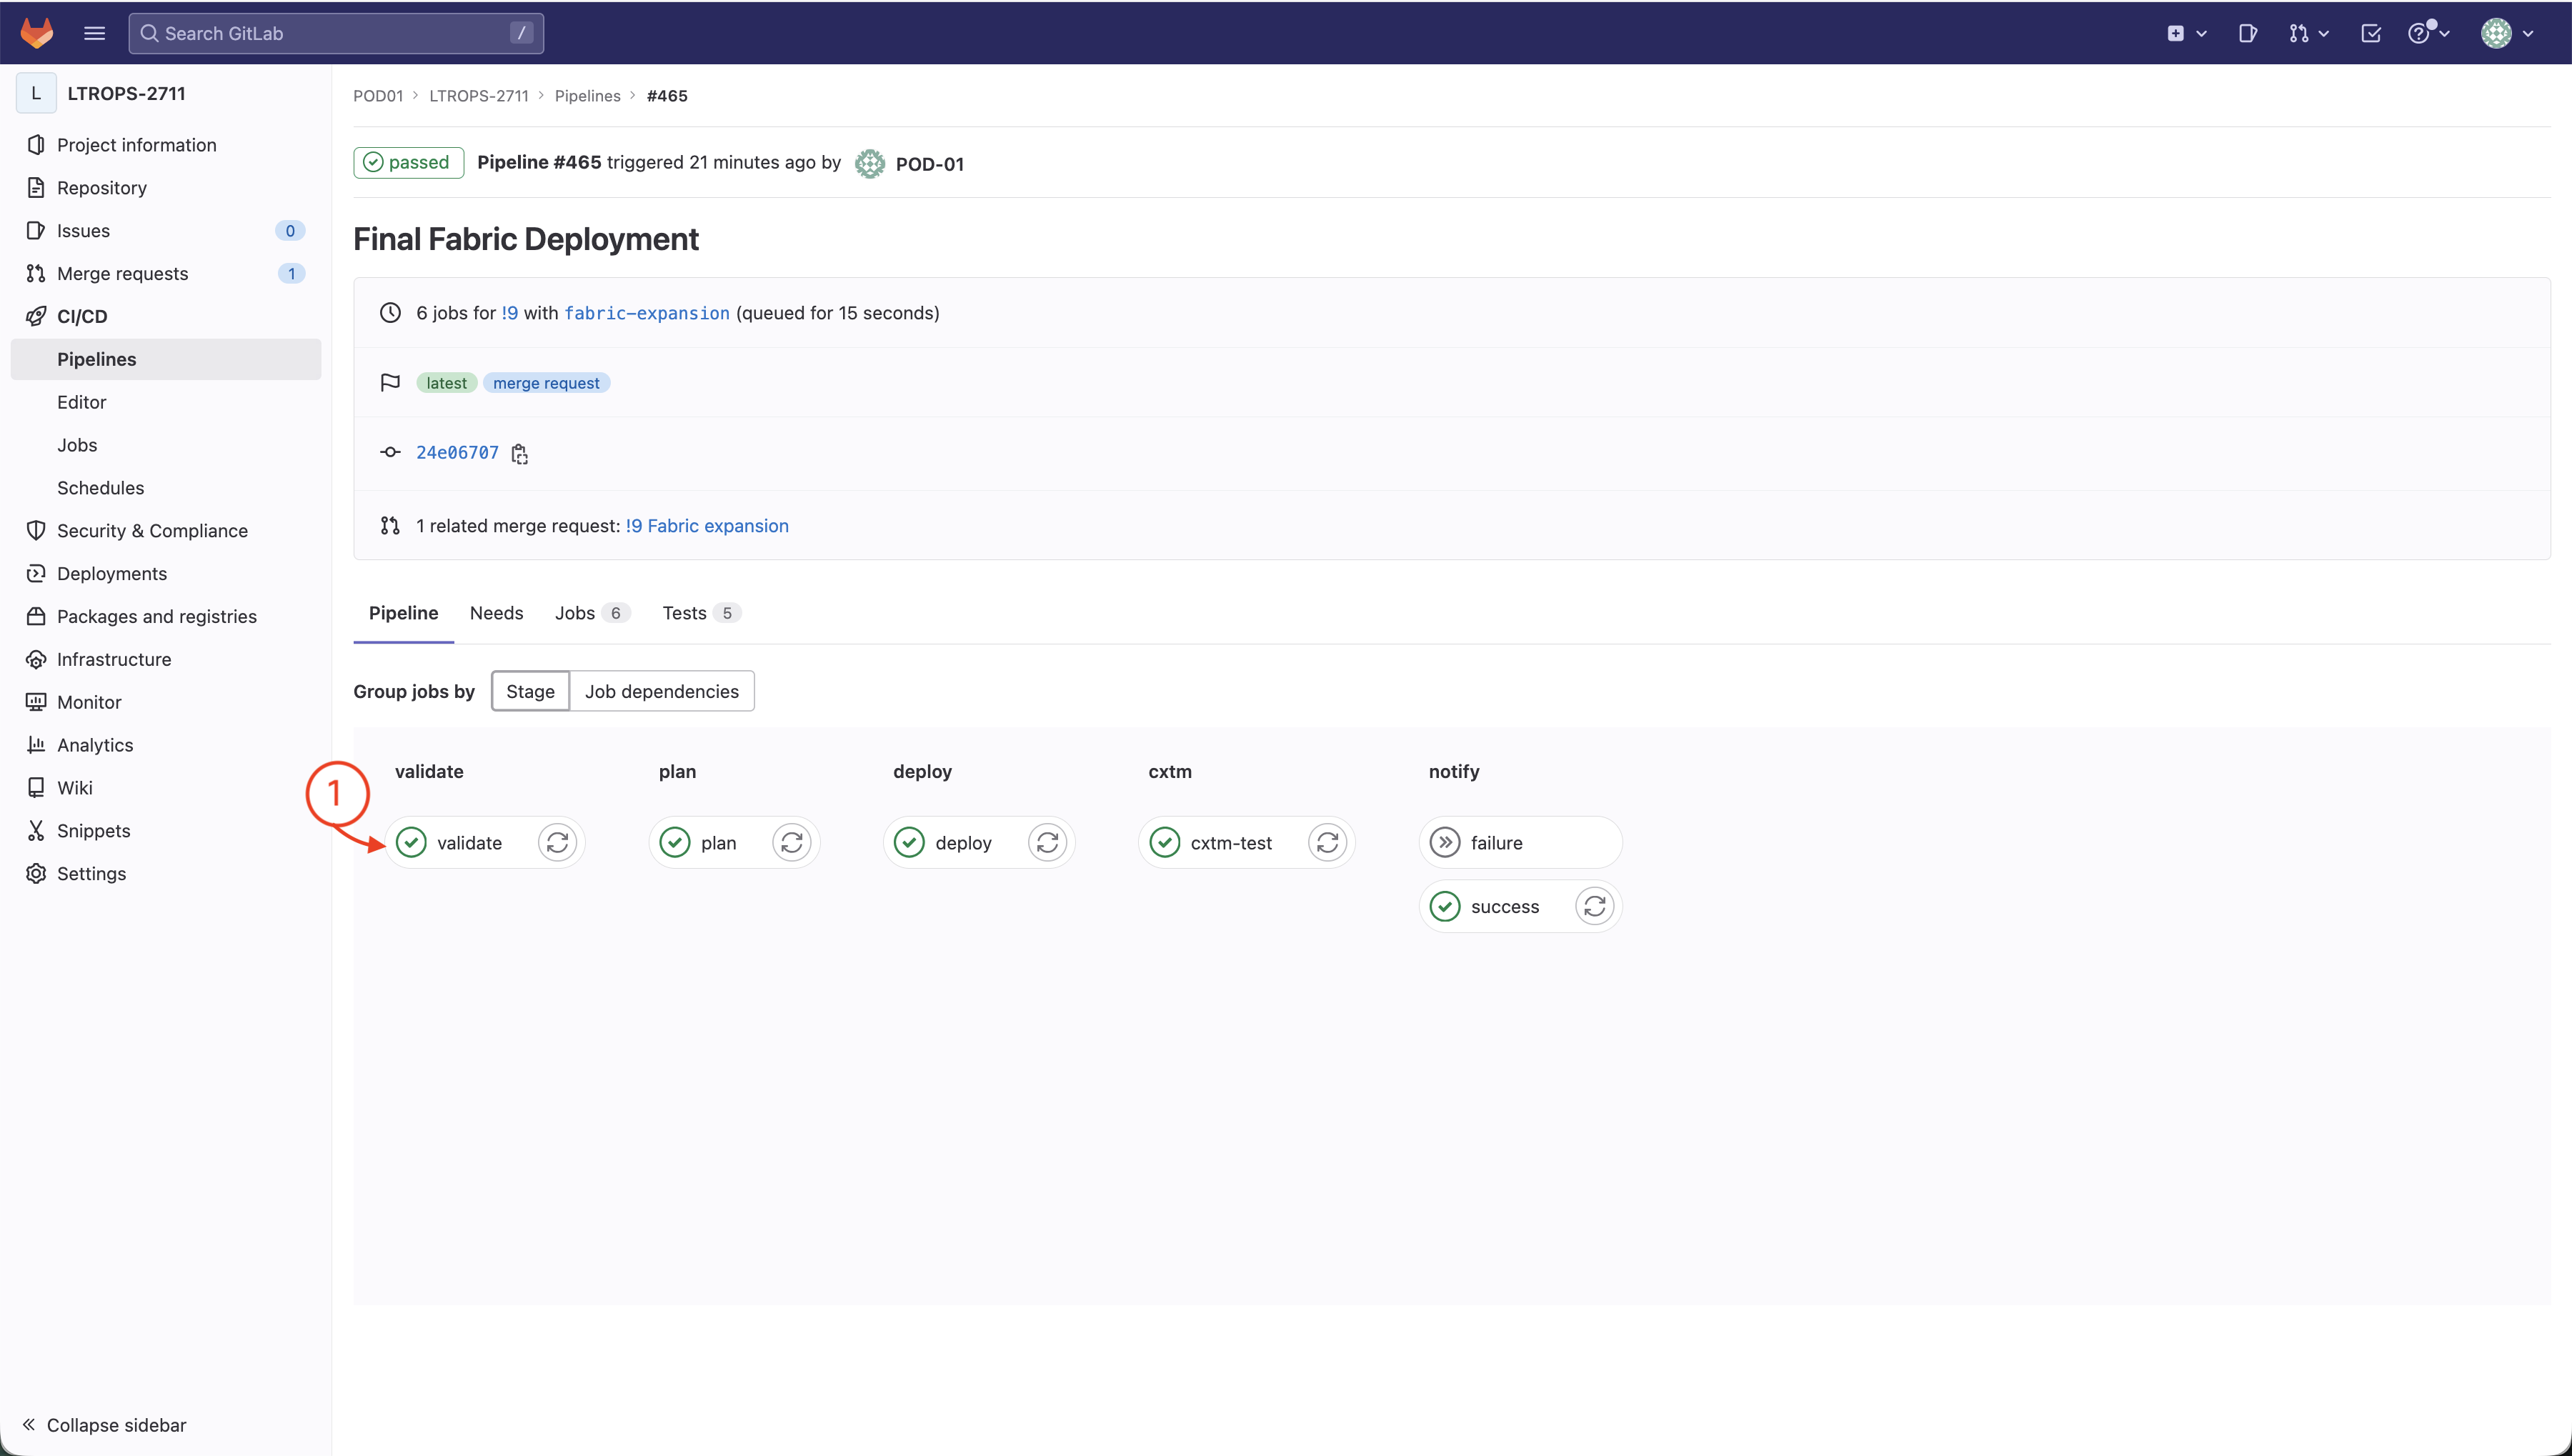
Step 6 - Navigate to Validate Stage
The validate stage checks the syntax of your Terraform configuration and YAML files. Let's review the results.
Click on the validate stage to view the validation job execution results.
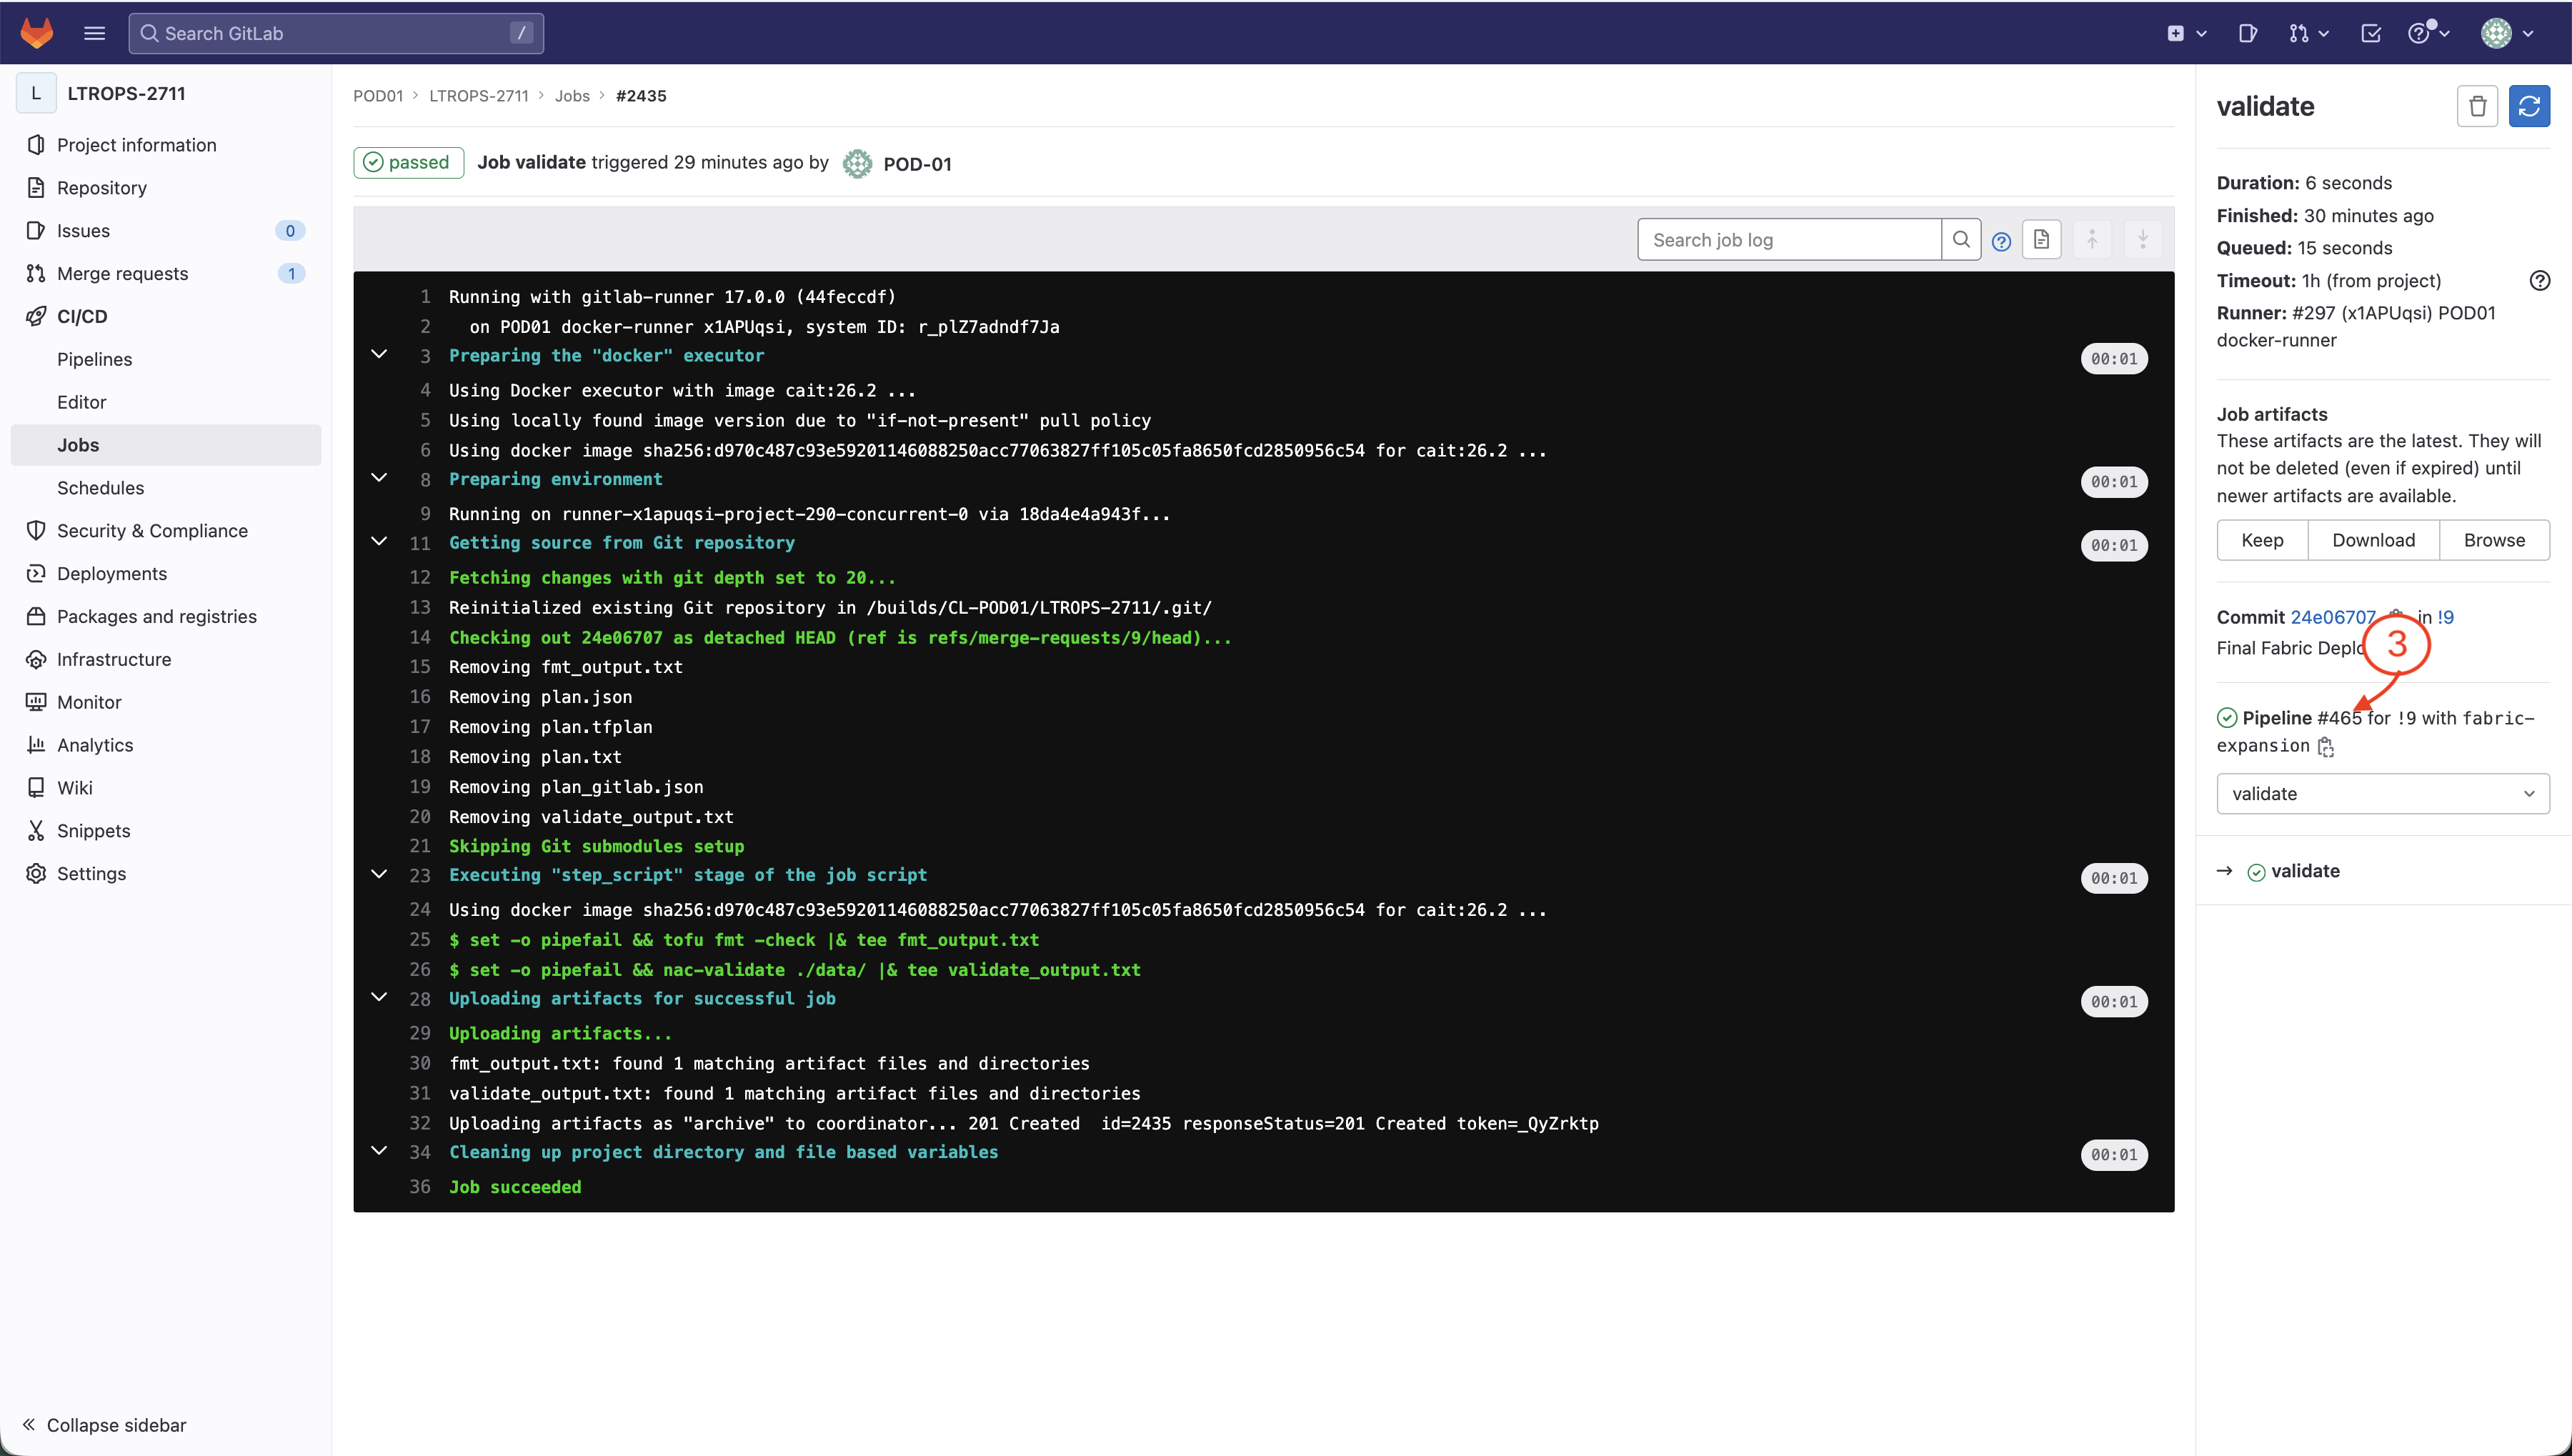
Review the pipeline execution to ensure the validation job completed successfully.
Click the pipeline number on the right-side pane.
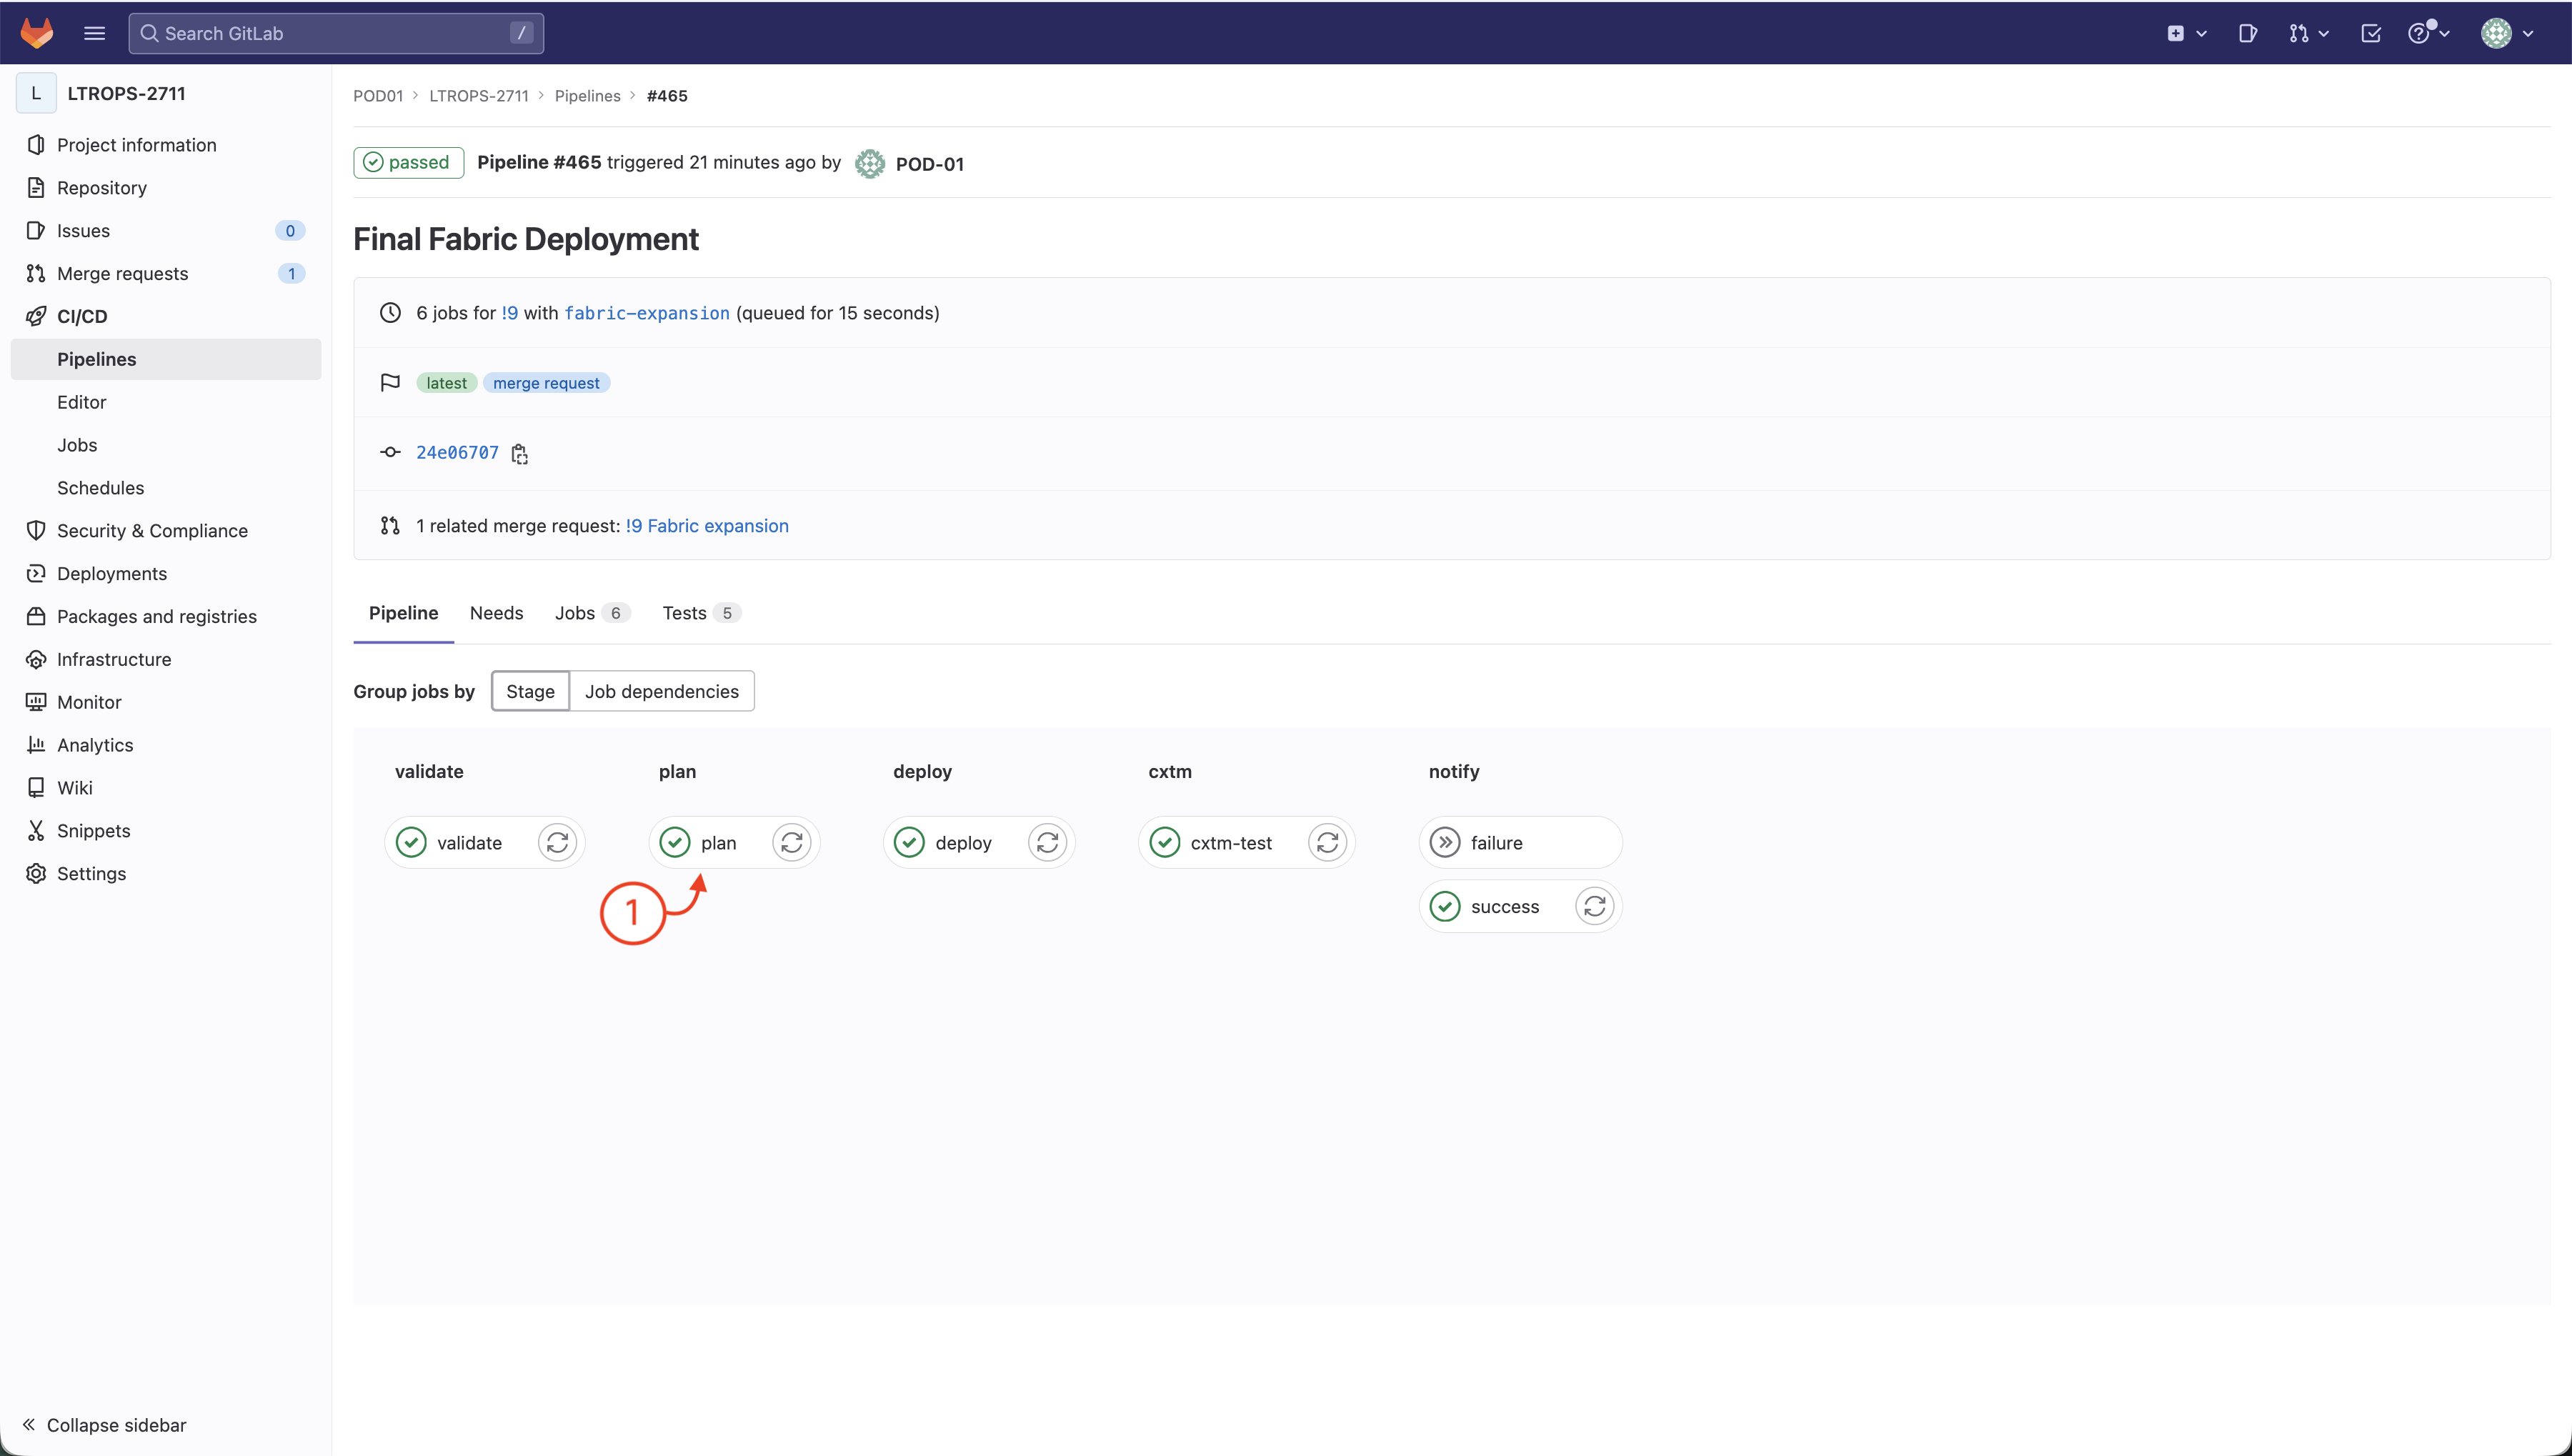
Step 7 - Navigate to Plan Stage
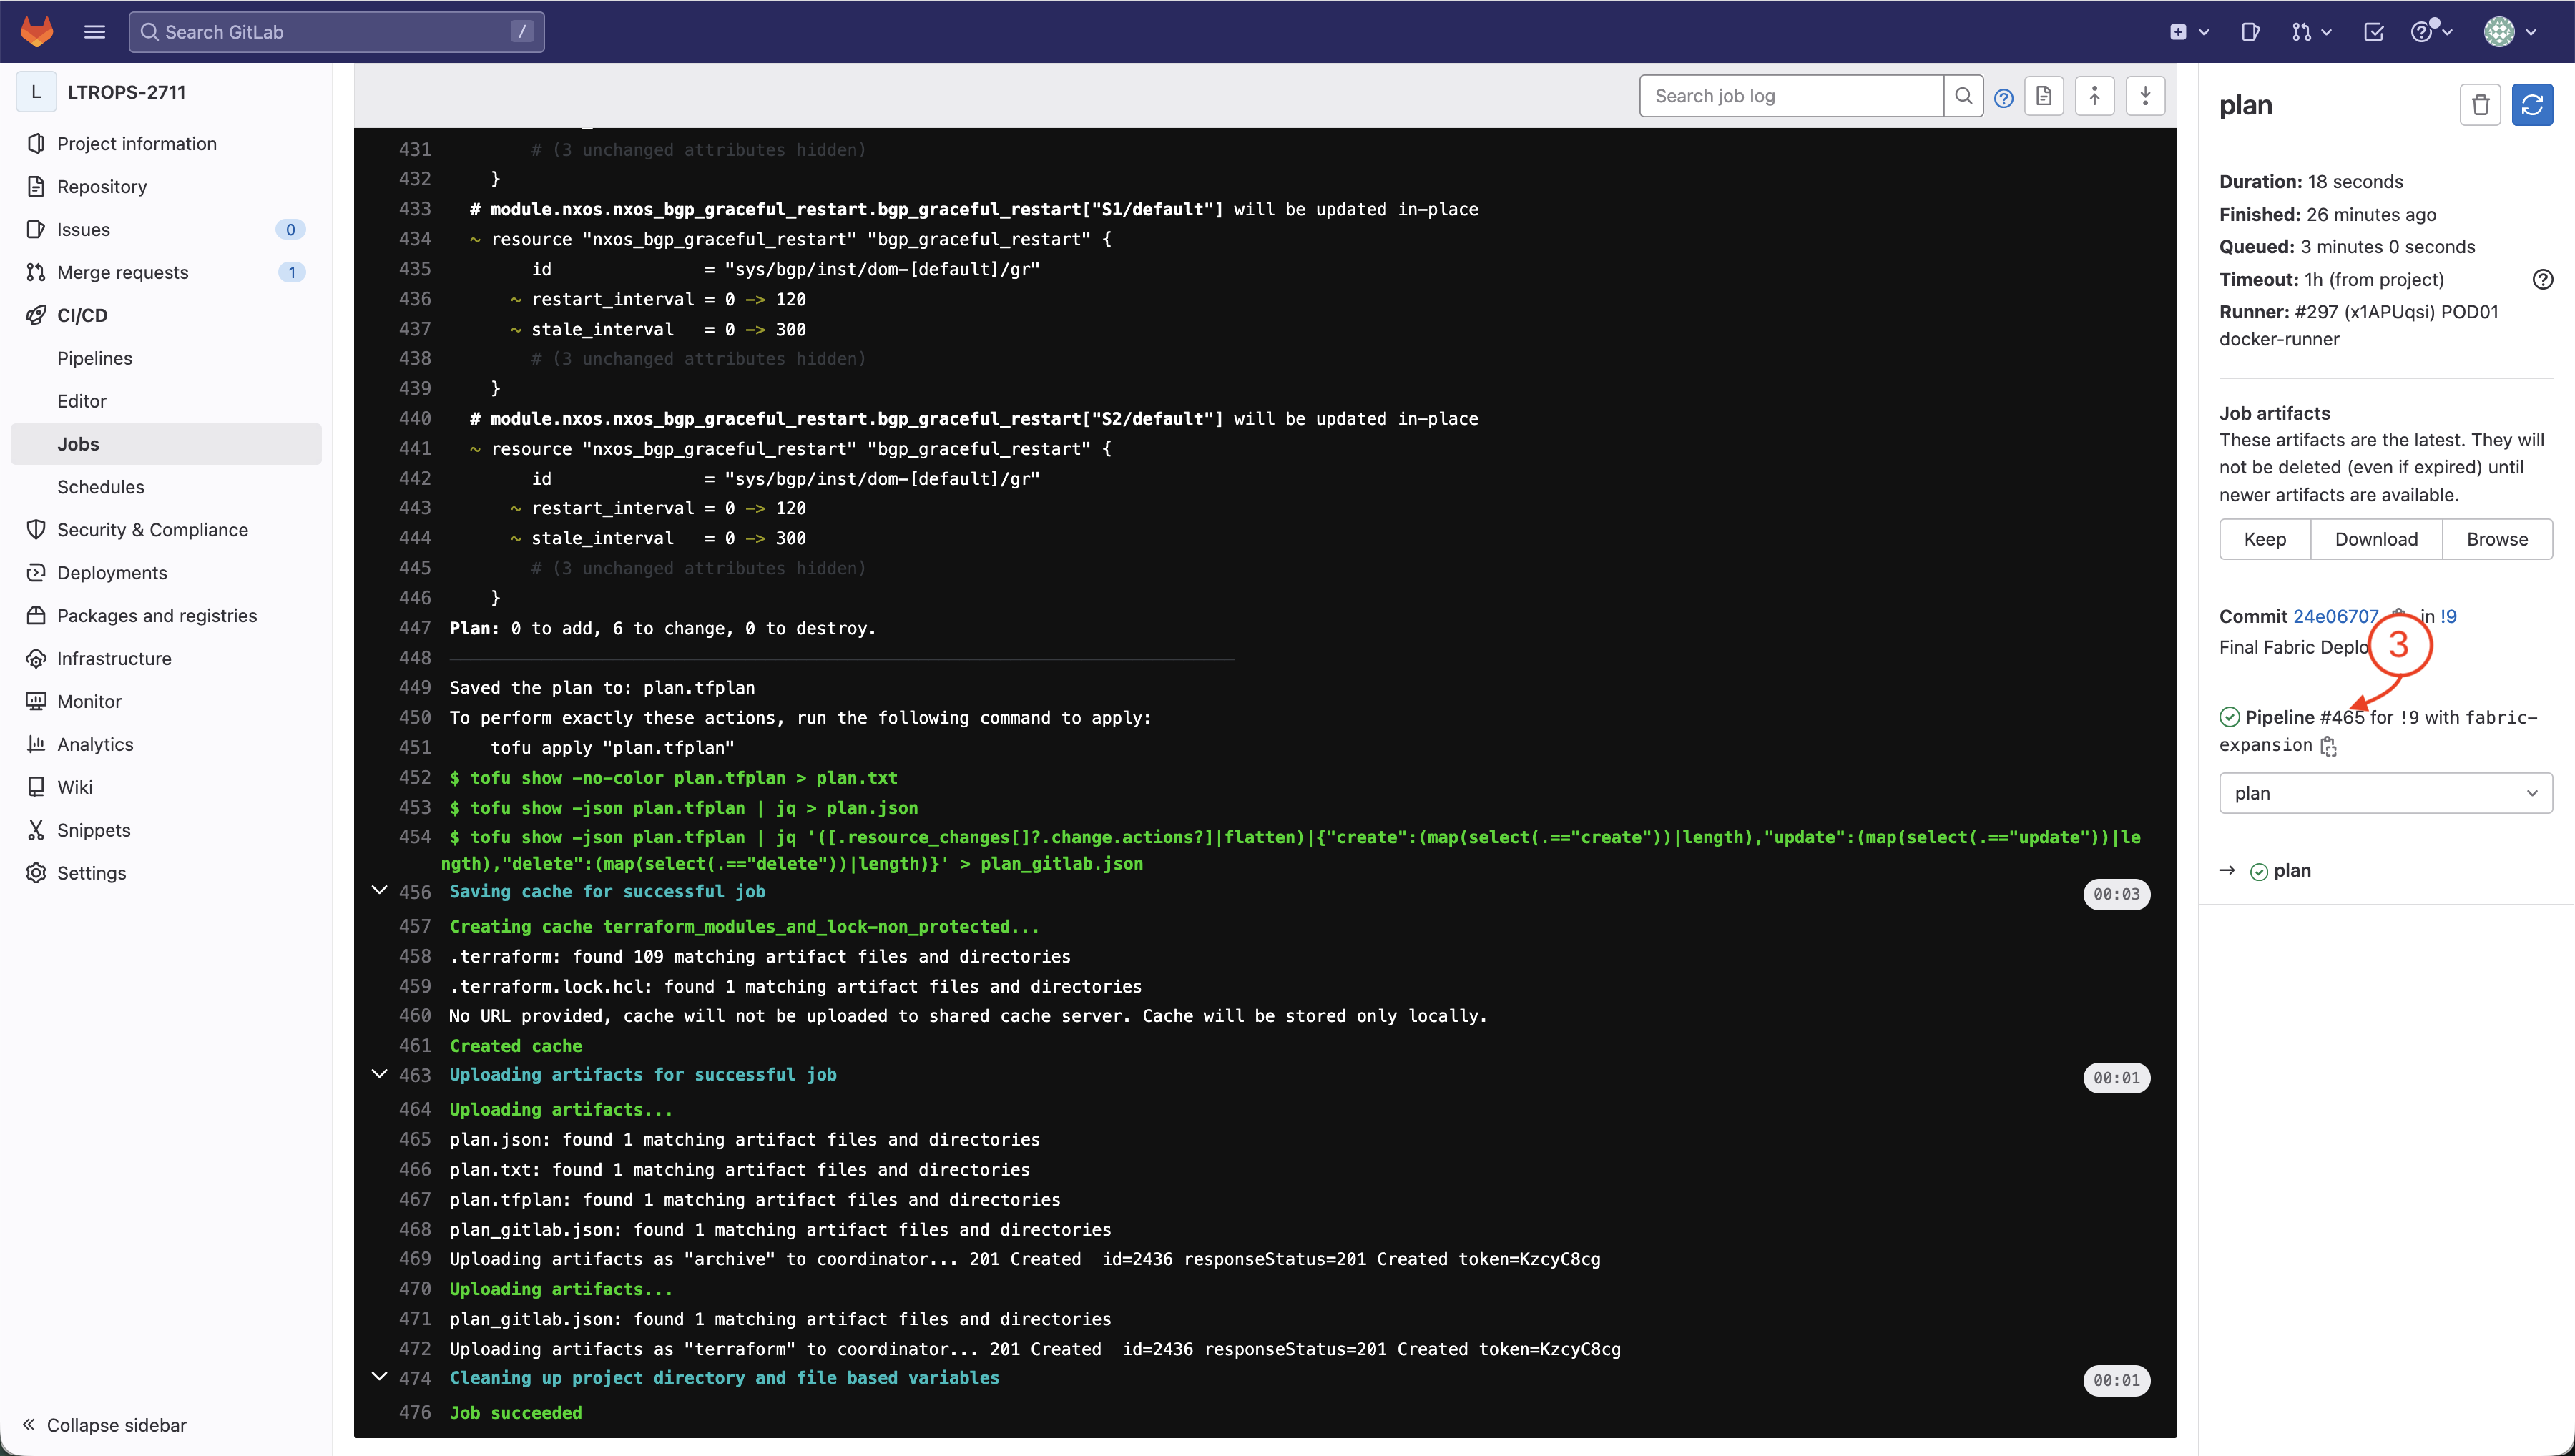
The plan stage generates an execution plan that identifies which resources will be created, modified, or destroyed on your Nexus fabric.
Click on the plan stage to view the plan stage execution results.
Review the pipeline execution to ensure the plan job completed successfully.
Click the pipeline number on the right-side pane.
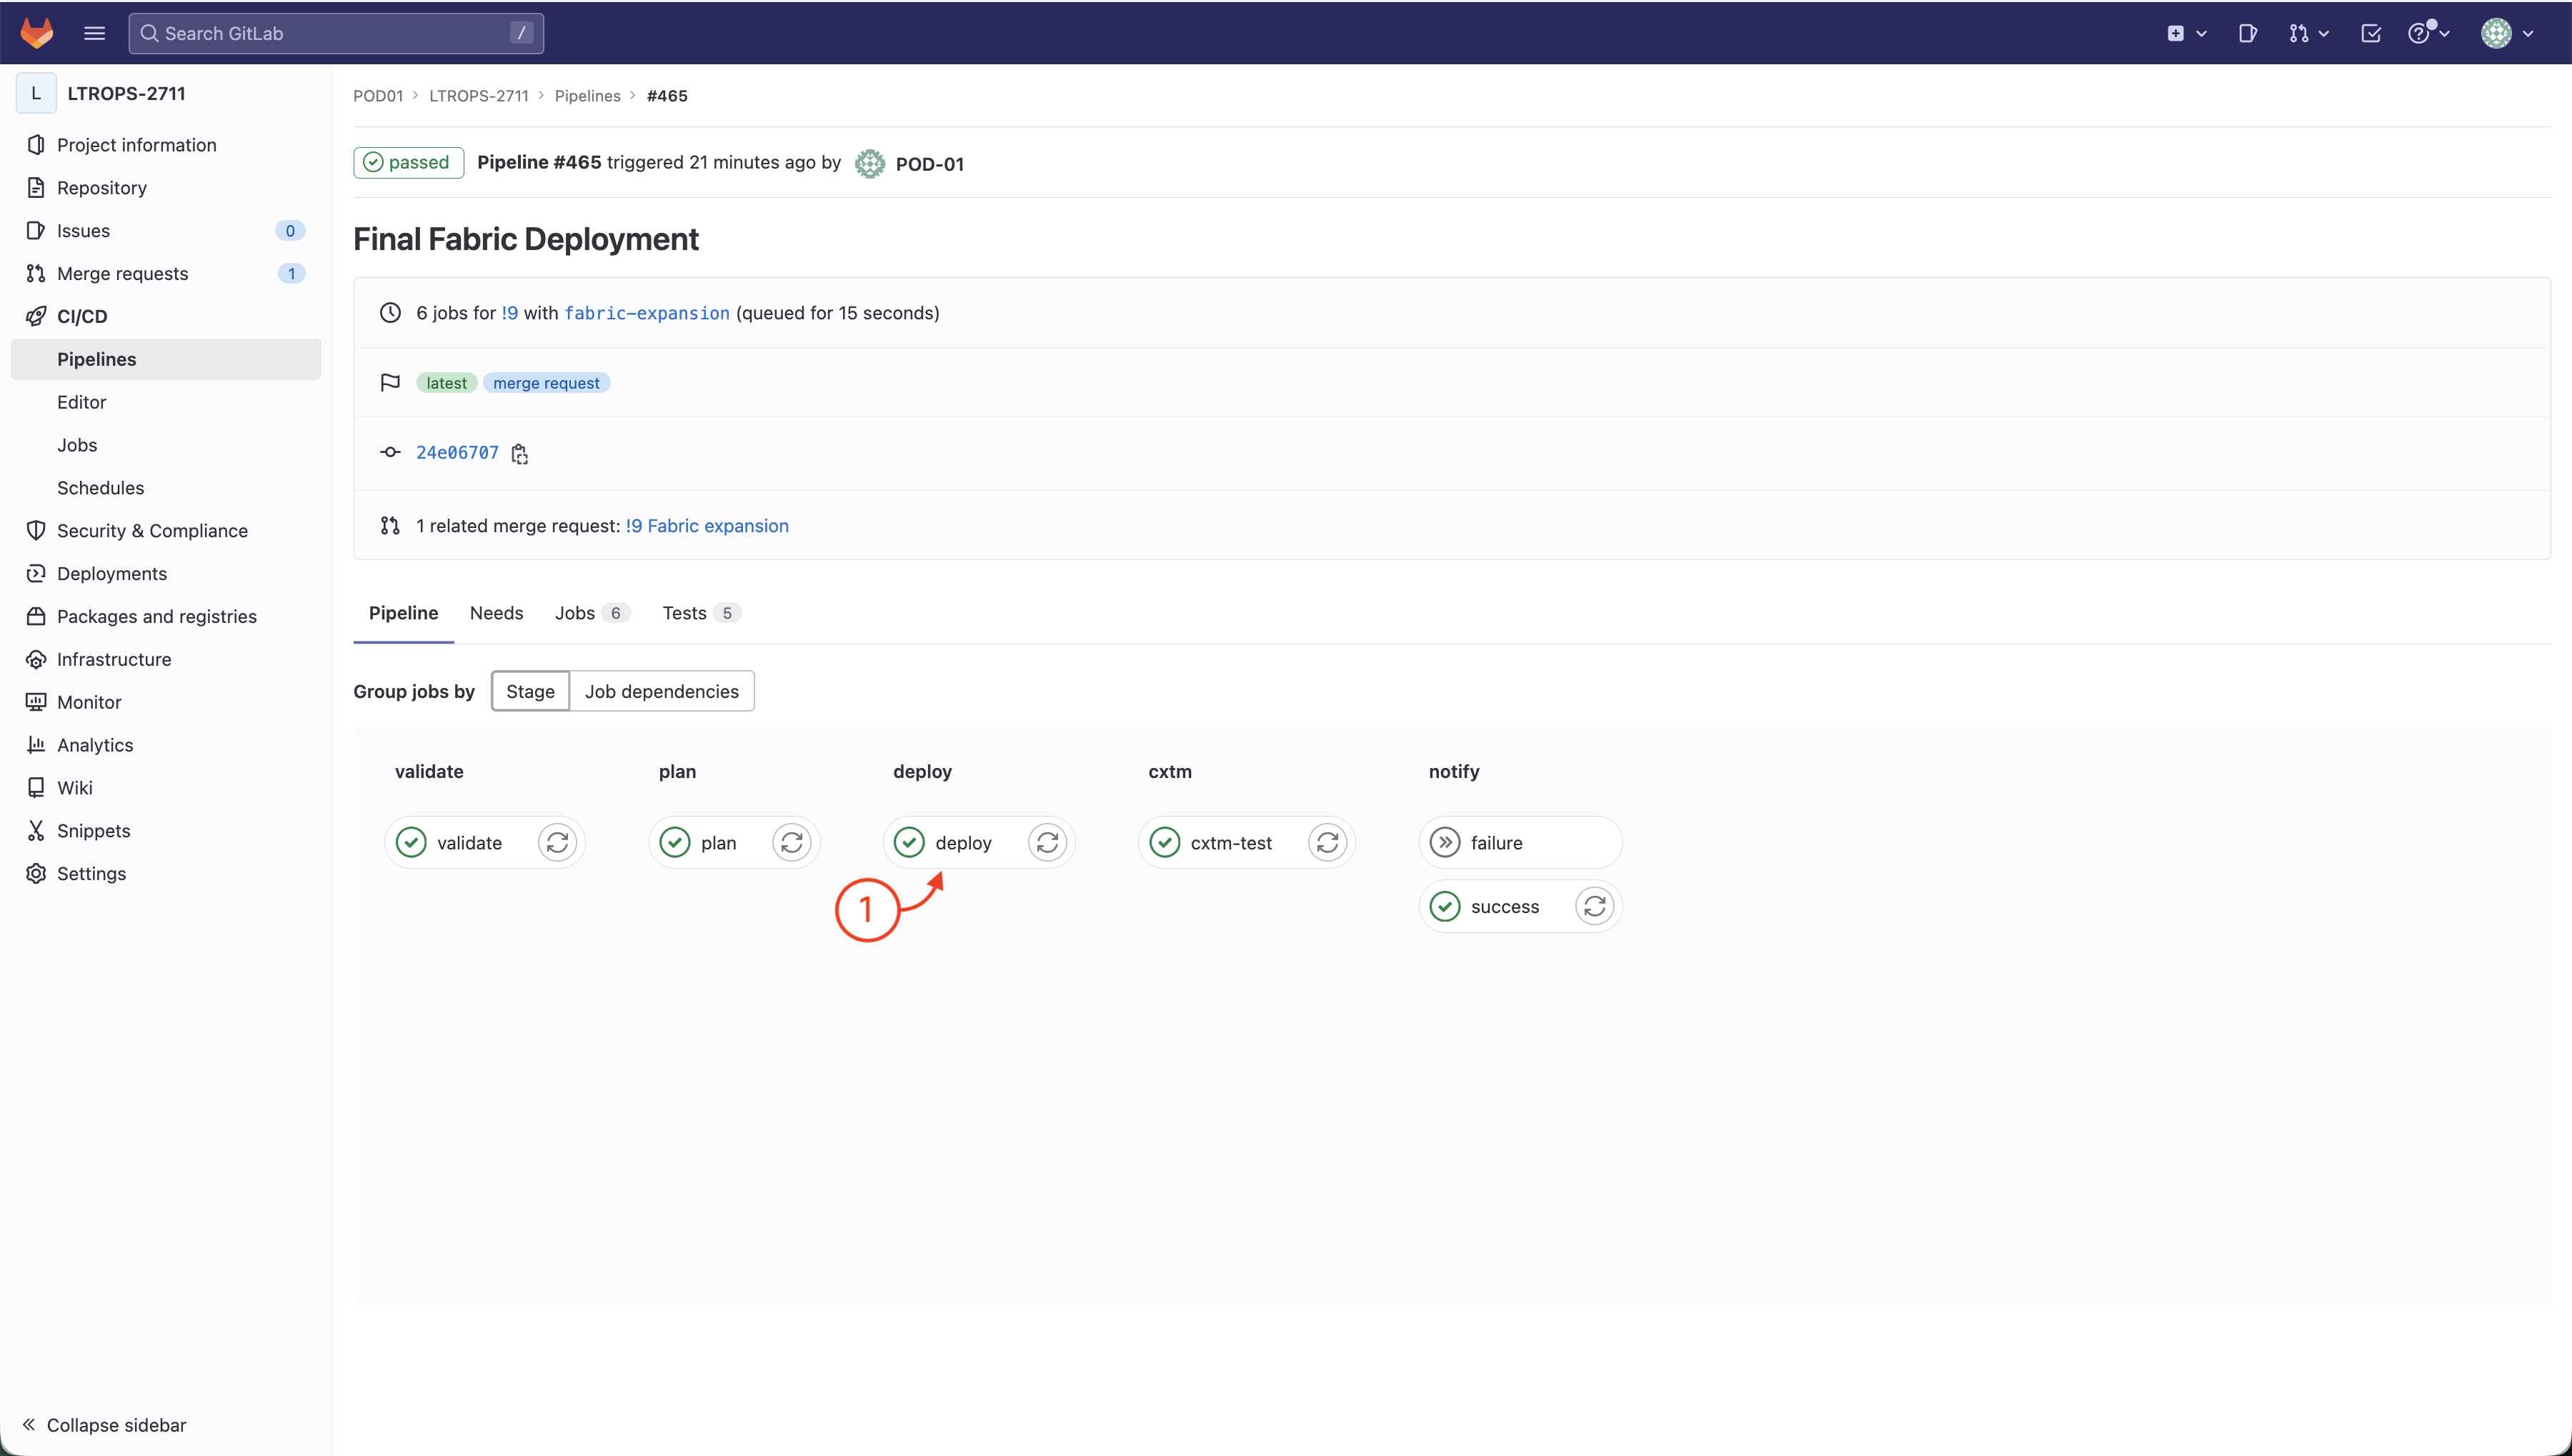
Step 8 - Navigate to Deploy Stage
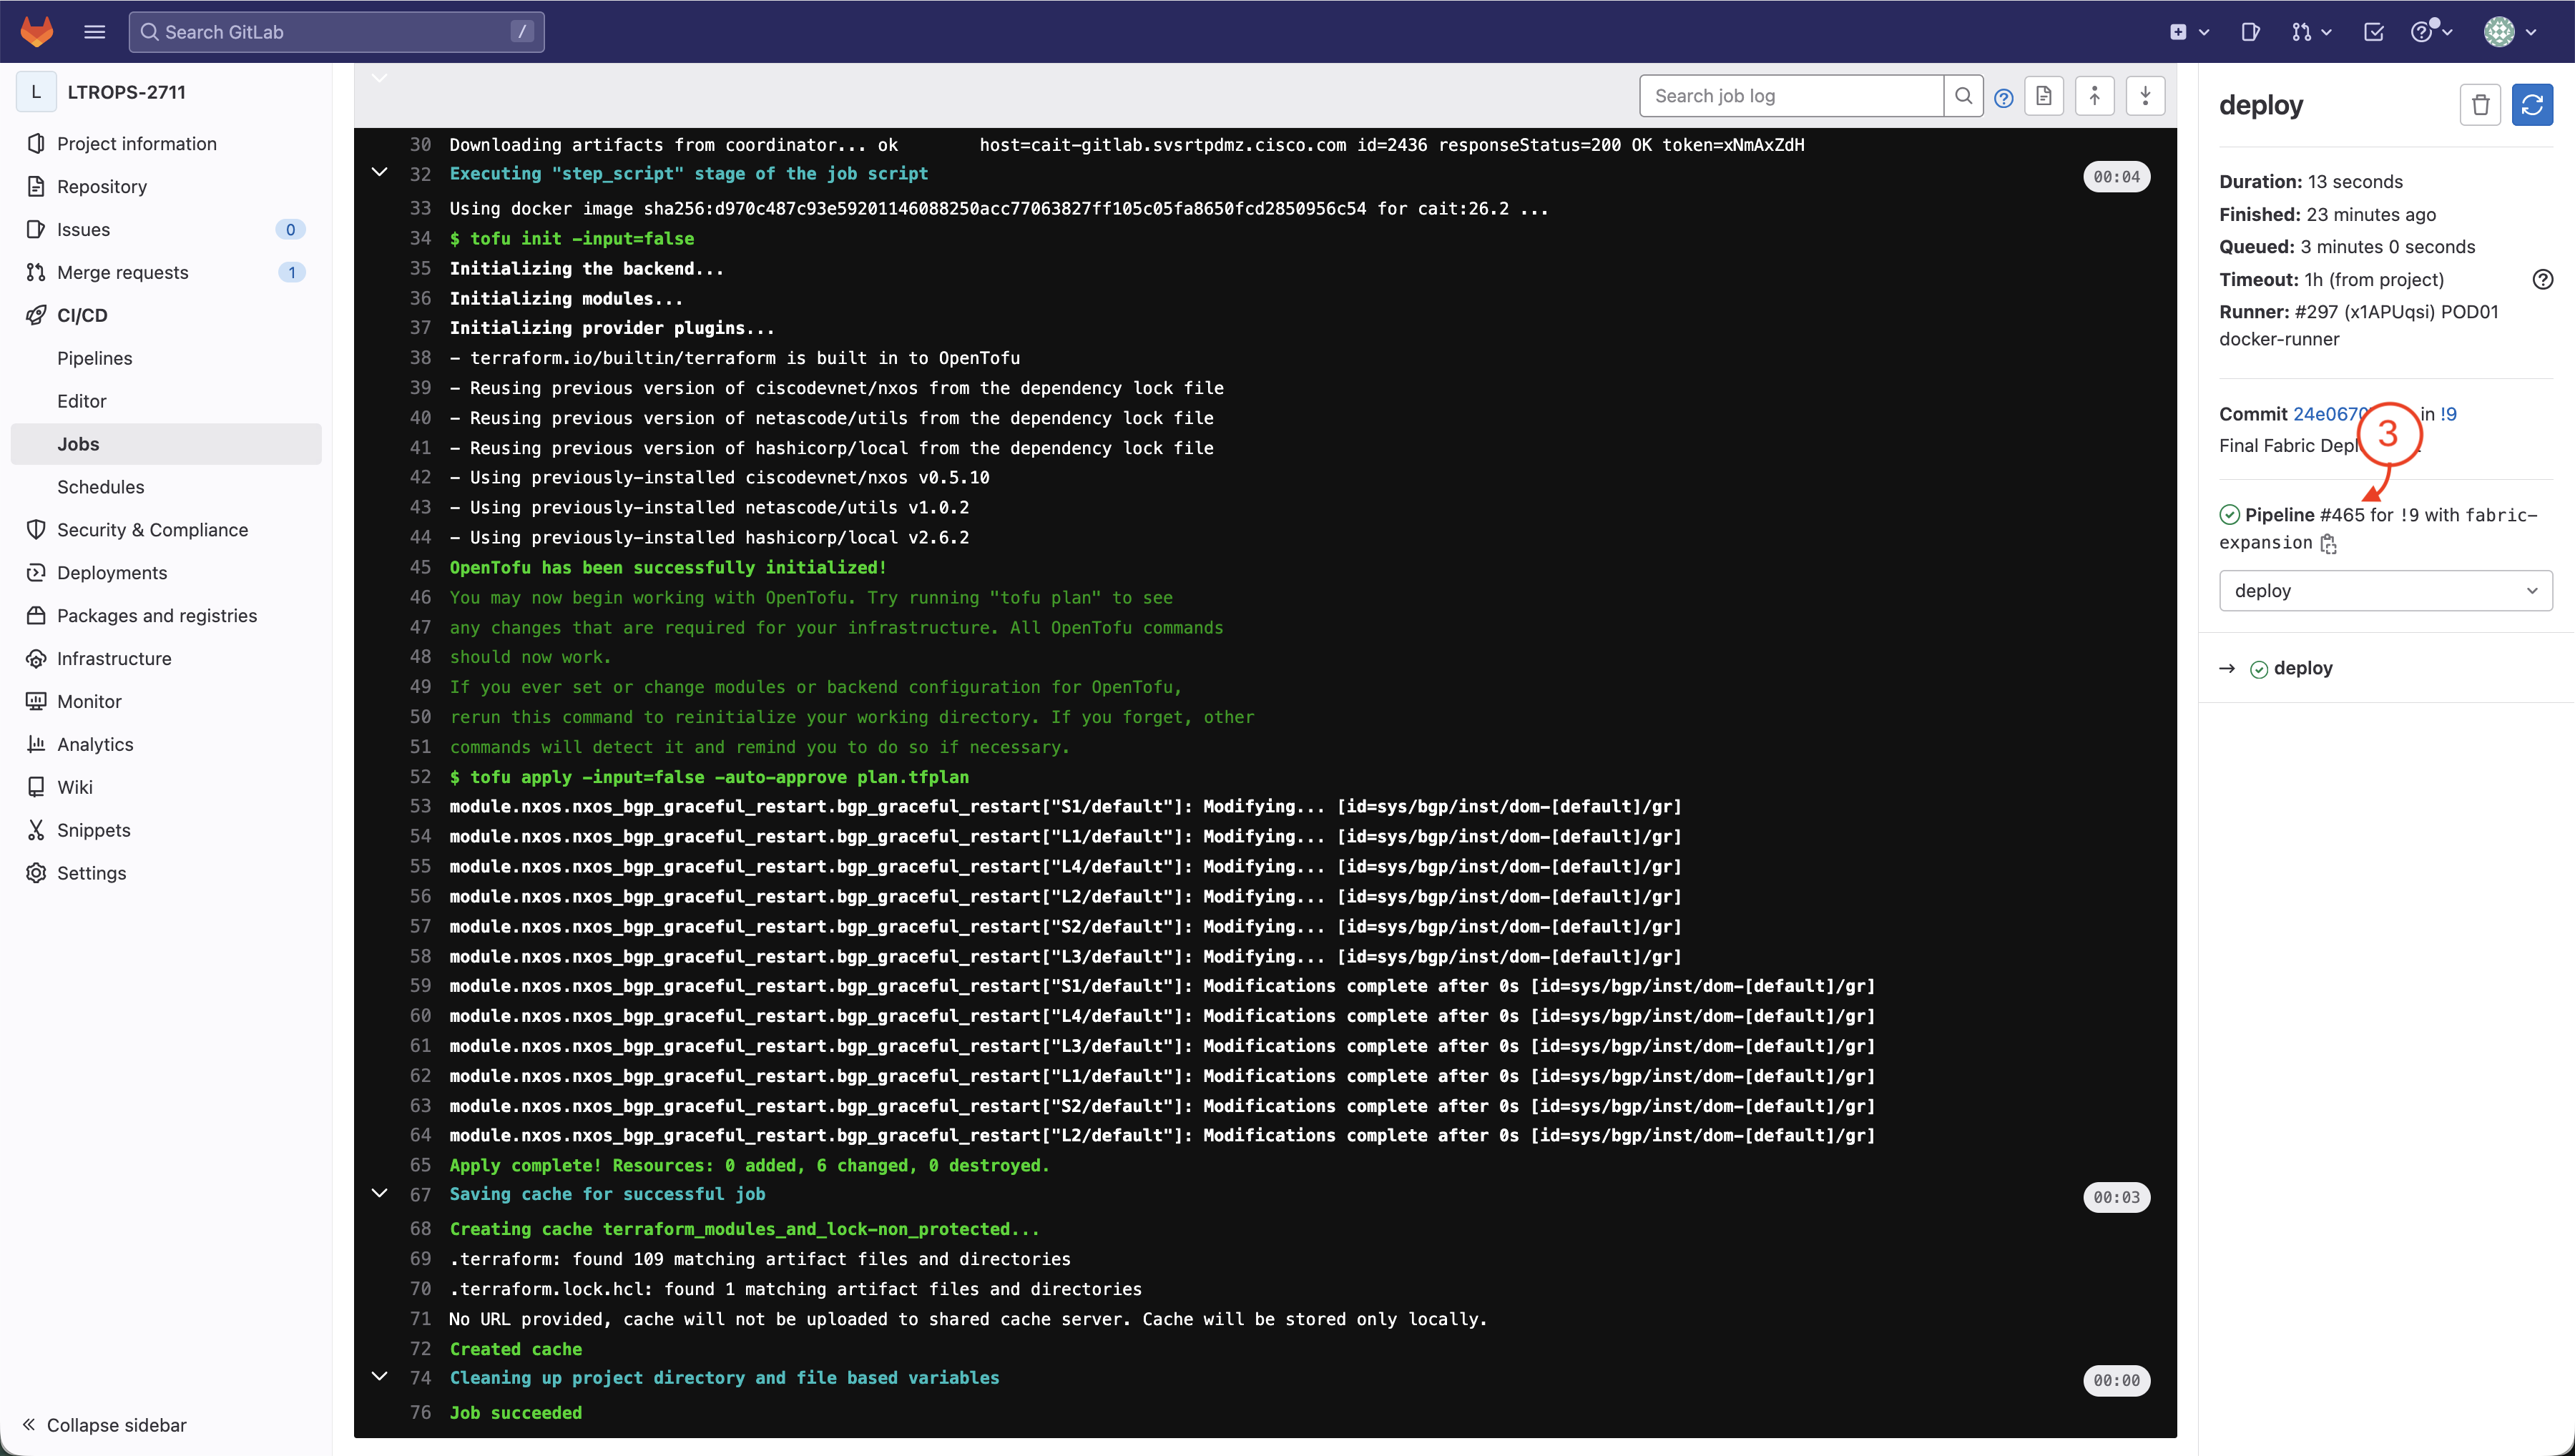
The deploy stage applies the configuration changes to your Nexus fabric by executing the Terraform apply.
Click on the deploy stage to view the deployment execution results.
Review the pipeline execution to ensure the deploy job completed successfully.
Click the pipeline number on the right-side pane.
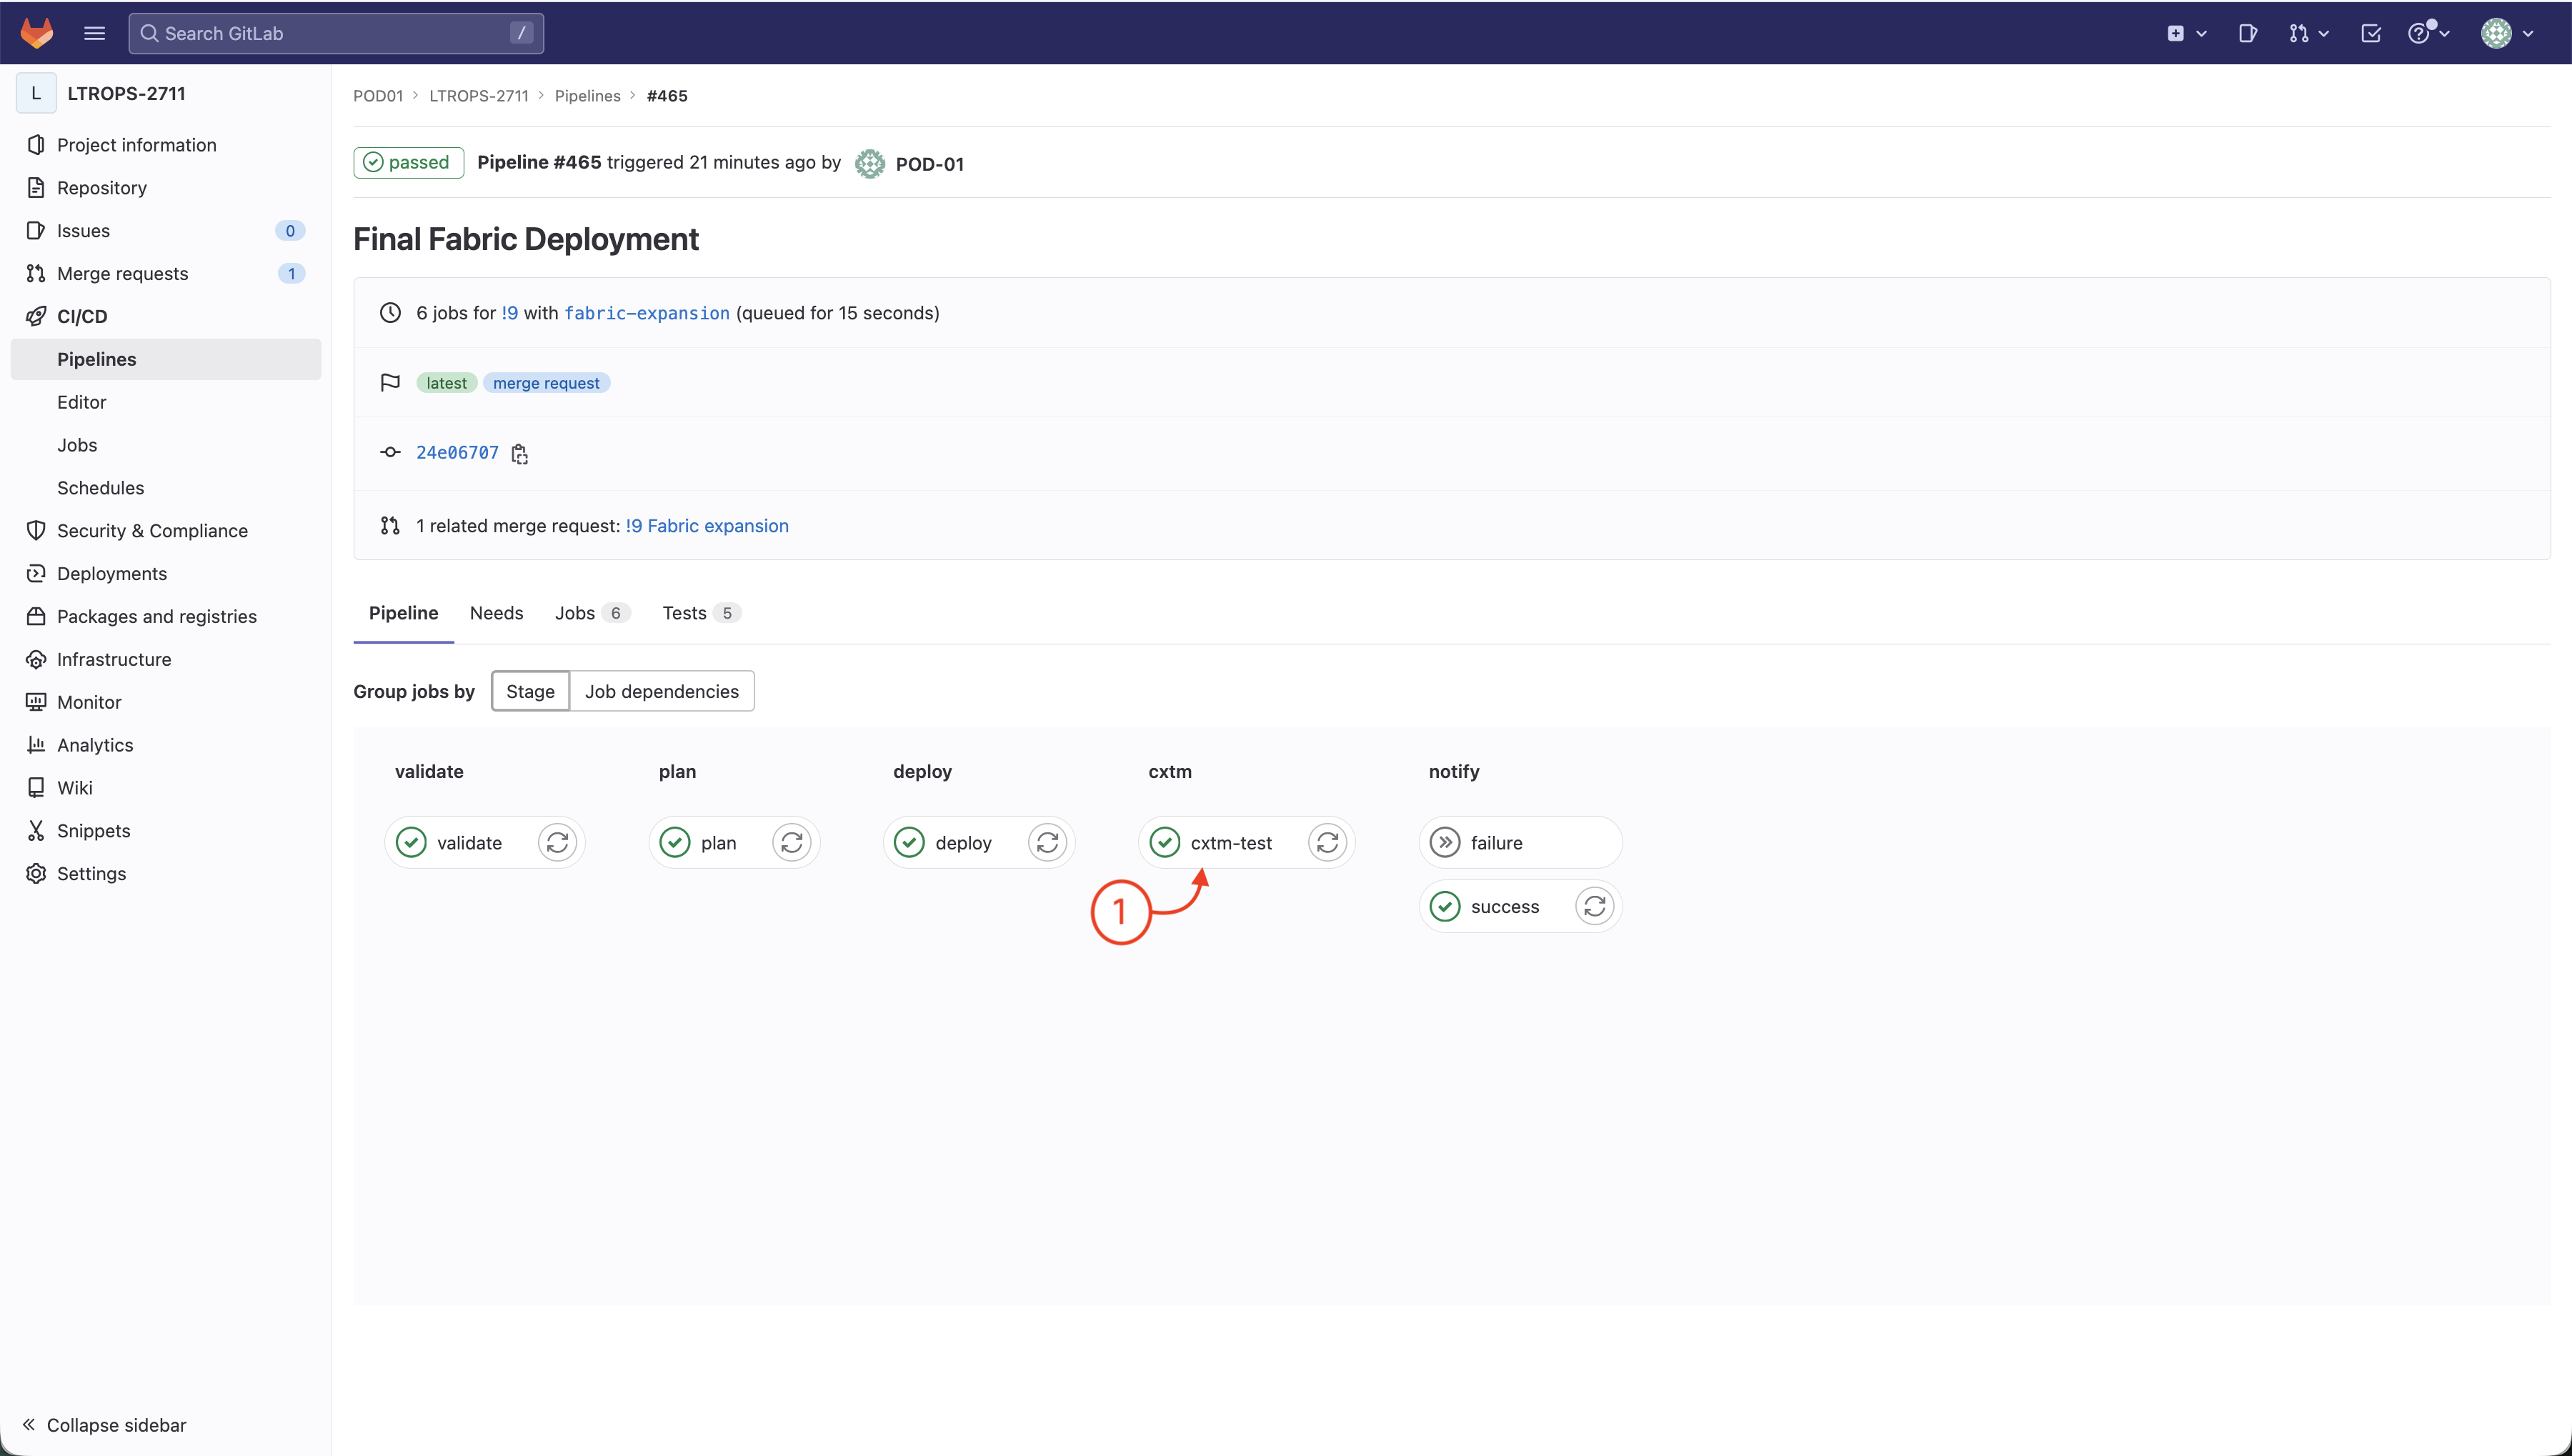
Step 9 - Navigate to CXTM Testing Stage
The cxtm stage executes automated network tests using Cisco's CX Test Manager to validate the deployed fabric configuration.
Click on the cxtm stage to view the test execution results.
Review the test execution to ensure all tests completed successfully.
Click the pipeline number on the right-side pane.
Step 10 - Navigate to Notify Stage
The notify stage sends notifications to Webex Teams about the pipeline execution results.
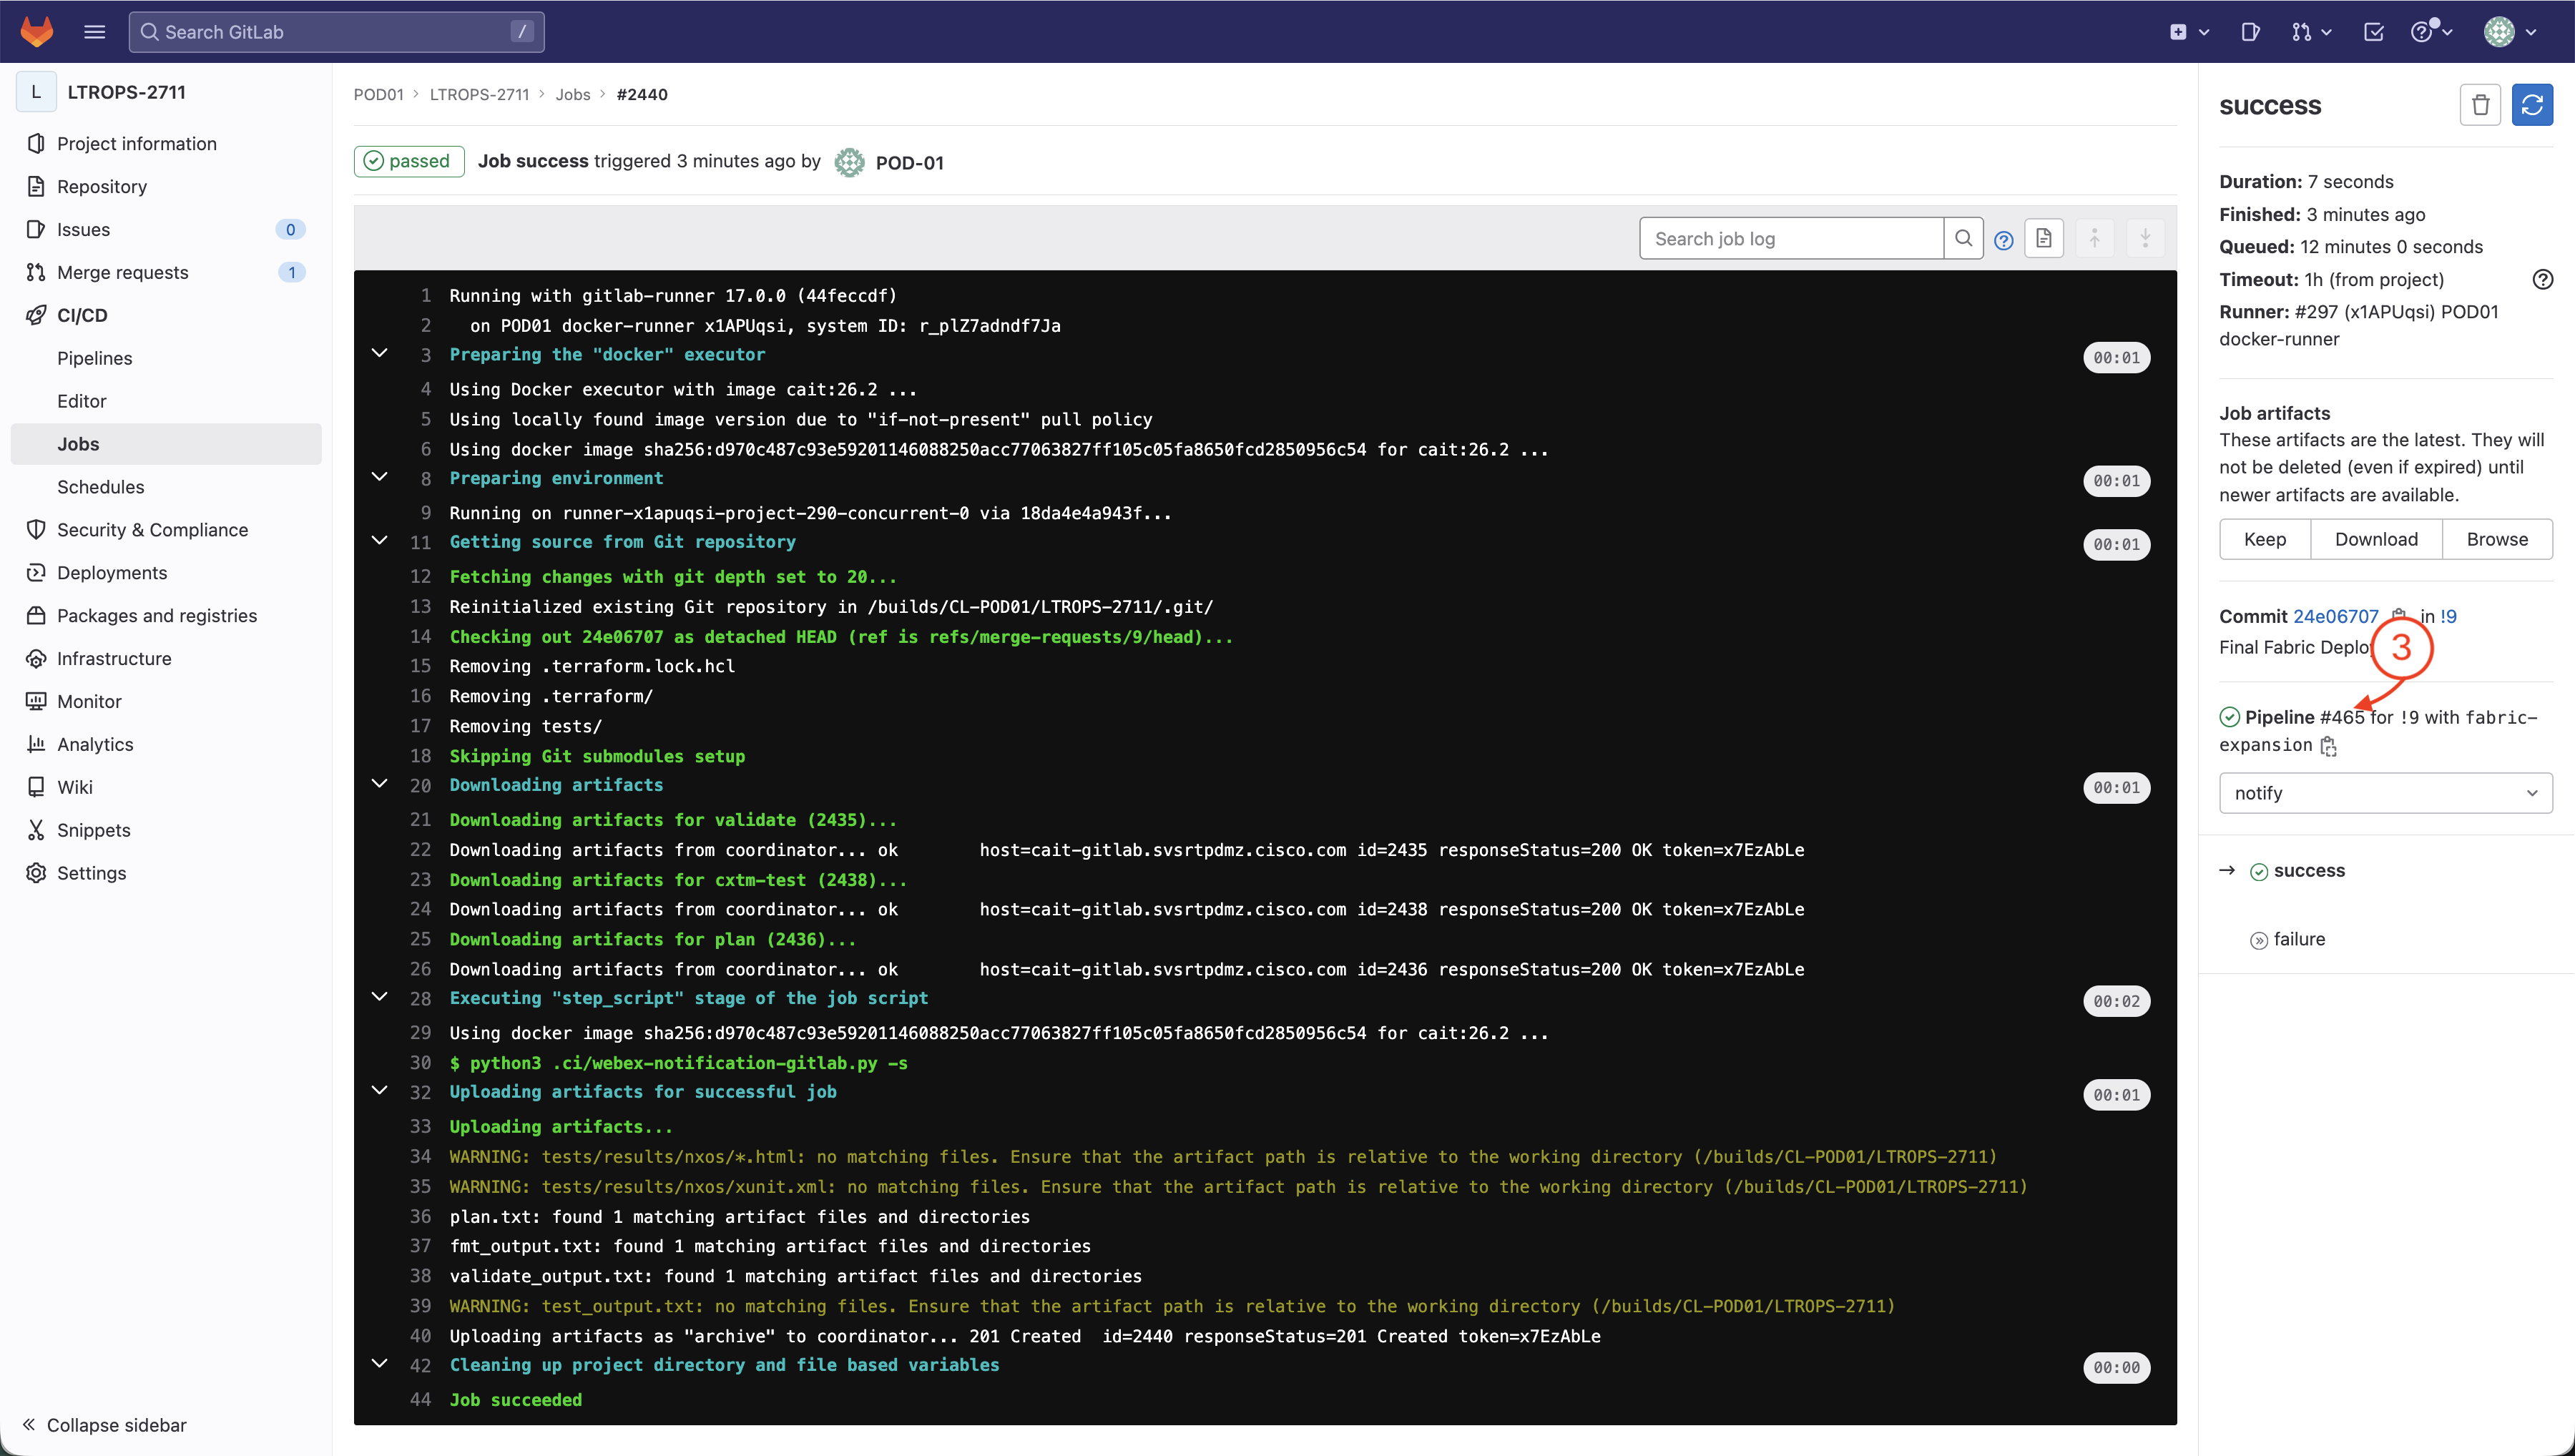
Click on the notify stage to view the notification job execution results.
Review the notification job to ensure it completed successfully.