In this section, you will configure Git integration in CXTM. Git integration allows you to link your CXTM project to a Git repository, enabling version control and collaboration for your test plans, automation scripts, and other project assets. By the end of this section, you will have successfully connected your CXTM project to a Git repository and be ready to leverage the benefits of Git integration in your testing workflow.
git ls-remote --get-url origin
The copied output should be the same as the following URL.
git@cait-gitlab.svsrtpdmz.cisco.com:CL-POD07/LTROPS-2711.git
From your CXTM Project's homepage:


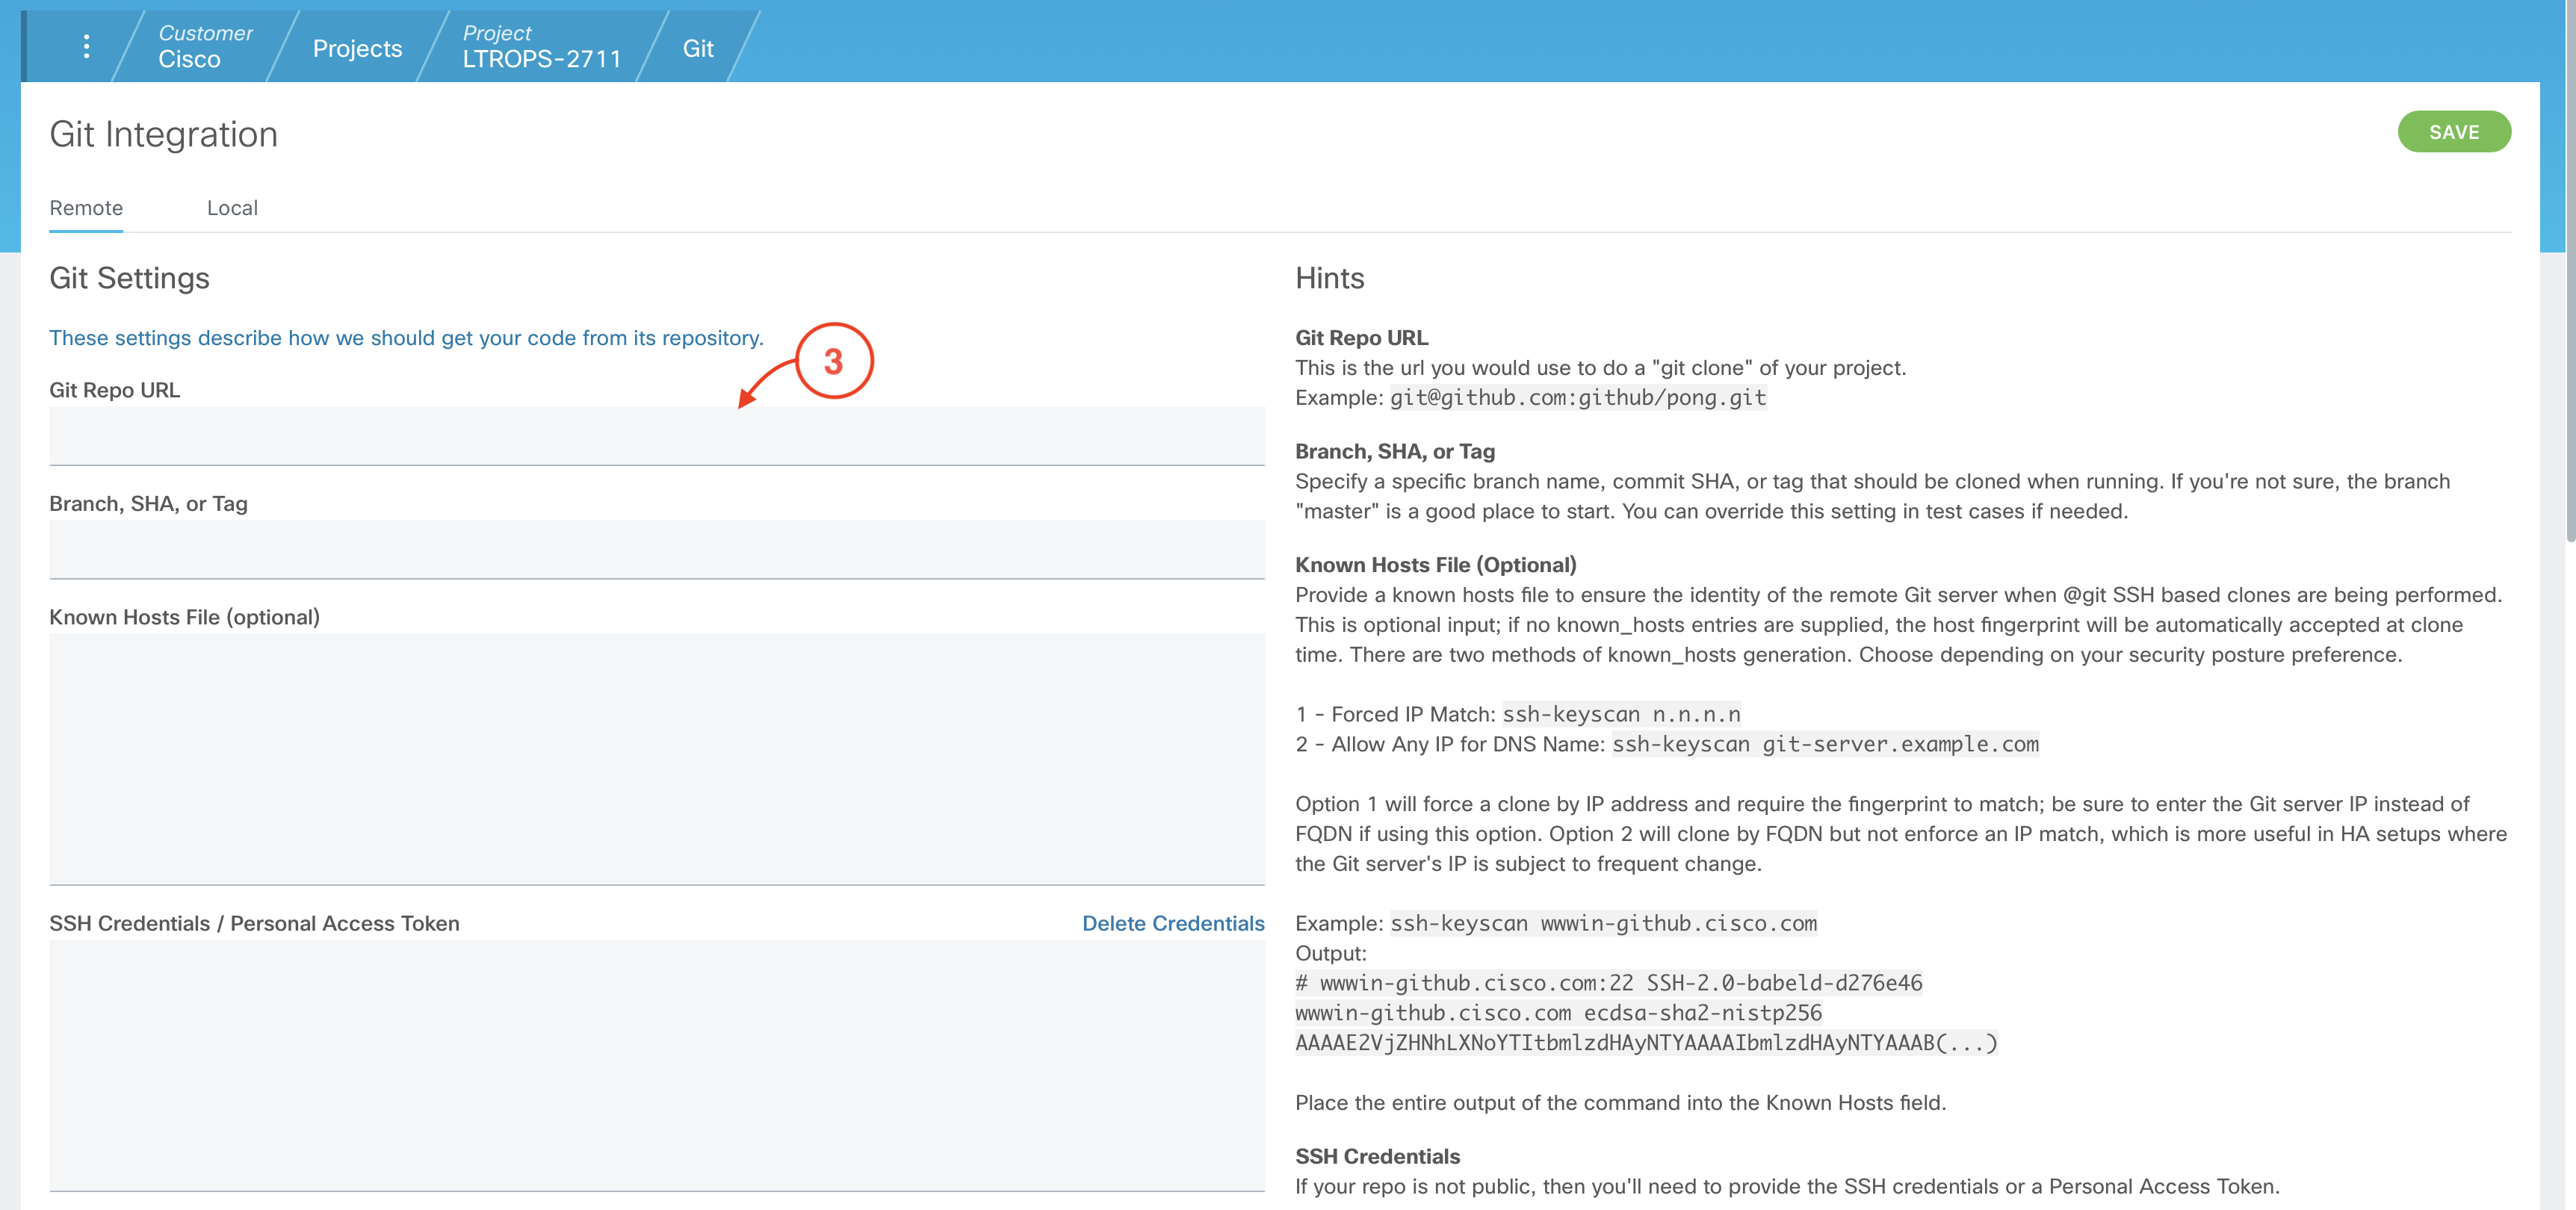
From your project's Git Integration Config page:
cat ~/.ssh/id_ecdsa
The copied output should look similar to the example below, but with a different key value:
-----BEGIN OPENSSH PRIVATE KEY-----
b3BlbnNzaC1rZXktdjEAAAAABG5vbmUAAAAEbm9uZQAAAAAAAAABAAAAaAAAABNlY2RzYS
1zaGEyLW5pc3RwMjU2AAAACG5pc3RwMjU2AAAAQQRgHX24IxPXoaedlv8DnbFZi2rIYh8I
7L4+MuOiJMQ6AT7RPHhX5Zt/gWF/a71PRJBIKhXeef4/W9B3U80bTmfbAAAAmLBS83mwUv
N5AAAAE2VjZHNhLXNoYTItbmlzdHAyNTYAAAAIbmlzdHAyNTYAAABBBGAdfbgjE9ehp52W
/wOdsVmLashiHwjsvj4y46IkxDoBPtE8eFflm3+BYX9rvU9EkEgqFd55/j9b0HdTzRtOZ9
sAAAAgLz5FK8L823Q0z0fIBUCgYTmRLd3b4PpjvkRheadbb1EAAAAA
-----END OPENSSH PRIVATE KEY-----
From your project's Git Integration Config page:


Continue to the next section.