- Introduction
- NaC Introduction
- Manual Validation
- CXTM Introduction
- CXTM Projects
- CXTM Test Cases
- CXTM Test Automation
- CXTM Git Integration
- CXTM Batches
- CXTM Notifications
- Final Deployment
- CXTM Reporting
- CXTM References
- Bonus Content
Create Job Files
In this section, you will create Job Files in CXTM linked to Git.
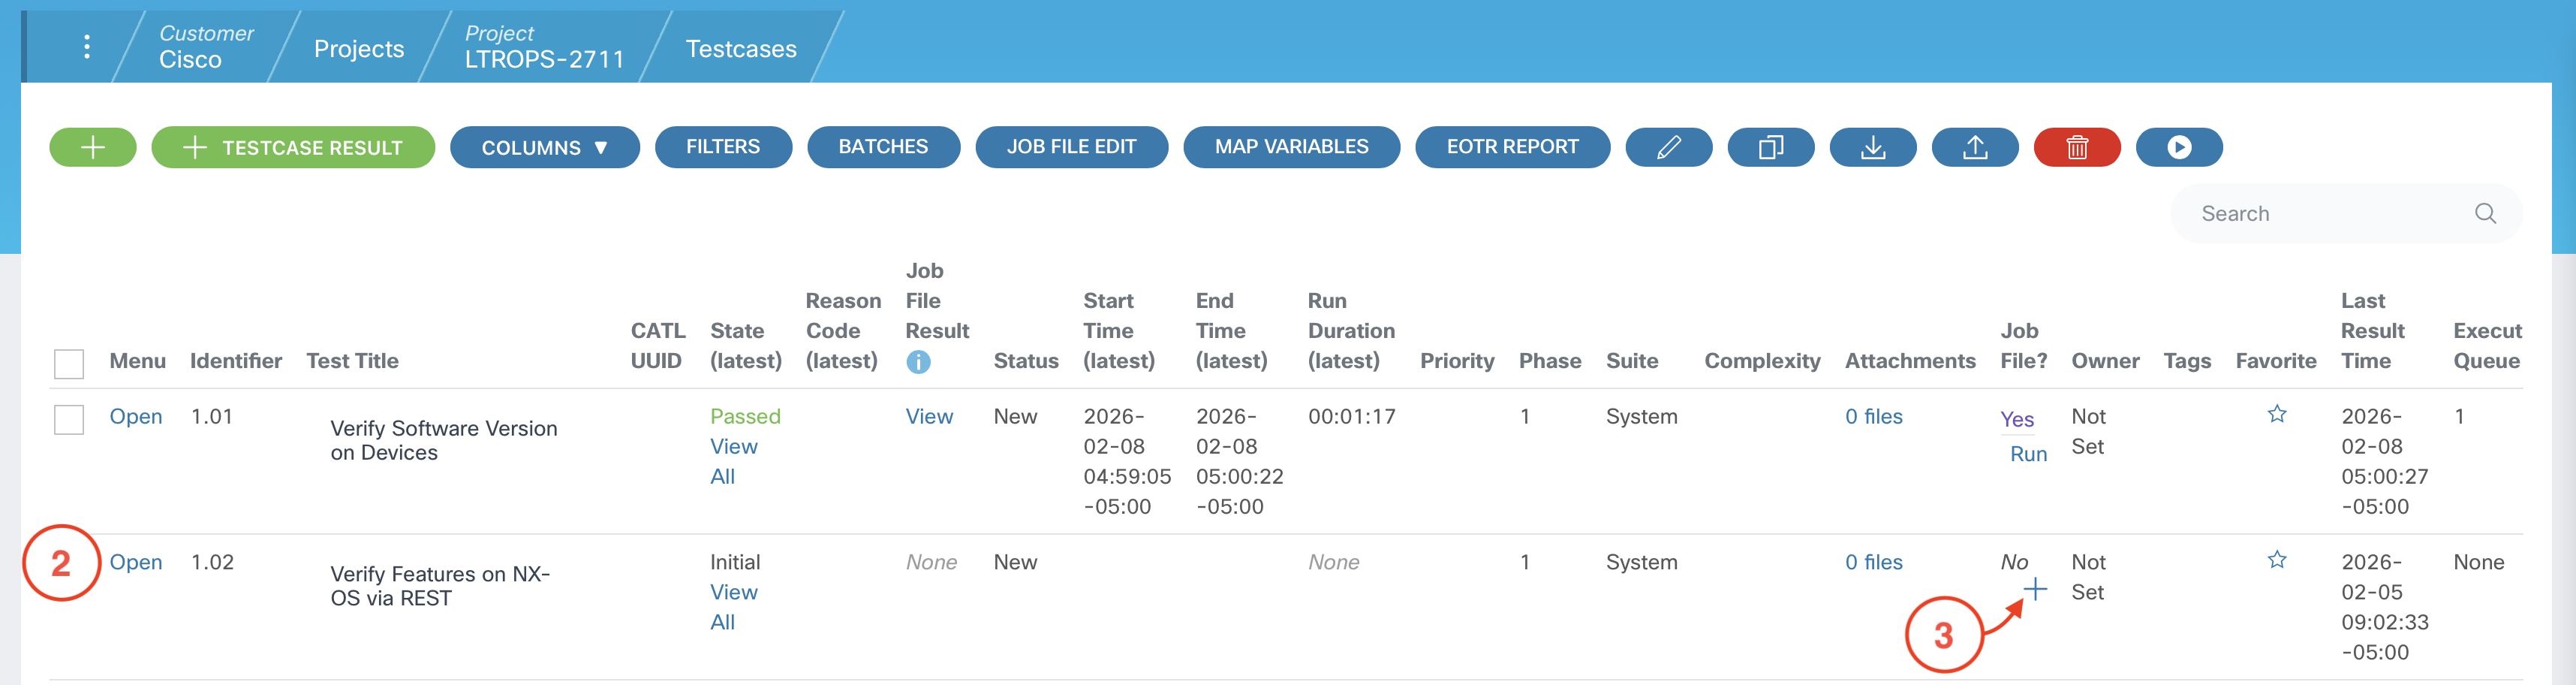
Step 1 - Create Job File for Verify Features on NX-OS via REST Test Case
From your project home page:
-
Click on VIEW TEST CASES

-
Locate the test case Verify Features on NX-OS via REST that has identifier 1.02
-
For this test case's row, click on the + (plus) icon under the Job File? column
-
For Job File Type select Script in Git Repo from the dropdown
-
For Runtime Image Version select cxta:25.6 from the dropdown

-
Use the parameters below and insert them into the Parameter File section of your Job File.
DEVICES:
    - L1
    - L2

EXPECTED_FEATURES:
    - bgp
    - interface-vlan
    - lldp

EXPECTED_STATE: enabled
-
Scroll down and enter the following command into the Command field under Advanced Settings
cxta -n cxtm/verify_features_on_NXOS_via_rest.robot
While still under the Advanced Settings section...
-
Select LTROPS-2711 Topology from the Default Topology dropdown
-
Enter
2
into the Execution Queue field

-
Scroll back up to the top of the Job File page and click Save

-
Navigate back to your project home by clicking on the Project LTROPS-2711 tab in the navigation breadcrumbs.

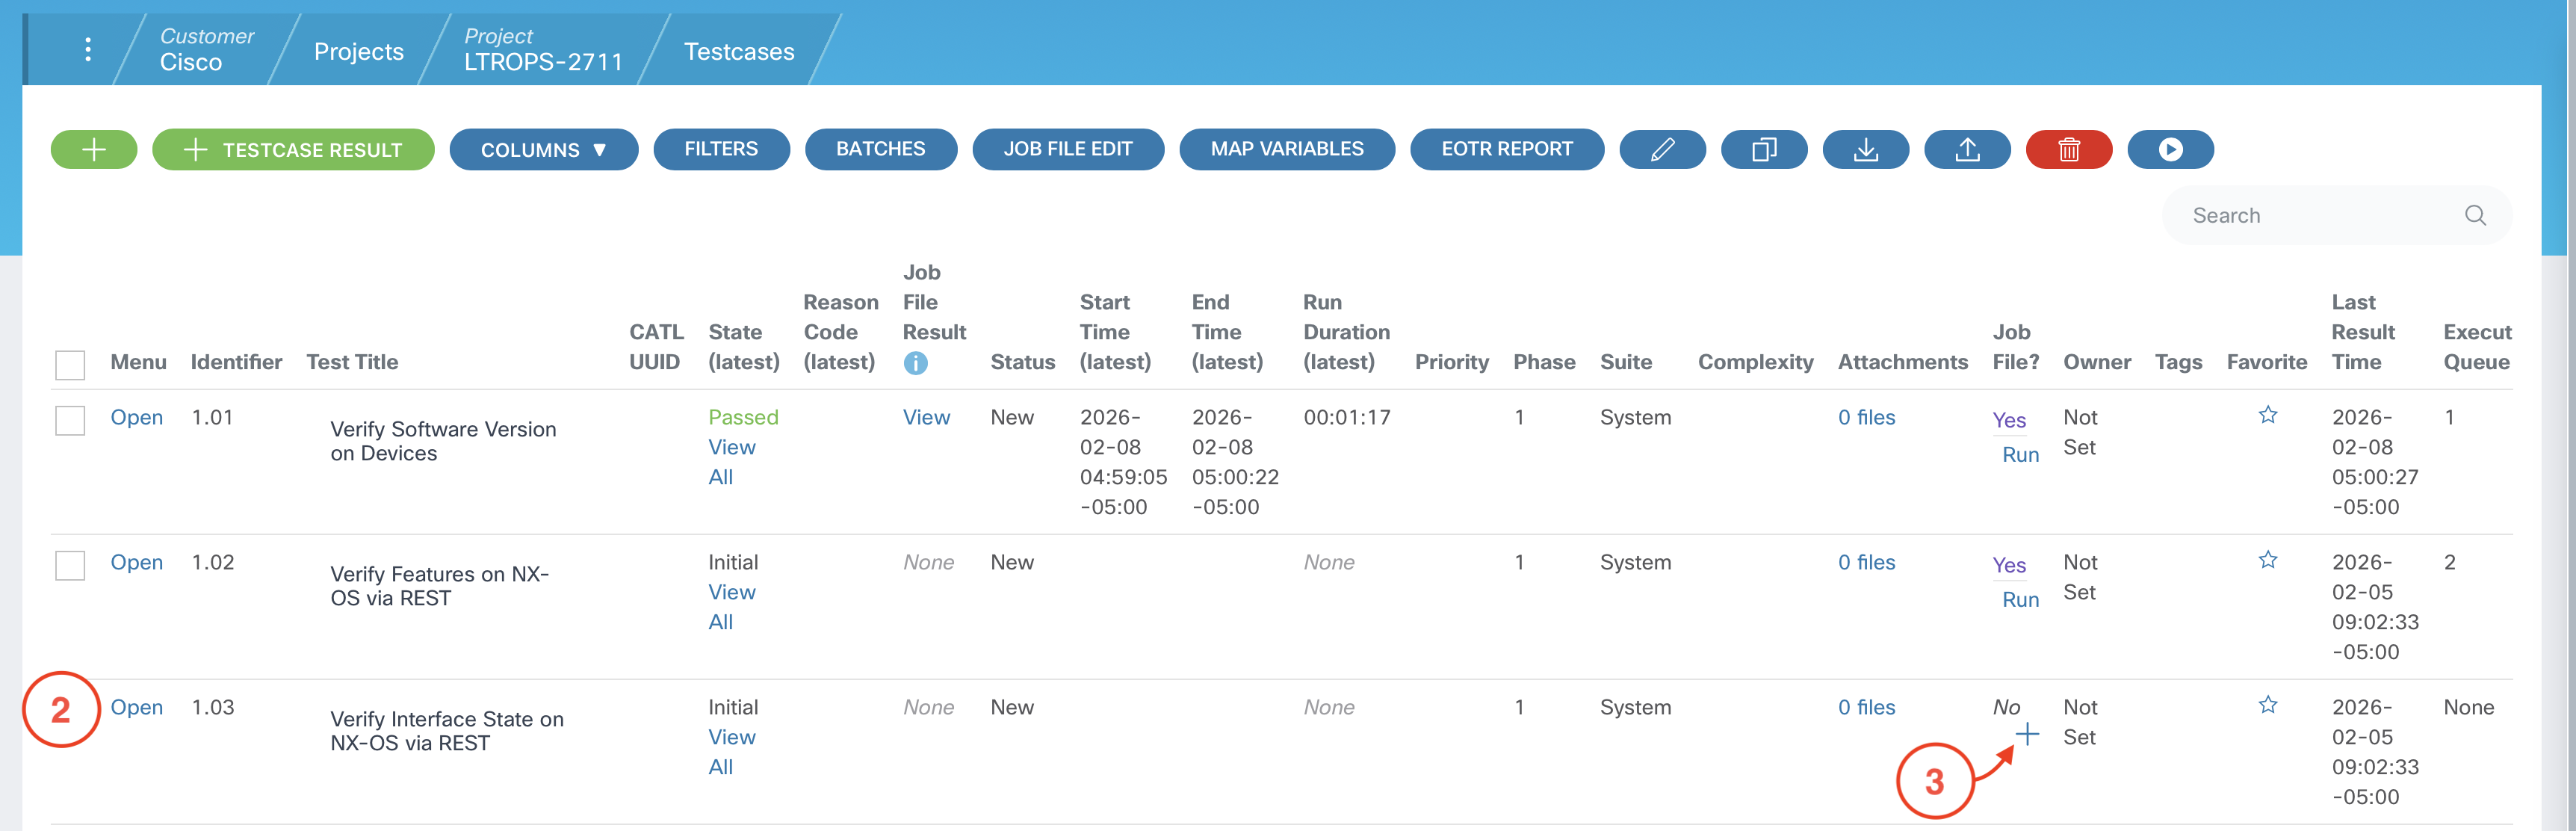
Step 2 - Create Job File for Verify Interface State on NX-OS via REST Test Case
From your project home page:
-
Click on VIEW TEST CASES
-
Locate the test case Verify Interface State on NX-OS via REST that has identifier 1.03
-
For this test case's row, click on the + (plus) icon under the Job File? column
-
For Job File Type select Script in Git Repo from the dropdown
-
For Runtime Image Version select cxta:25.6 from the dropdown

-
Use the parameters below and insert them into the Parameter File section of your Job File.
DEVICES_DATA:
    S1:
      INTERFACES:
        - Lo0
        - Eth1/1
        - Eth1/2
        - Eth1/3
        - Eth1/11
        - Eth1/12
        - Eth1/13
    S2:
      INTERFACES:
        - Lo0
        - Eth1/1
        - Eth1/2
        - Eth1/3
        - Eth1/11
        - Eth1/12
        - Eth1/13
    L1:
      INTERFACES:
        - Vlan101
        - Lo0
        - Eth1/29
        - Eth1/30
        - Eth1/31
        - Eth1/32
    L2:
      INTERFACES:
        - Vlan102
        - Lo0
        - Eth1/29
        - Eth1/30
        - Eth1/31
        - Eth1/32

EXPECTED_STATE: up
-
Scroll down and enter the following command into the Command field under Advanced Settings
cxta -n cxtm/verify_interface_state_on_NXOS_via_REST.robot
While still under the Advanced Settings section...
-
Select LTROPS-2711 Topology from the Default Topology dropdown
-
Enter
3
into the Execution Queue field

-
Scroll back up to the top of the Job File page and click Save

-
Navigate back to your project home by clicking on the Project LTROPS-2711 tab in the navigation breadcrumbs.

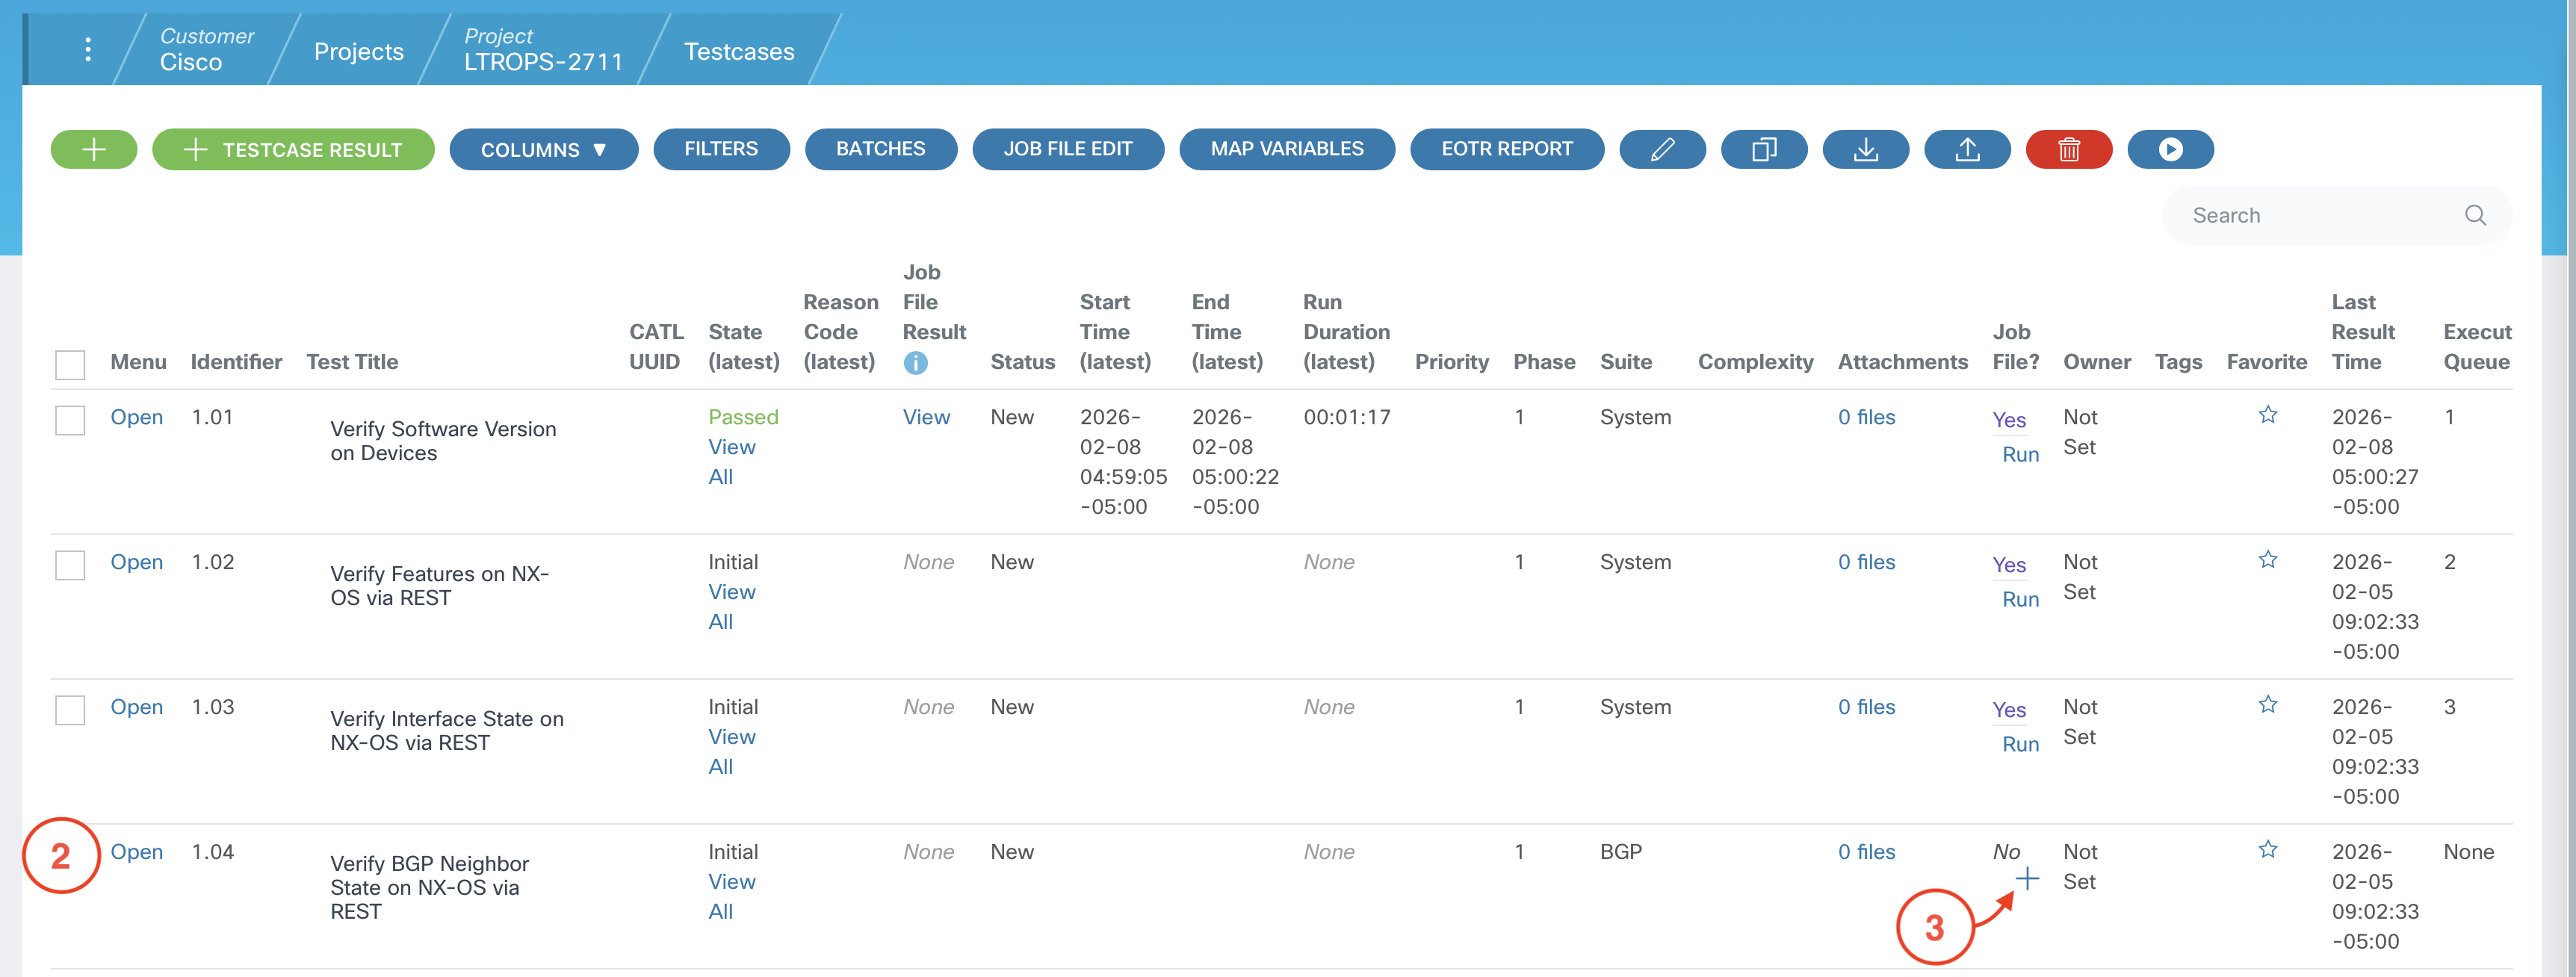
Step 3 - Create Job File for Verify BGP Neighbor State on NX-OS via REST Test Case
From your project home page:
-
Click on VIEW TEST CASES
-
Locate the test case Verify BGP Neighbor State on NX-OS via REST that has identifier 1.04
-
For this test case's row, click on the + (plus) icon under the Job File? column
-
For Job File Type select Script in Git Repo from the dropdown
-
For Runtime Image Version select cxta:25.6 from the dropdown

-
Use the parameters below and insert them into the Parameter File section of your Job File.
DEVICES:
    - S1
    - S2
    - L1
    - L2

EXPECTED_STATE: Established
-
Scroll down and enter the following command into the Command field under Advanced Settings
cxta -n cxtm/verify_BGP_neighbor_state_on_NXOS_via_REST.robot
While still under the Advanced Settings section...
-
Select LTROPS-2711 Topology from the Default Topology dropdown
-
Enter
4
into the Execution Queue field

-
Scroll back up to the top of the Job File page and click Save

-
Navigate back to your project home by clicking on the Project LTROPS-2711 tab in the navigation breadcrumbs.
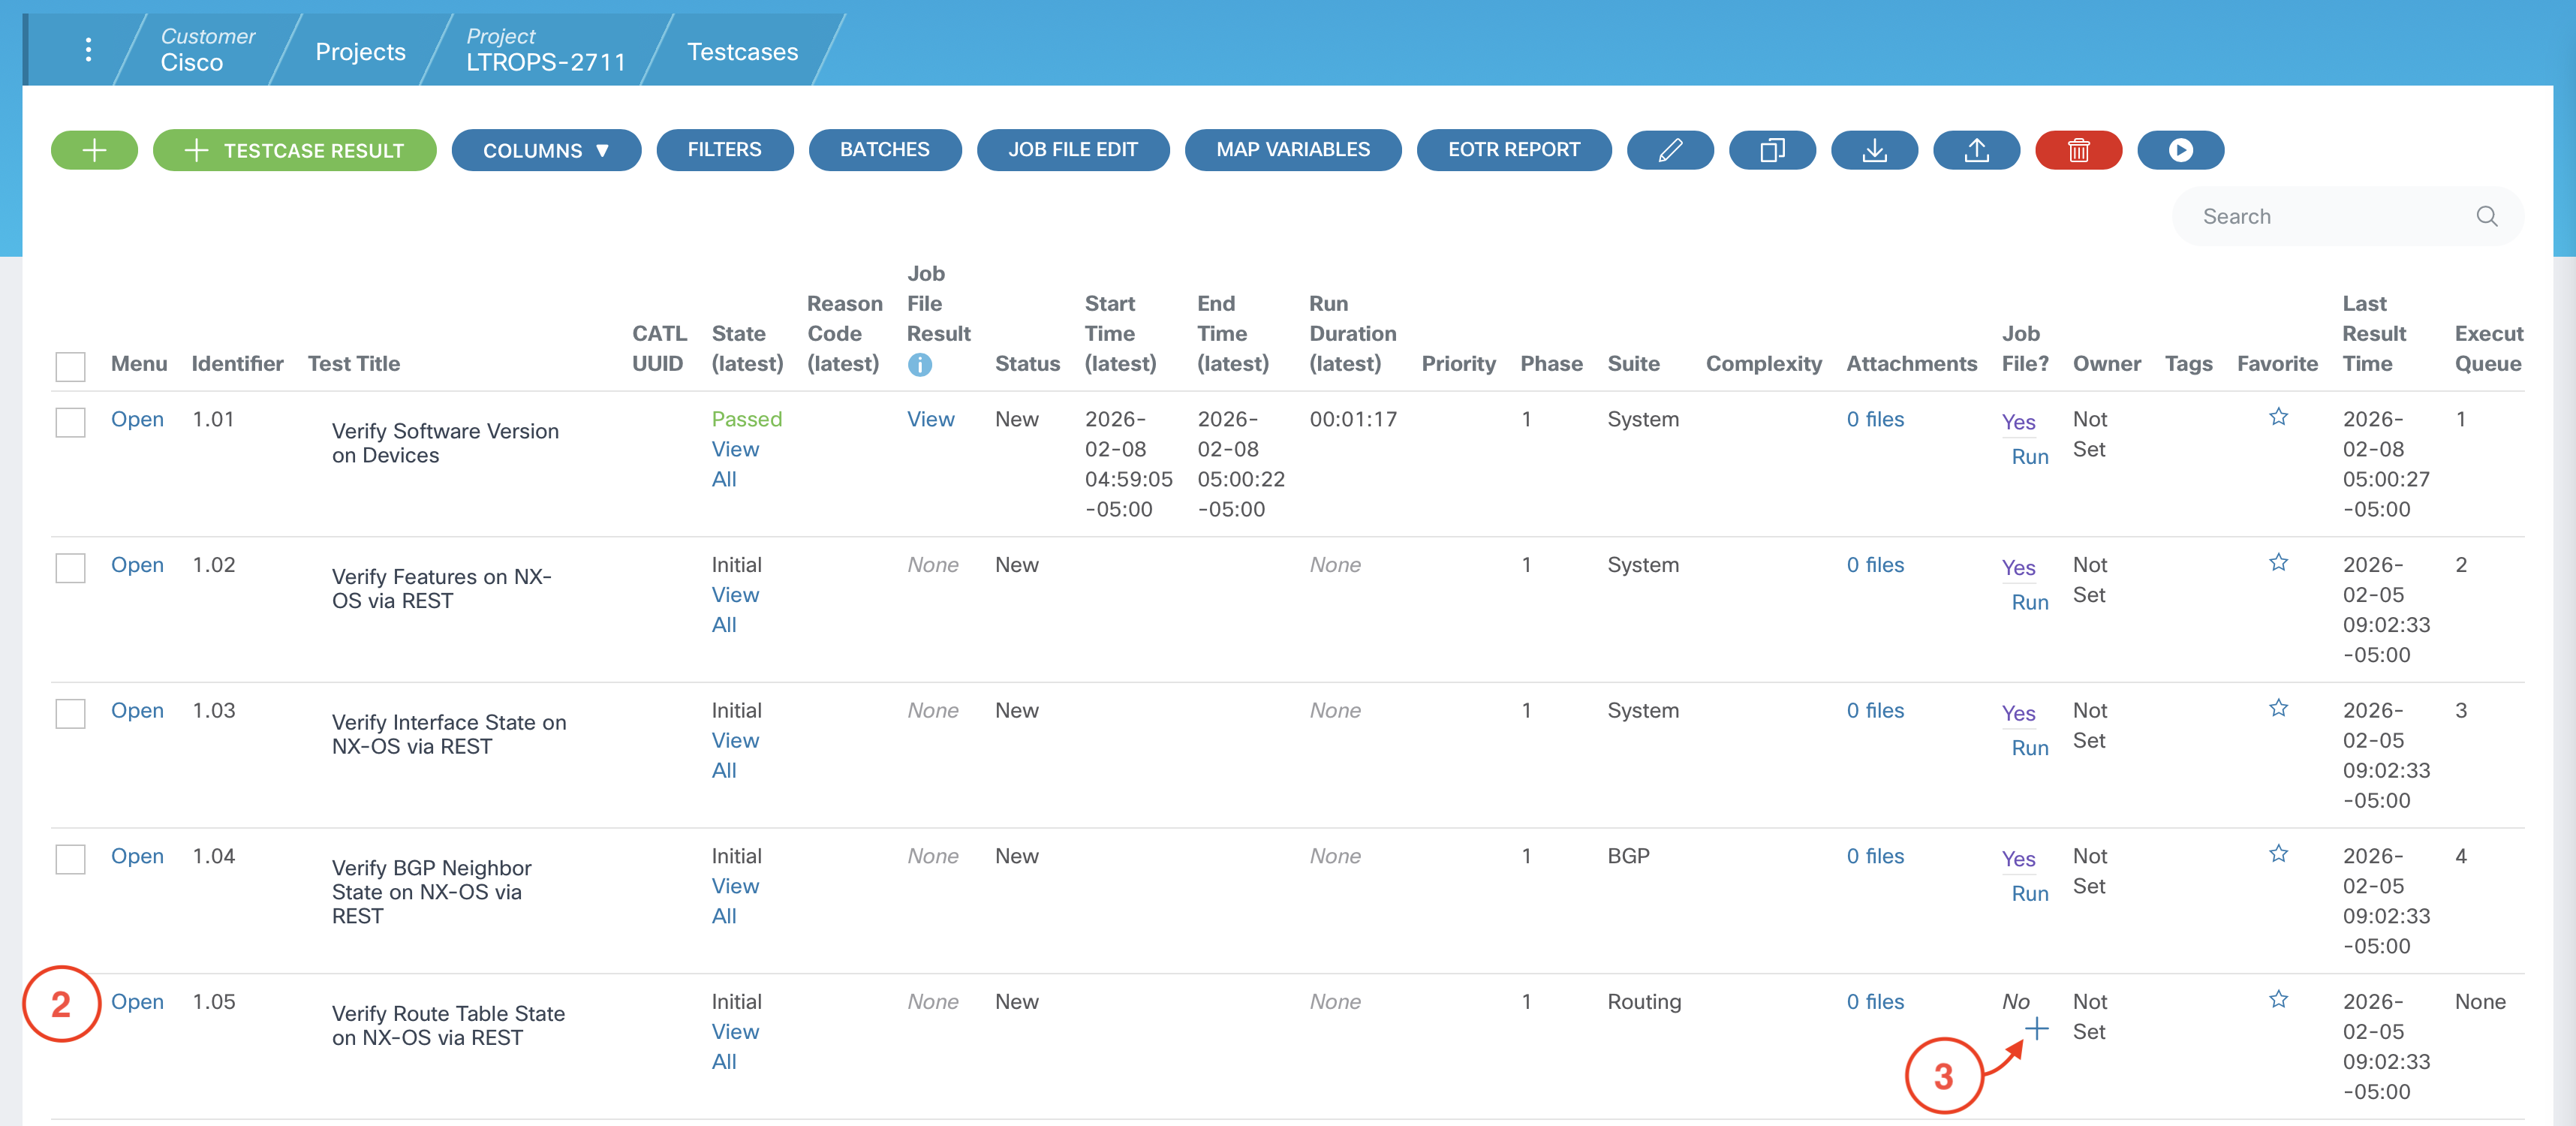
Step 4 - Create Job File for Verify Route Table State on NX-OS via REST Test Case
From your project home page:
-
Click on VIEW TEST CASES
-
Locate the test case Verify Route Table State on NX-OS via REST that has identifier 1.05
-
For this test case's row, click on the + (plus) icon under the Job File? column
-
For Job File Type select Script in Git Repo from the dropdown
-
For Runtime Image Version select cxta:25.6 from the dropdown

-
Use the parameters below and insert them into the Parameter File section of your Job File.
DEVICES:
    - S1
    - S2
    - L1
    - L2

EXPECTED_ROUTES:
    - 10.0.1.1/32
    - 10.0.2.2/32
    - 10.254.101.0/24
    - 10.254.102.0/24
-
Scroll down and enter the following command into the Command field under Advanced Settings
cxta -n cxtm/verify_route_table_state_on_NXOS_via_REST.robot
While still under the Advanced Settings section...
-
Select LTROPS-2711 Topology from the Default Topology dropdown
-
Enter
5
into the Execution Queue field

-
Scroll back up to the top of the Job File page and click Save

-
Navigate back to your project home by clicking on the Project LTROPS-2711 tab in the navigation breadcrumbs.

Step 5 - Return to your project's Test Cases page
From your project home page:
-
Click on VIEW TEST CASES
Continue to the next section.