- Introduction
- CXTM Basics
- CXTM Projects
- CXTM Test Cases
- CXTM Test Automation
- Revisit Imported Test Cases
- CXTM Batches
- CXTM Notifications
- NetDevOps
- CXTM Reporting
- CXTM References
- Bonus: Project Users
- Bonus: CXTM REST API
- Bonus: Secret Env Variables
Run GitLab CI/CD pipeline
With your infrastructure as code and your pipeline file present in your Git repo config change branch, the next step you need to take is to create a merge request.
Merge request is the terminology used by GitLab and is equivalent to GitHub's Pull Request terminology.
This is the step in the process where the developer opens a "ticket" for the change to the code base, i.e. main branch, they wish to make.
Upon opening this ticket request, Continuous Integration (CI) occurs where the build and test steps execute.
In the paradigm of NetDevOps with CI, the build and deploy phase is the configuration of the test network and the testing is the linting steps and pre-/post- network test steps.
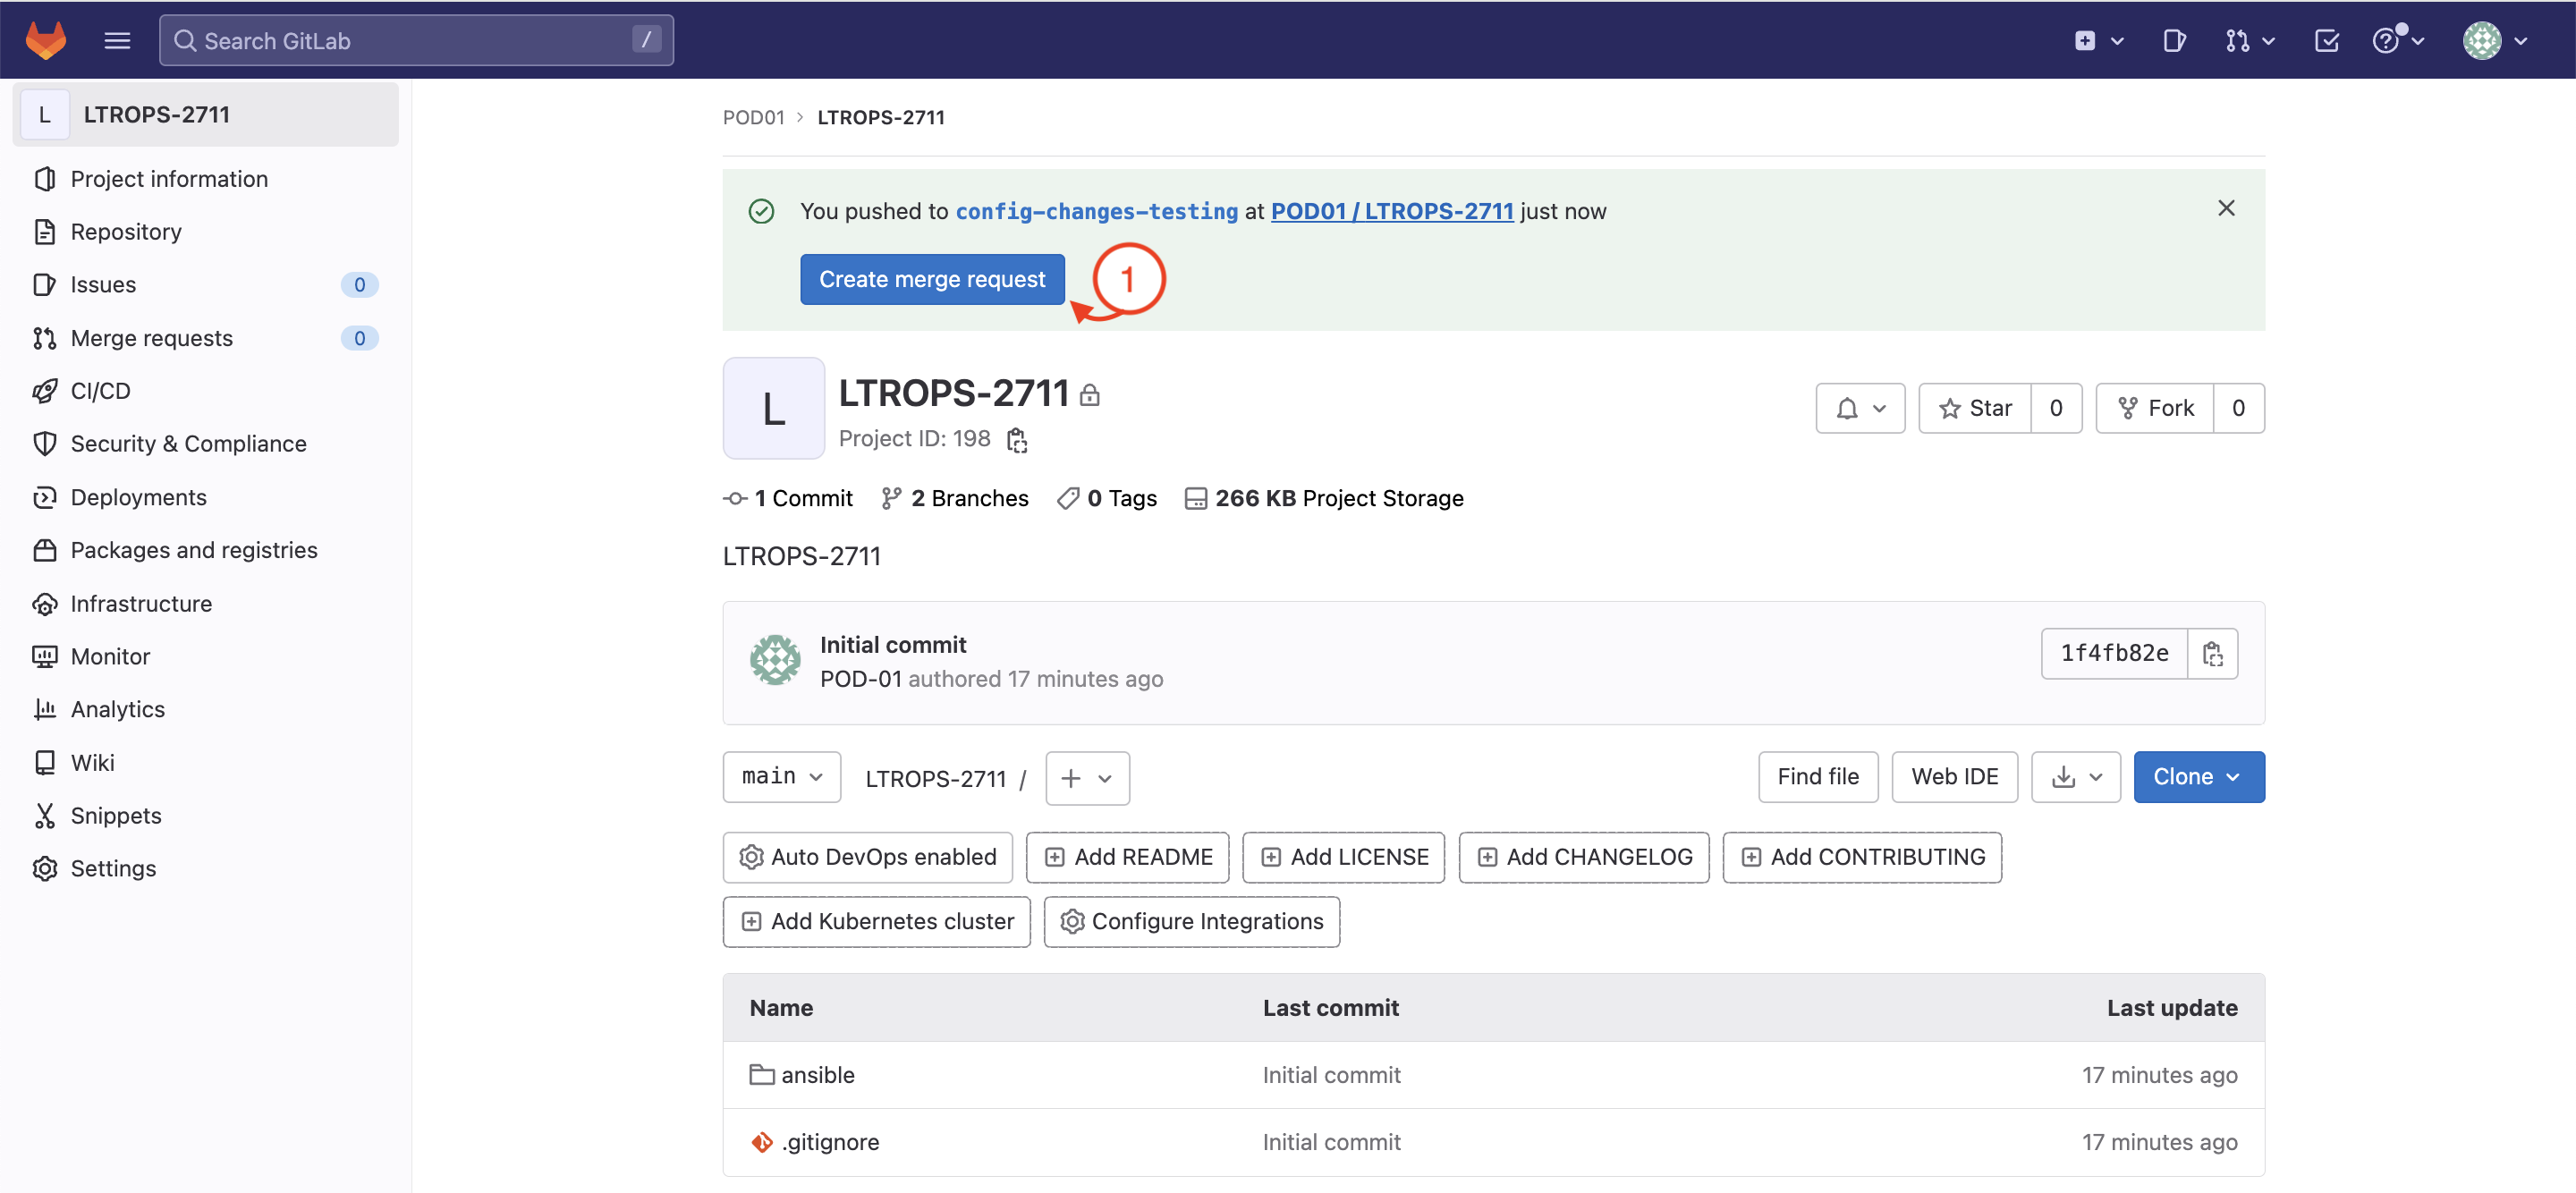
Step 1 - Create a Merge Request
From your GitLab project page:
-
Click Create merge request
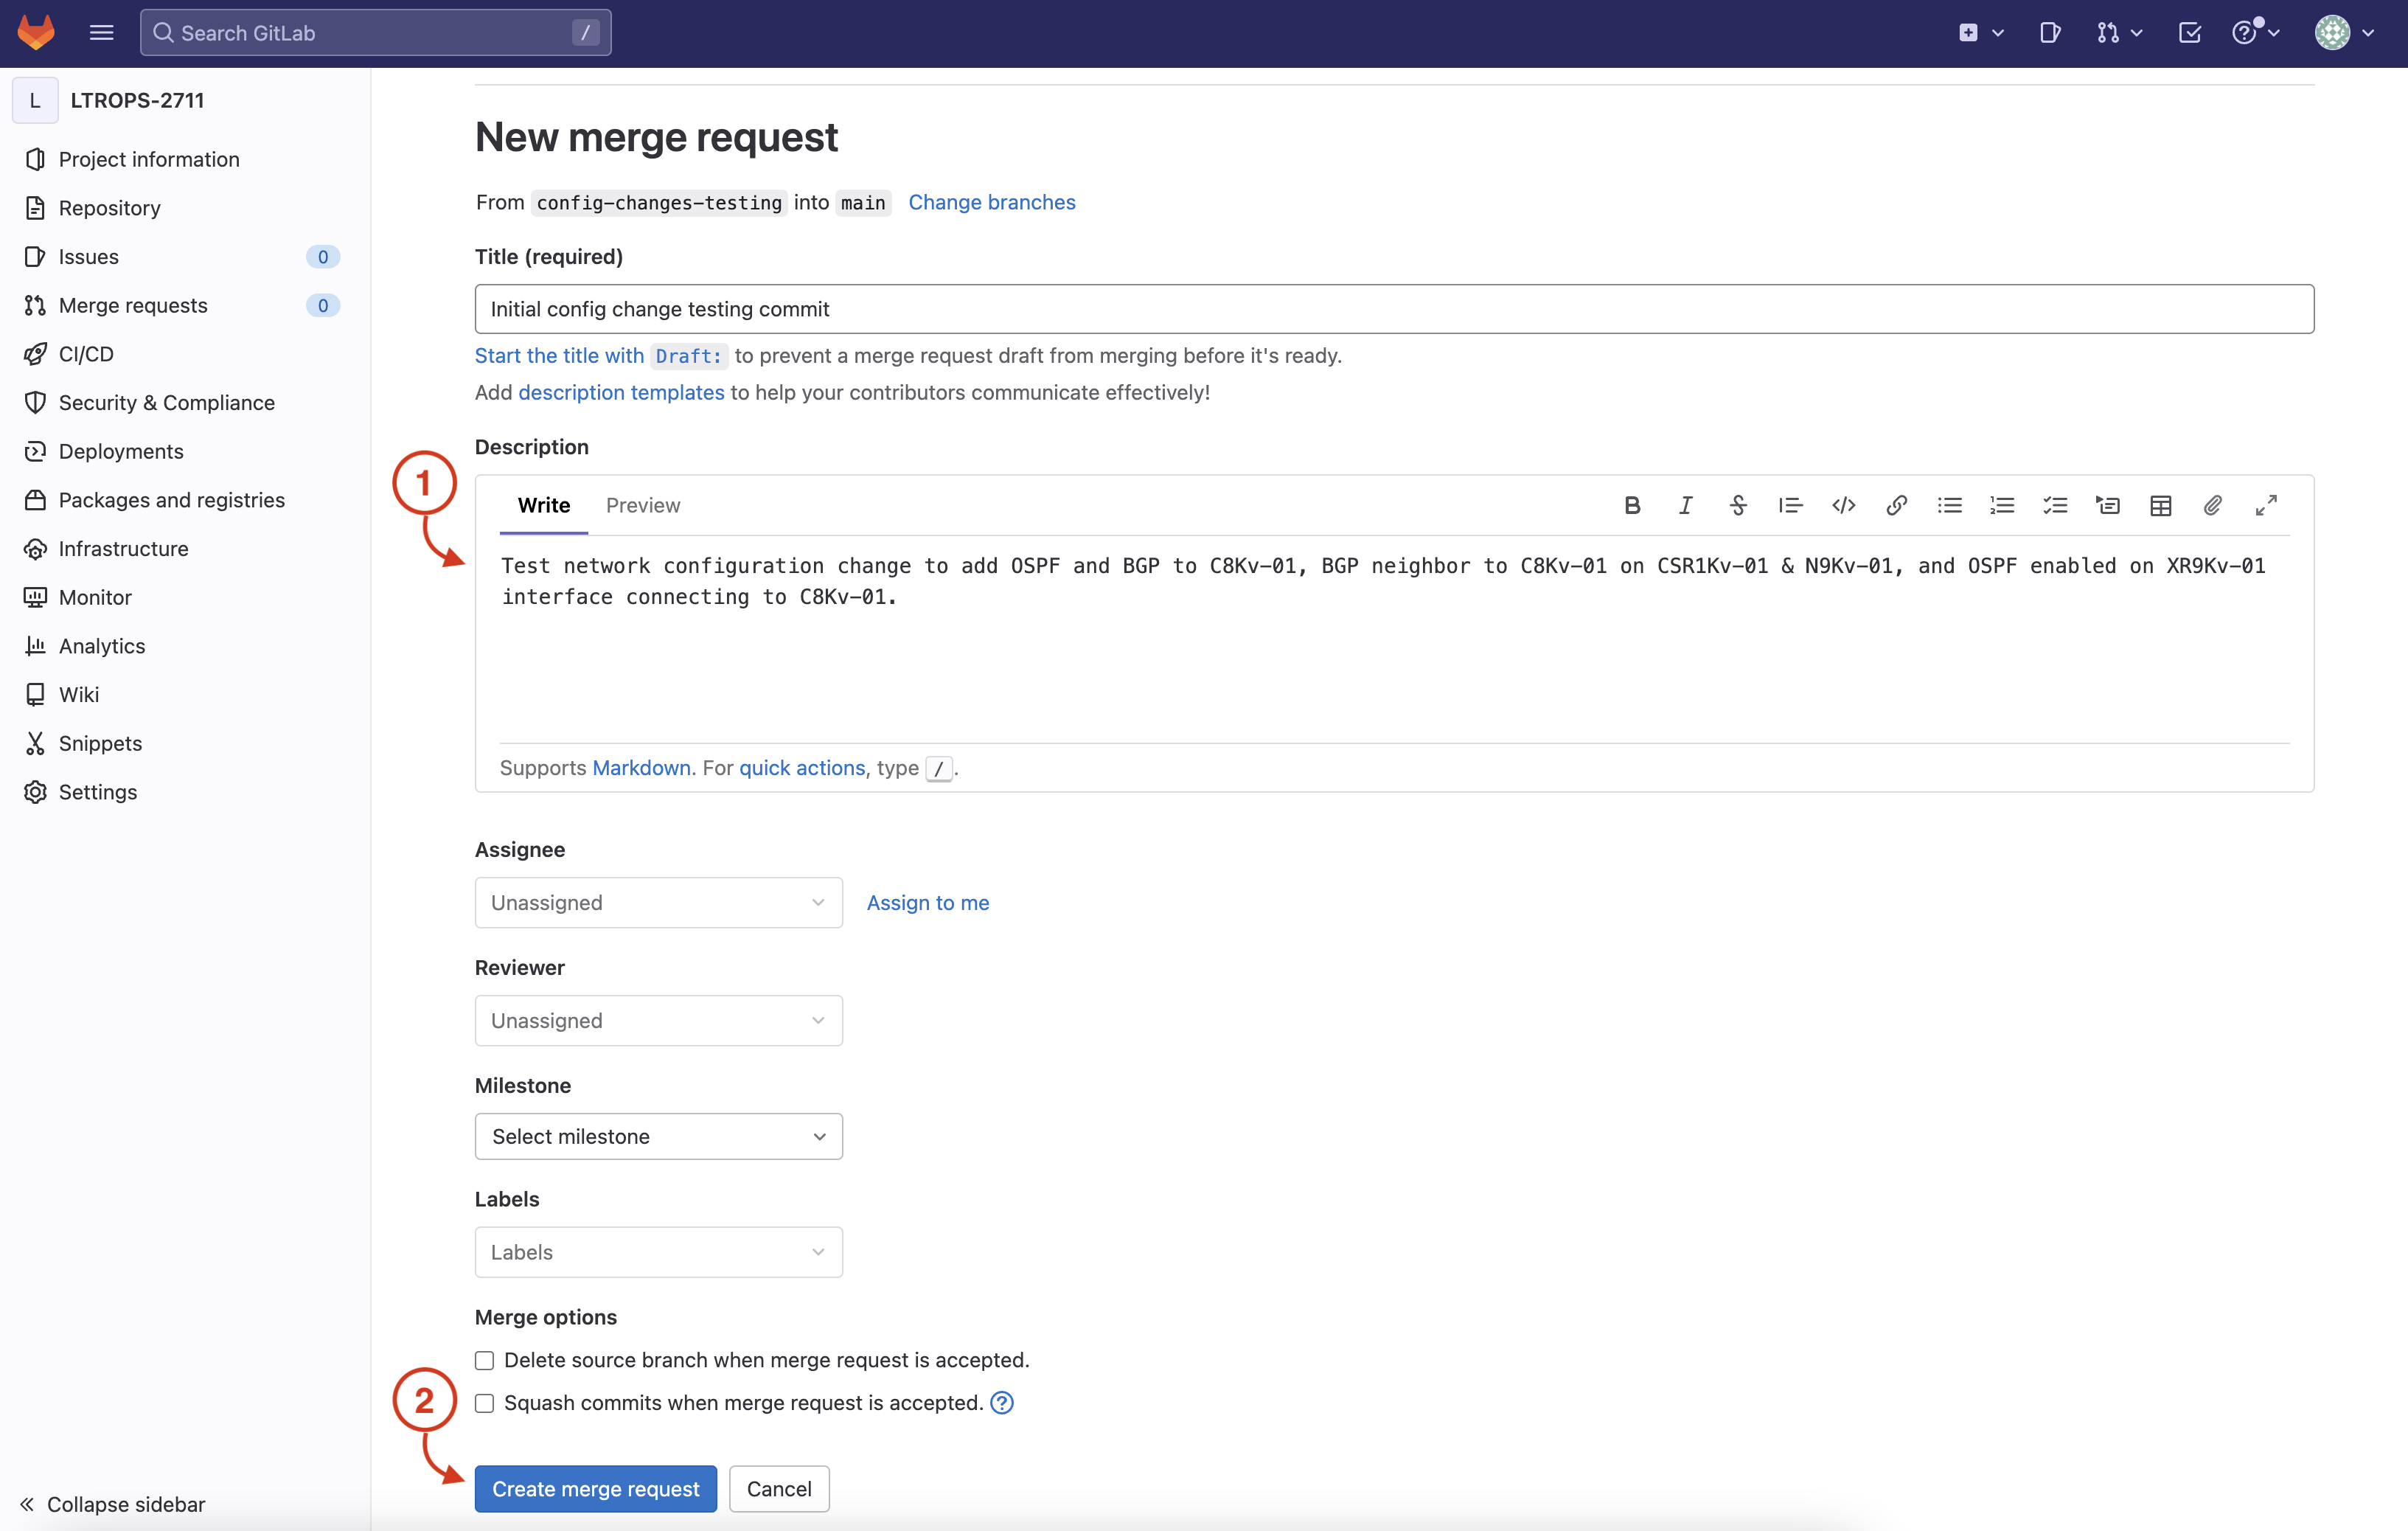
Step 2 - Open Merge Request
In the New merge request window, perform the following:
-
Insert a description:
Test network configuration change to add OSPF and BGP to C8Kv-01, BGP neighbor to C8Kv-01 on CSR1Kv-01 & N9Kv-01, and OSPF enabled on XR9Kv-01 interface connecting to C8Kv-01.
-
Click Create merge request
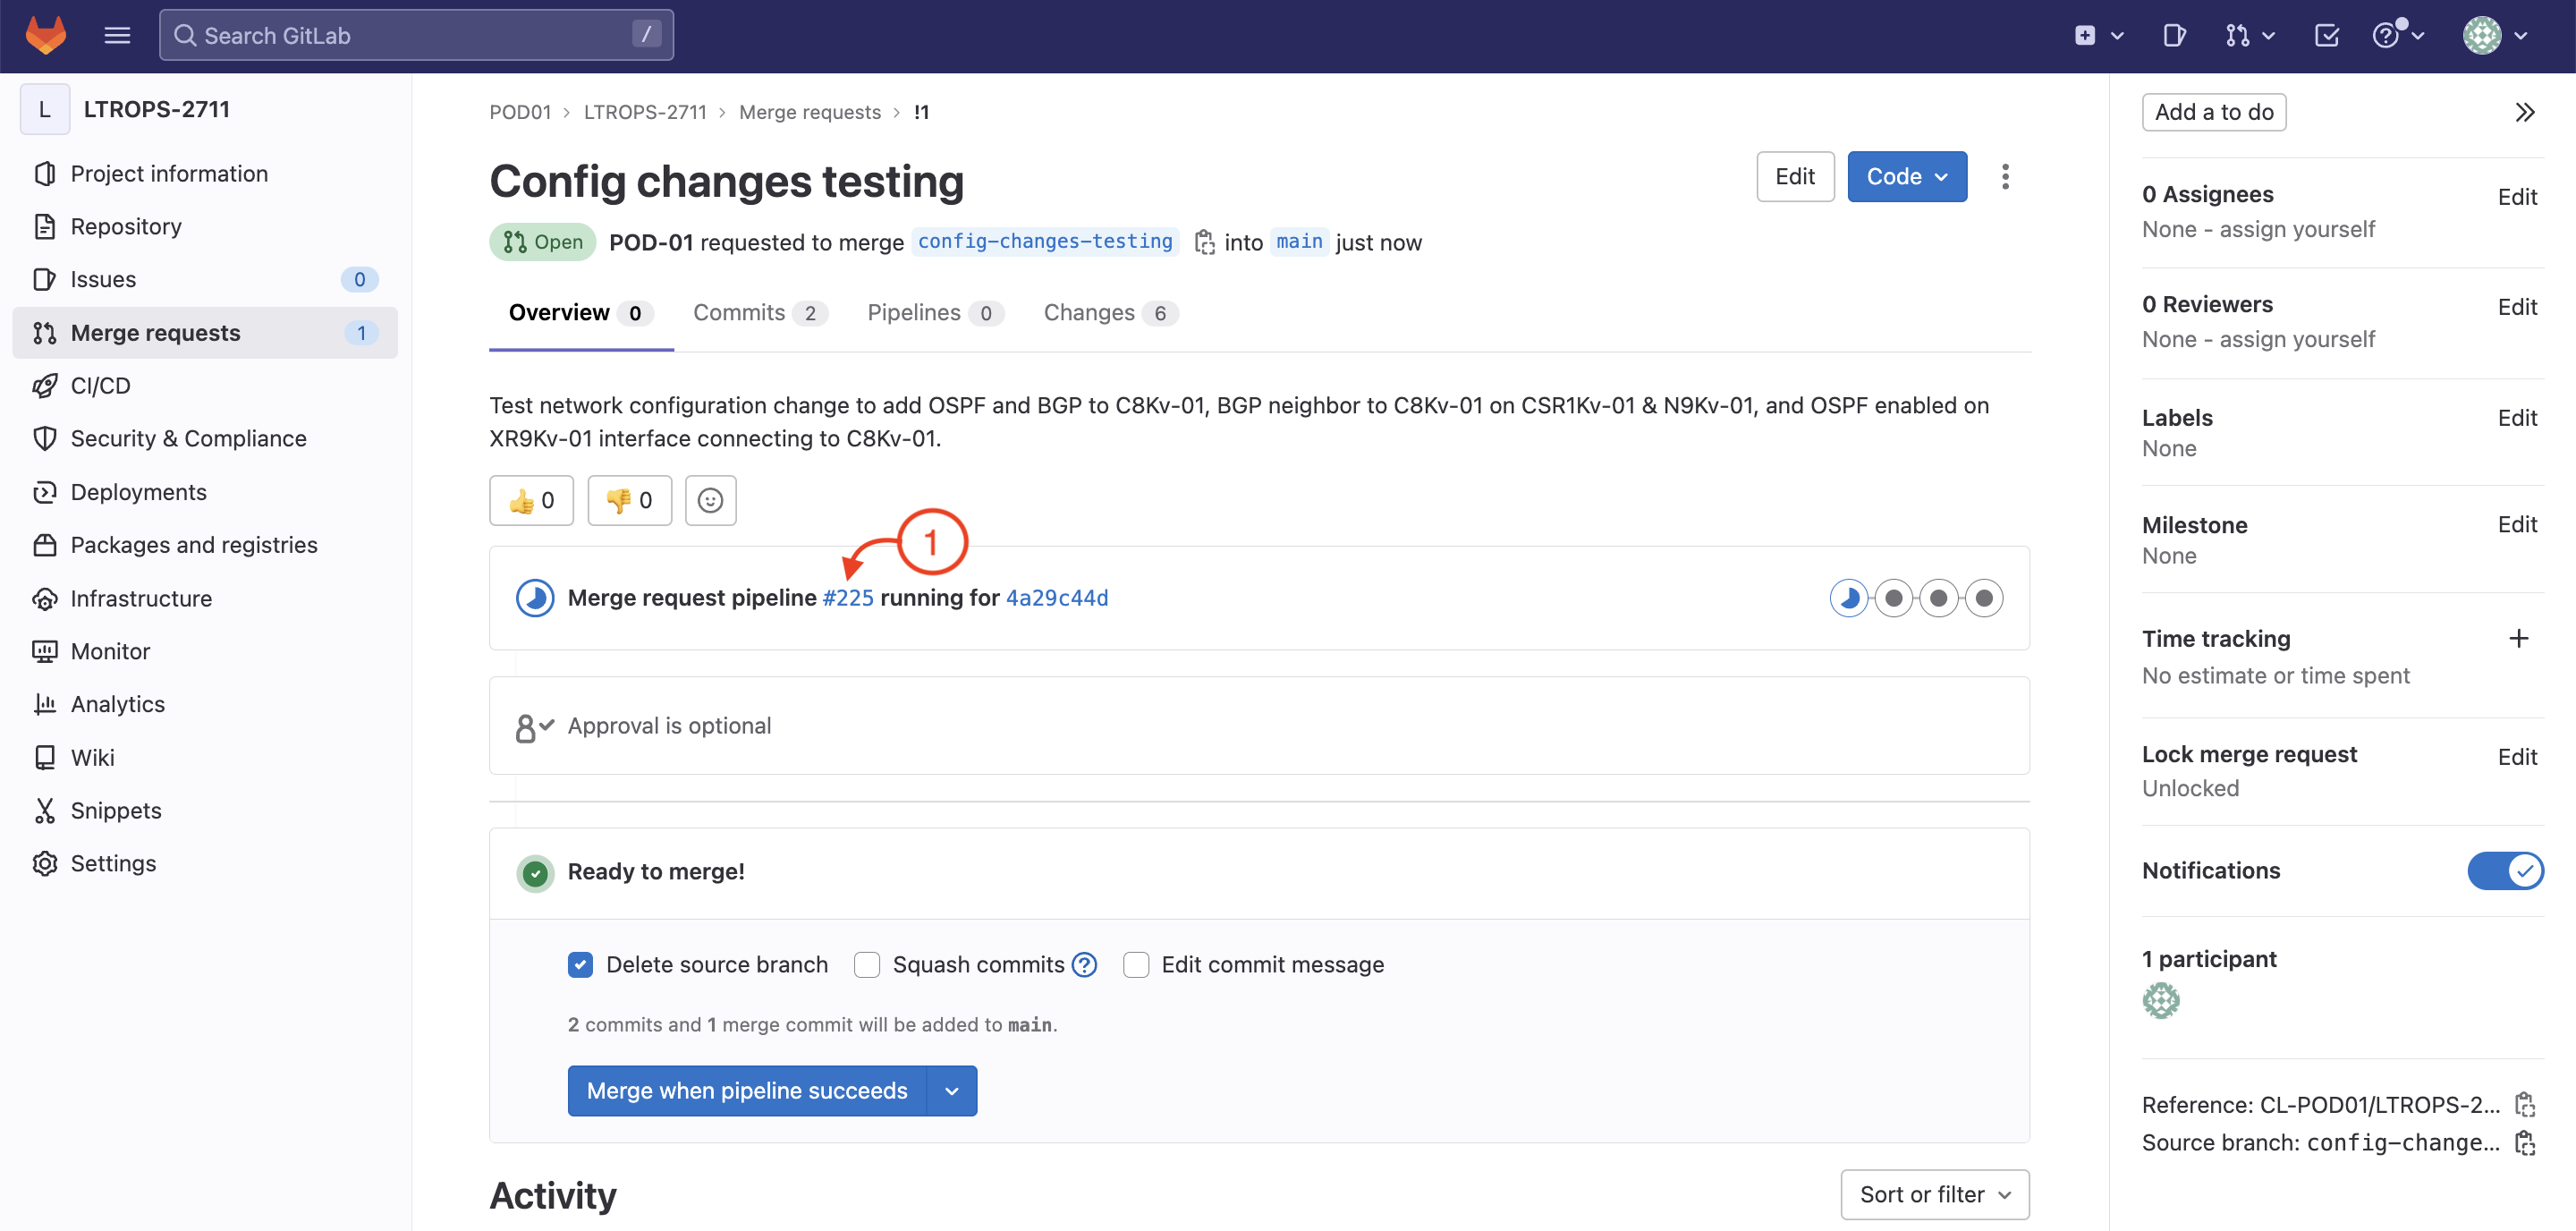
Step 3 - Navigate to Pipeline
Navigate to the pipeline that was launched when you opened your merge request:
-
Click the number for the merge request pipeline that comes after Merge request pipeline
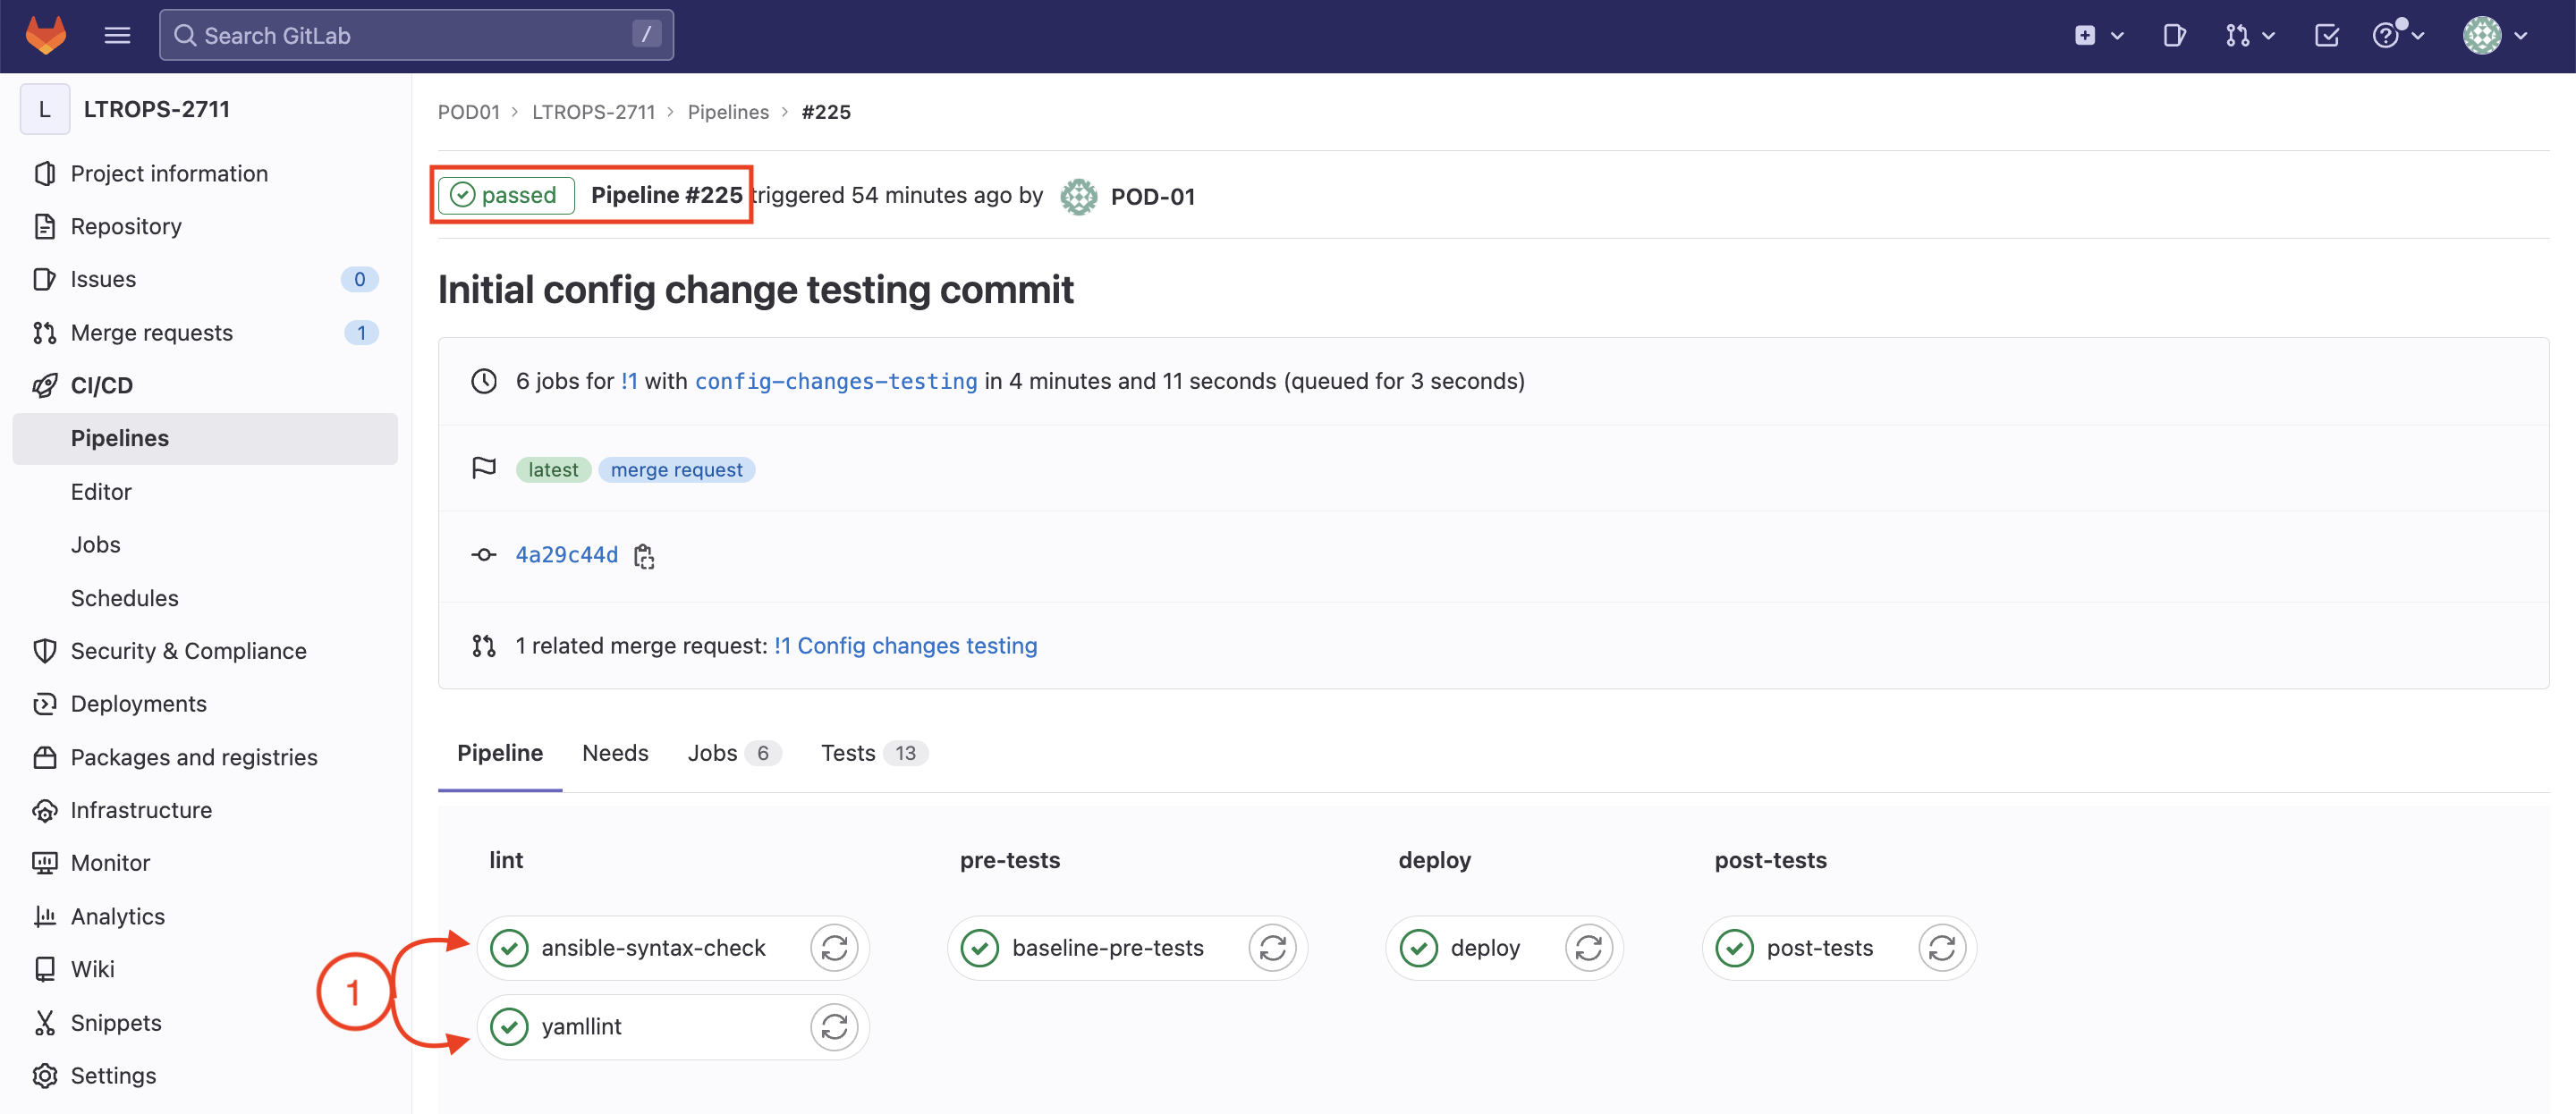
Step 4 - Review Overall Pipeline
At this point, you should have successfully triggered the CI pipeline for your proposed configuration change and all the tests you have developed.
The screenshots below show a completed and Passed pipeline. If your own pipeline is still running, please wait until all your pipeline stages have completed
before proceeding.
-
The lint stage should have successfully executed two steps: yamllint, and ansible-syntax-check. This stage will check
the syntax of your Ansible playbook and YAML files.
Alert
Notify your proctor if any stages of your pipeline have Failed before moving on.
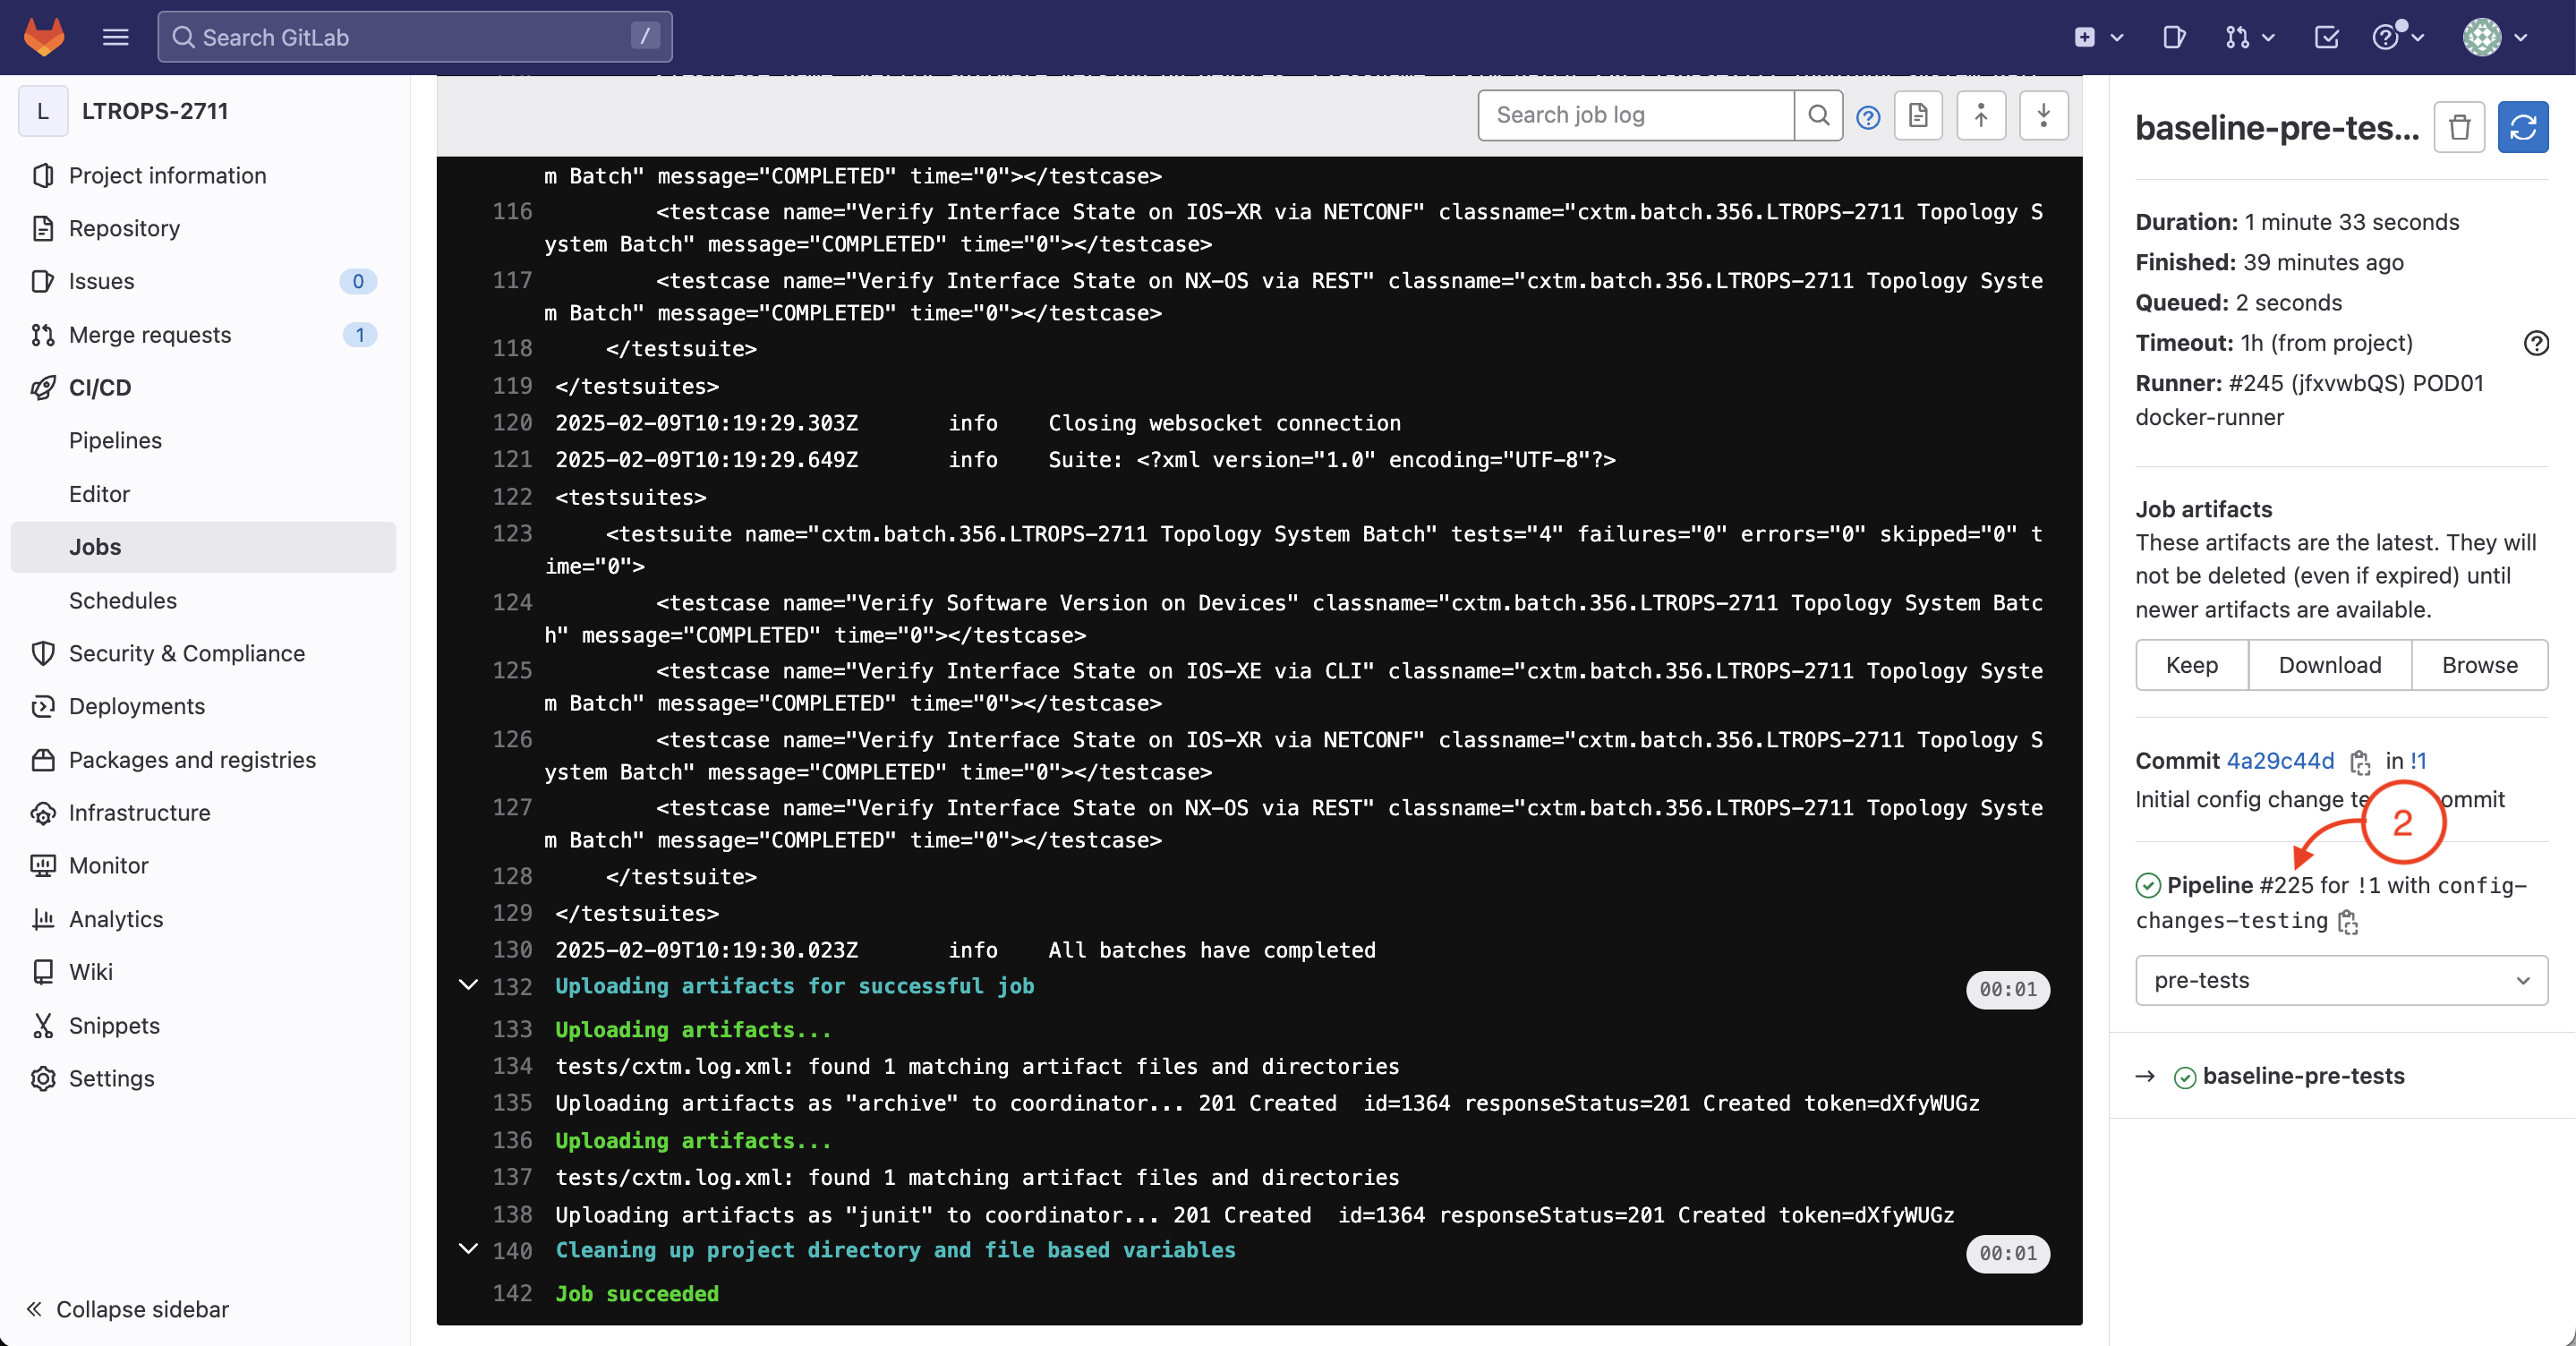
Step 5 - Navigate to baseline-pre-tests step under pre-tests stage
-
Click on baseline-pre-tests

Step 6 - Review baseline-pre-tests step
-
This will bring you to the job run completed for your baseline-pre-tests that is using the CXTM websocket to drive the execution of your first batch you created earlier in the lab.
-
Click the pipeline number on the right-side pane.
Pause and look up!
As your batches complete their runs, you should see notifications appearing in the LTROPS-2711 - CXTM Notifications space
displayed on the screen in the front of the lab
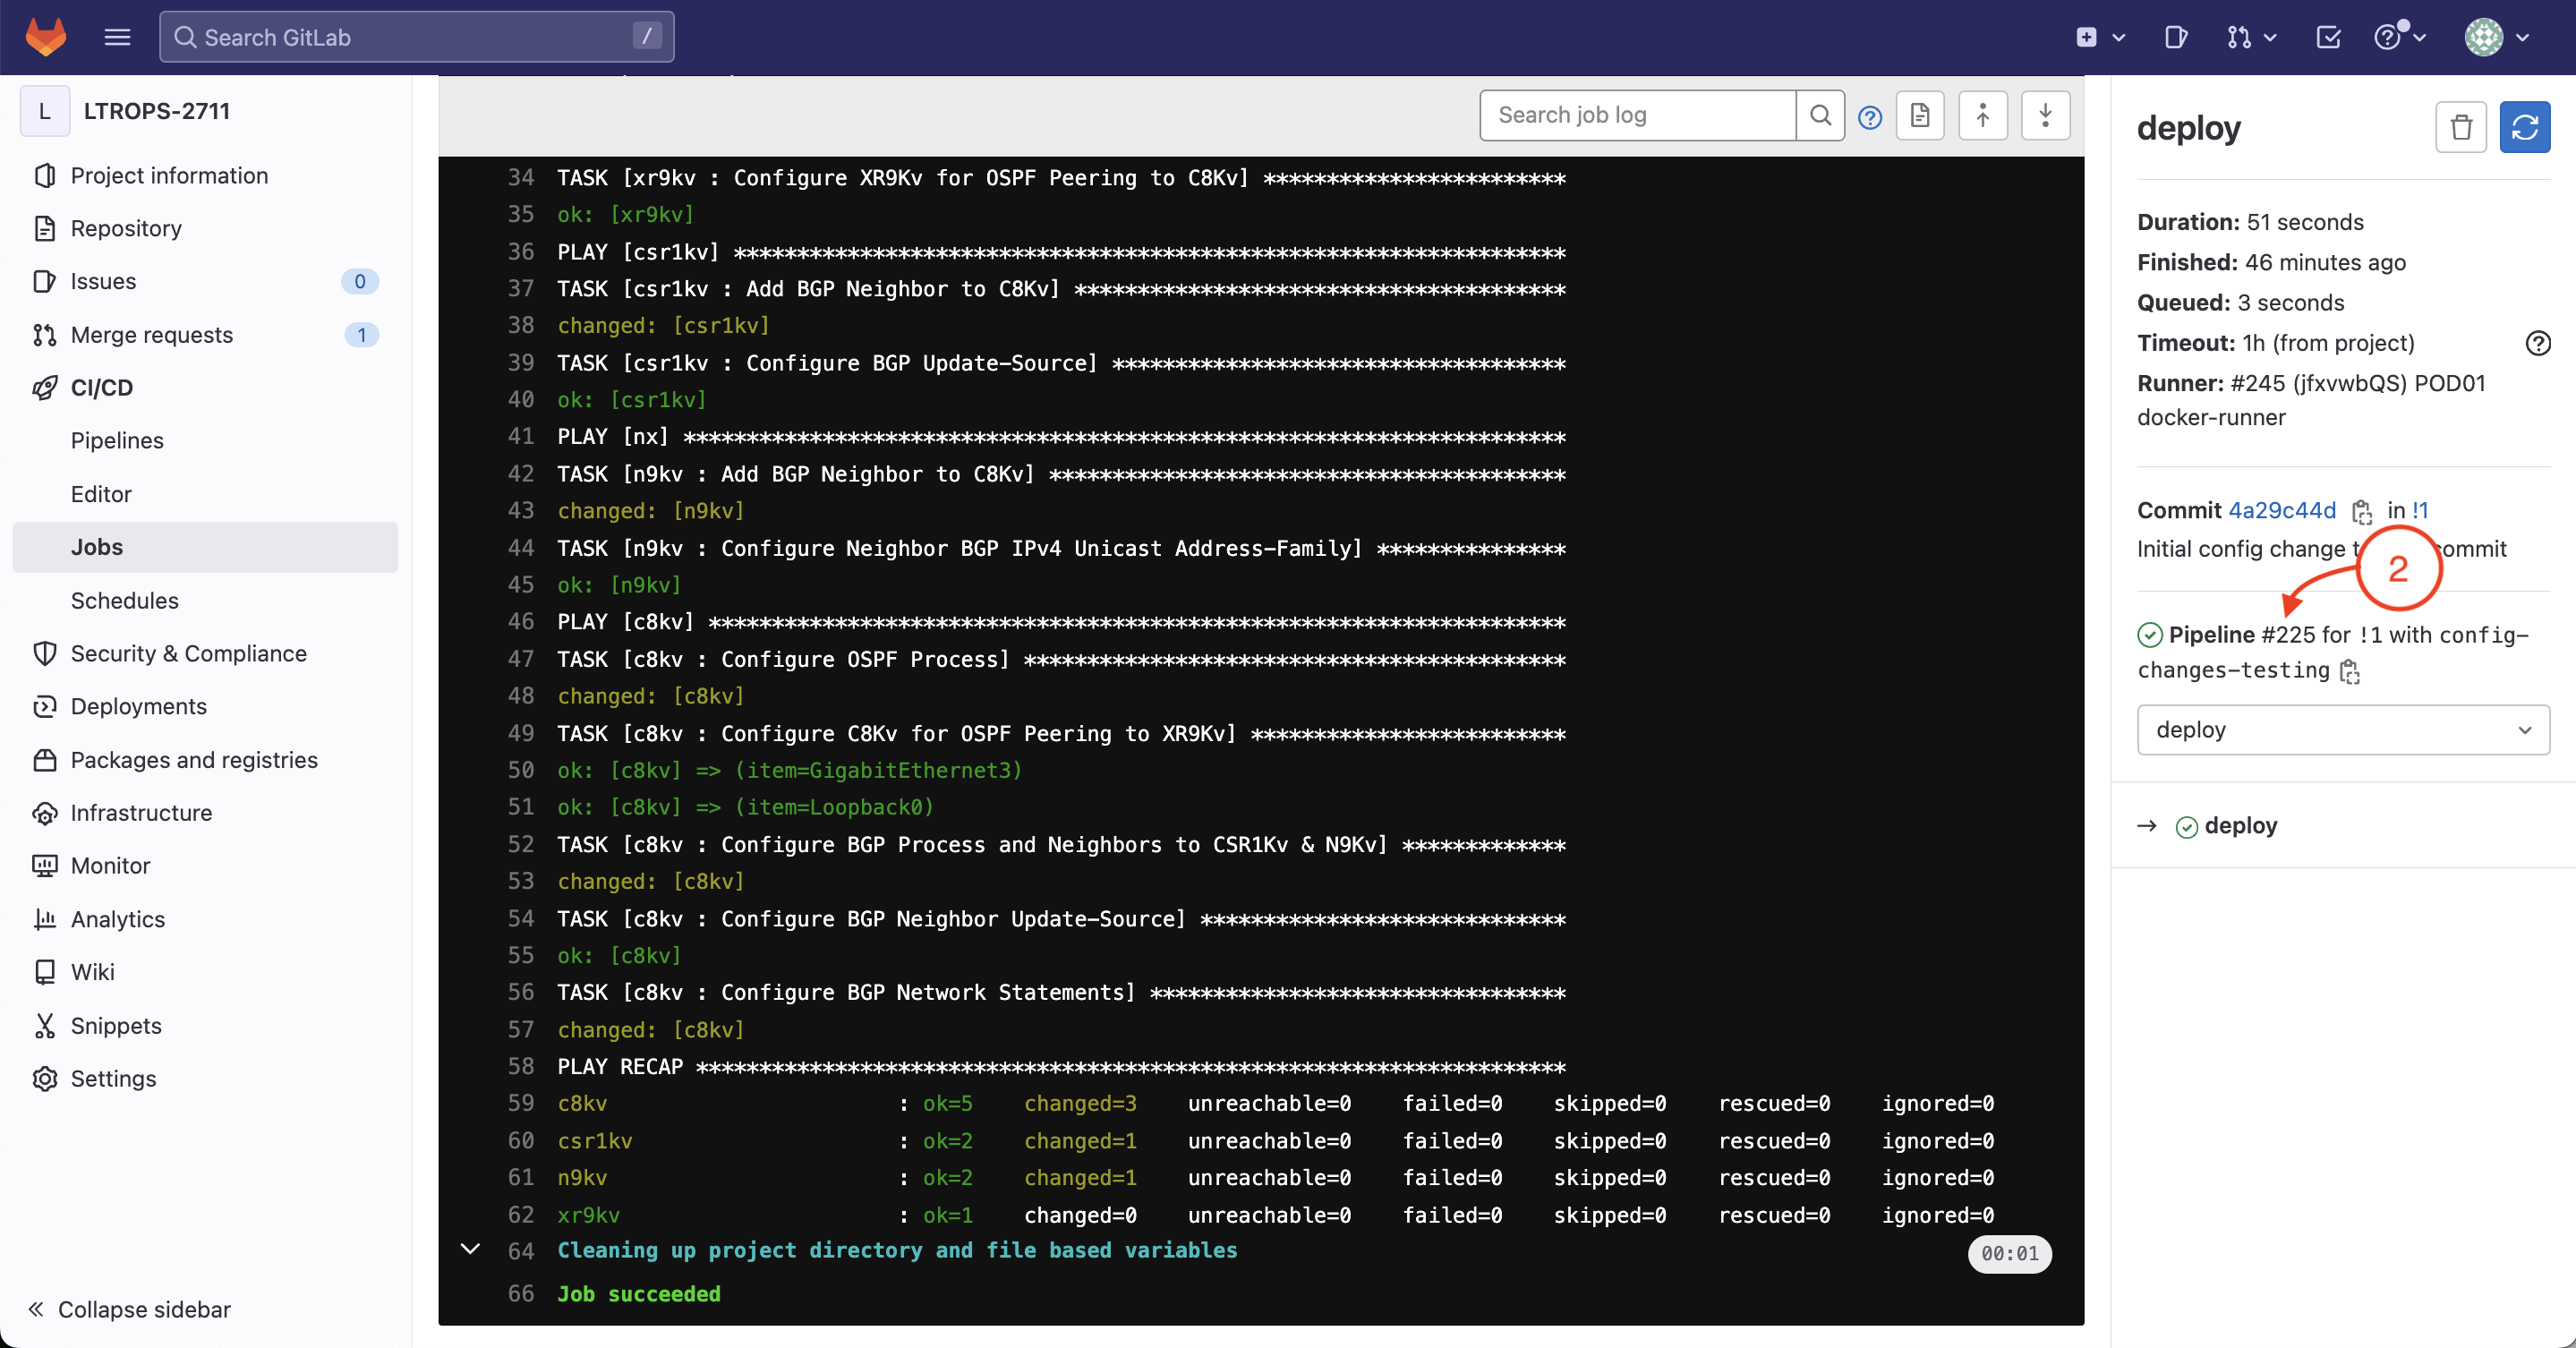
Step 7 - Navigate to deploy step under the deploy stage
-
Click on deploy
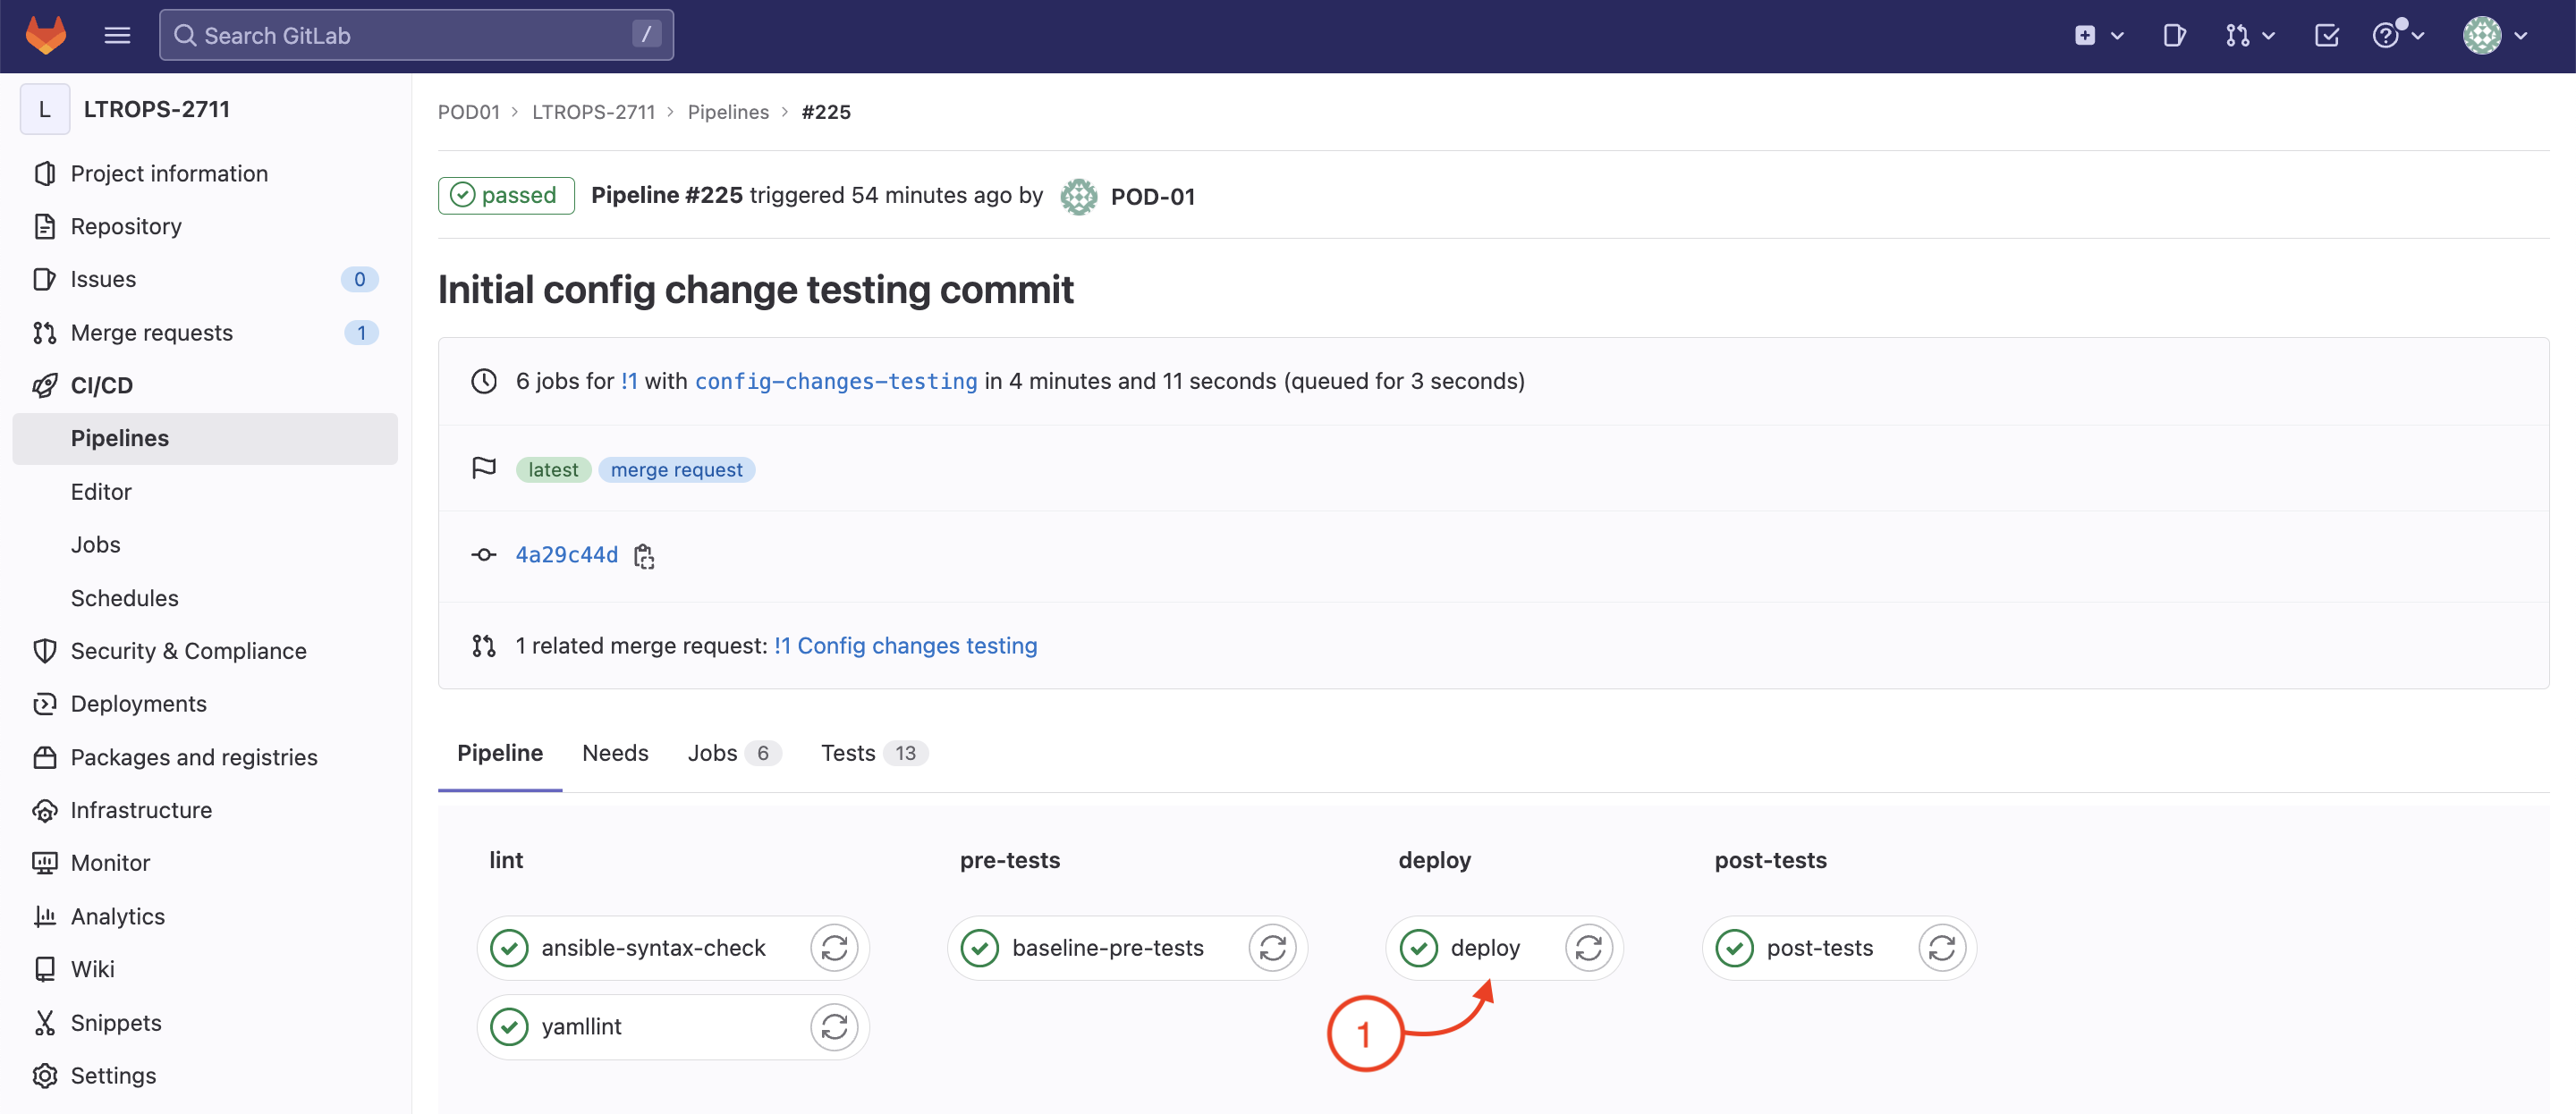
Step 8 - Review deploy Job
-
Review the running configuration changes job that is using your IaC Ansible playbook to modify the test network configuration.
-
click the pipeline number on the right-side pane.
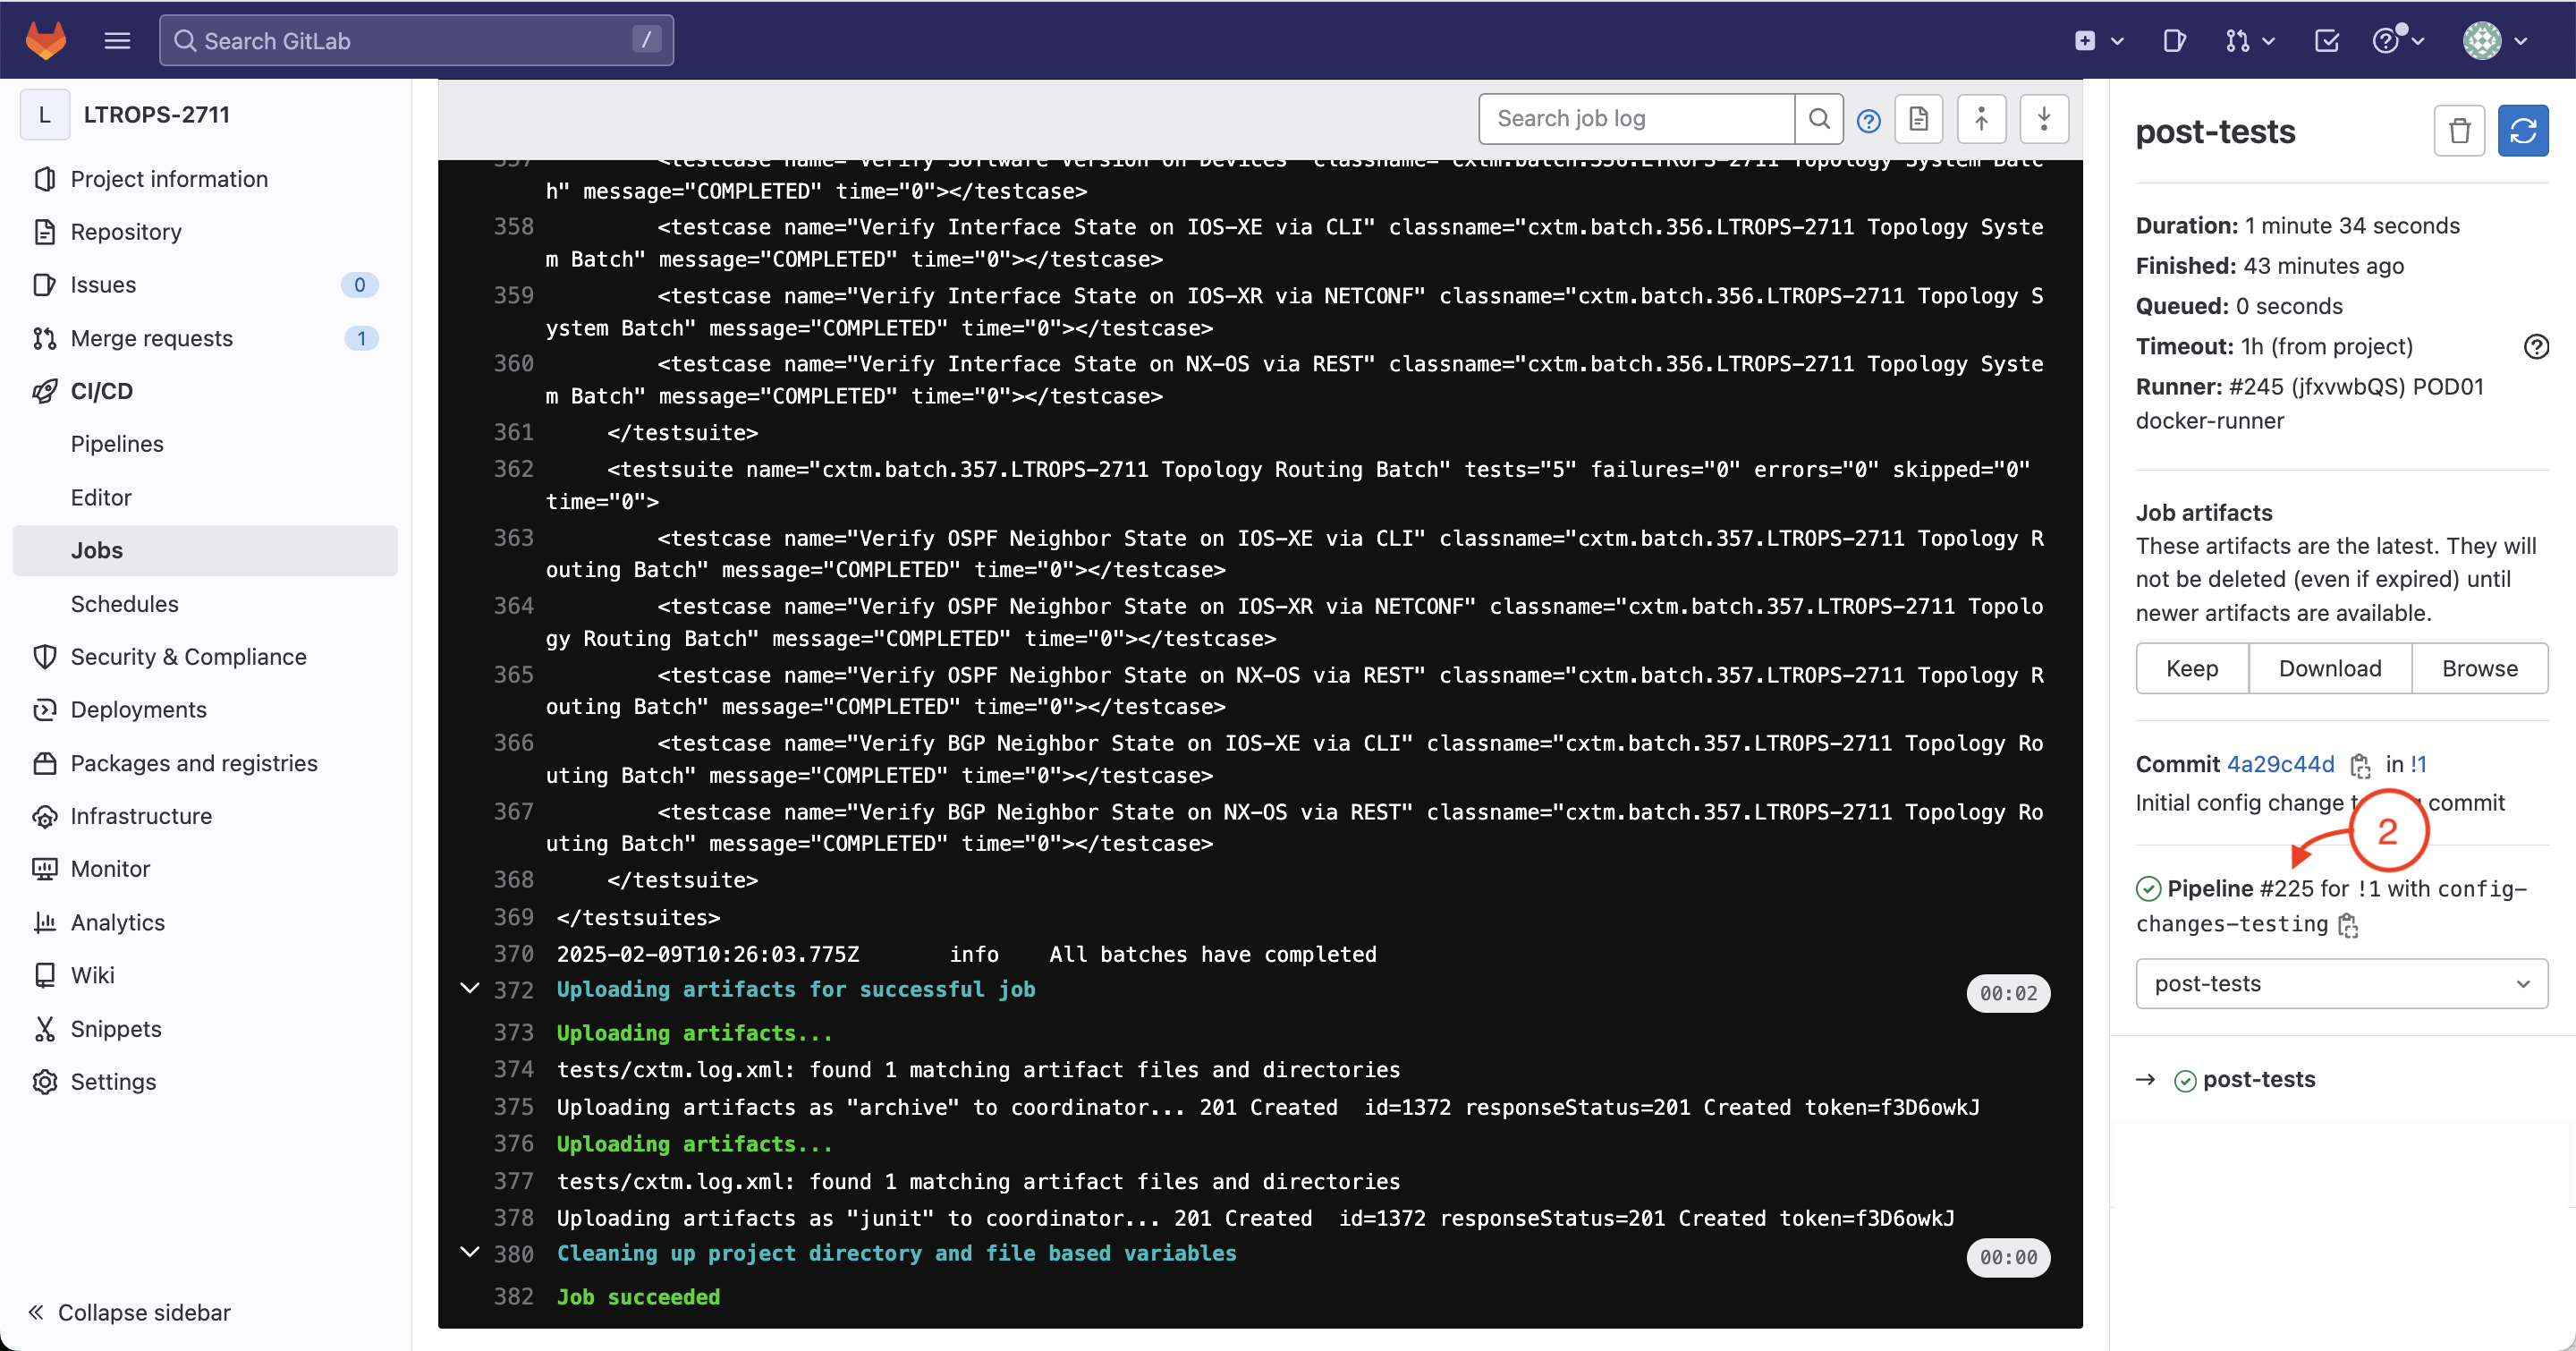
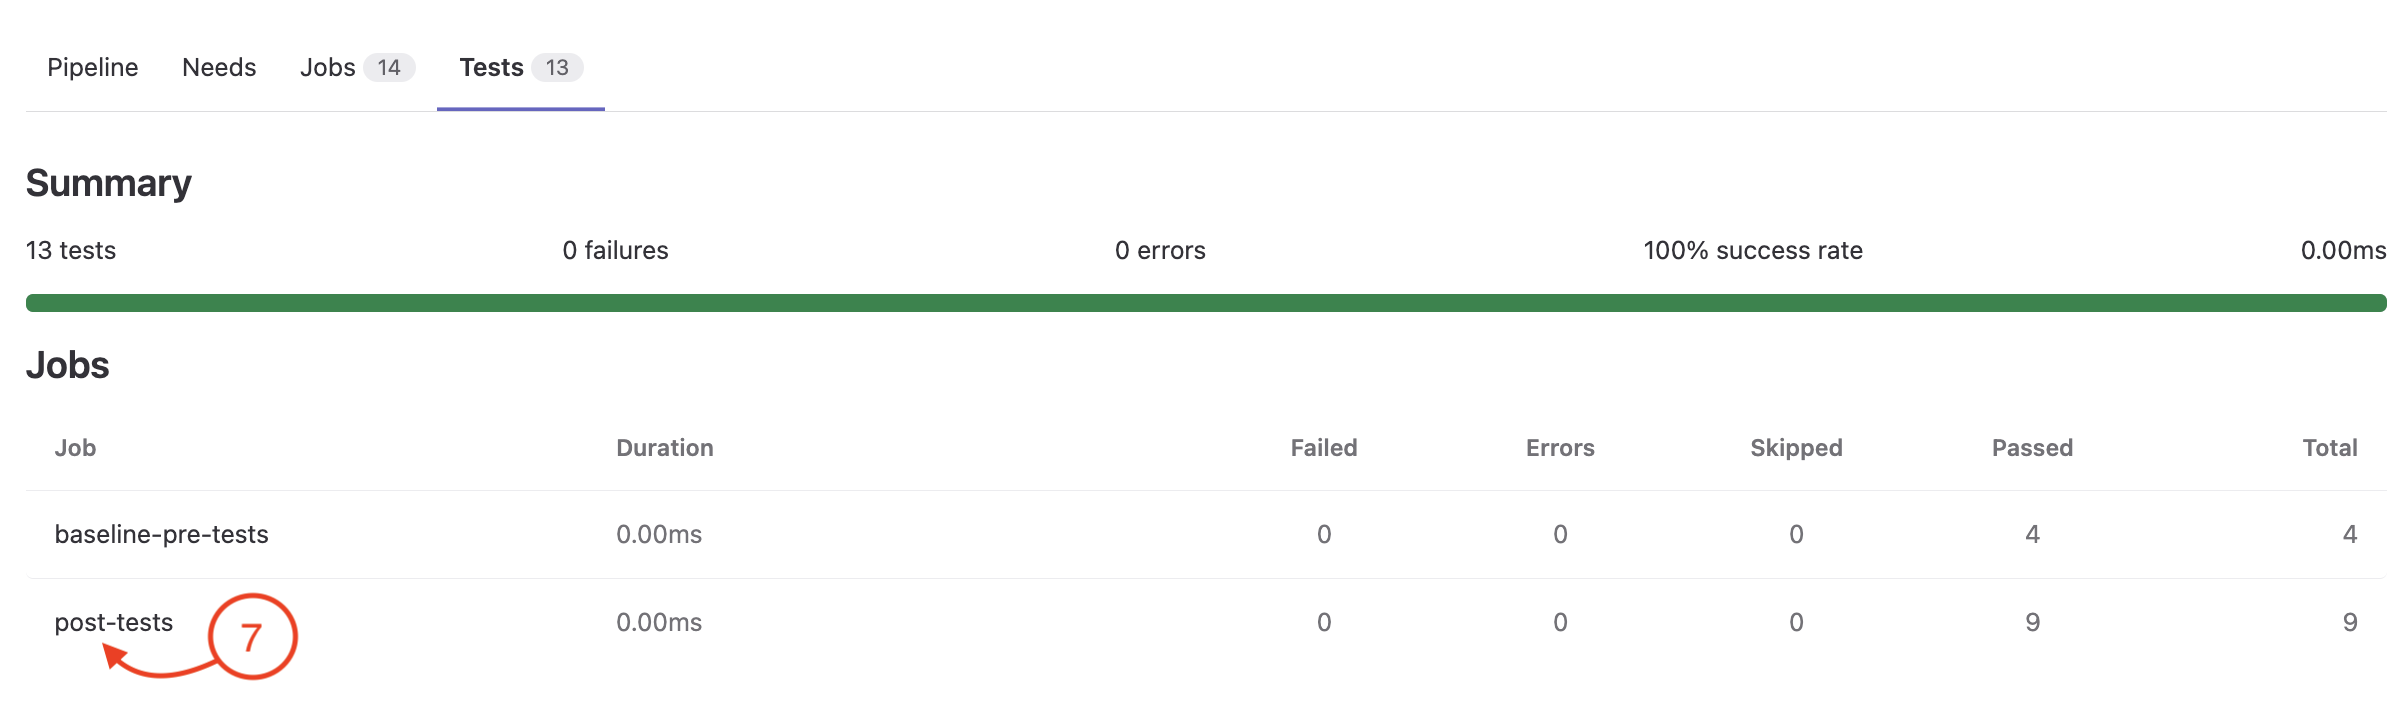
Step 9 - Navigate to post-tests stage
-
After the deploy stage has completed, your post-tests stage will start.
The post-tests stage will run two batches of testcases, one for the LTROPS-2711 Topology System Batch tests and the other for the LTROPS-2711 Topology Routing Batch.
-
Click on post-tests

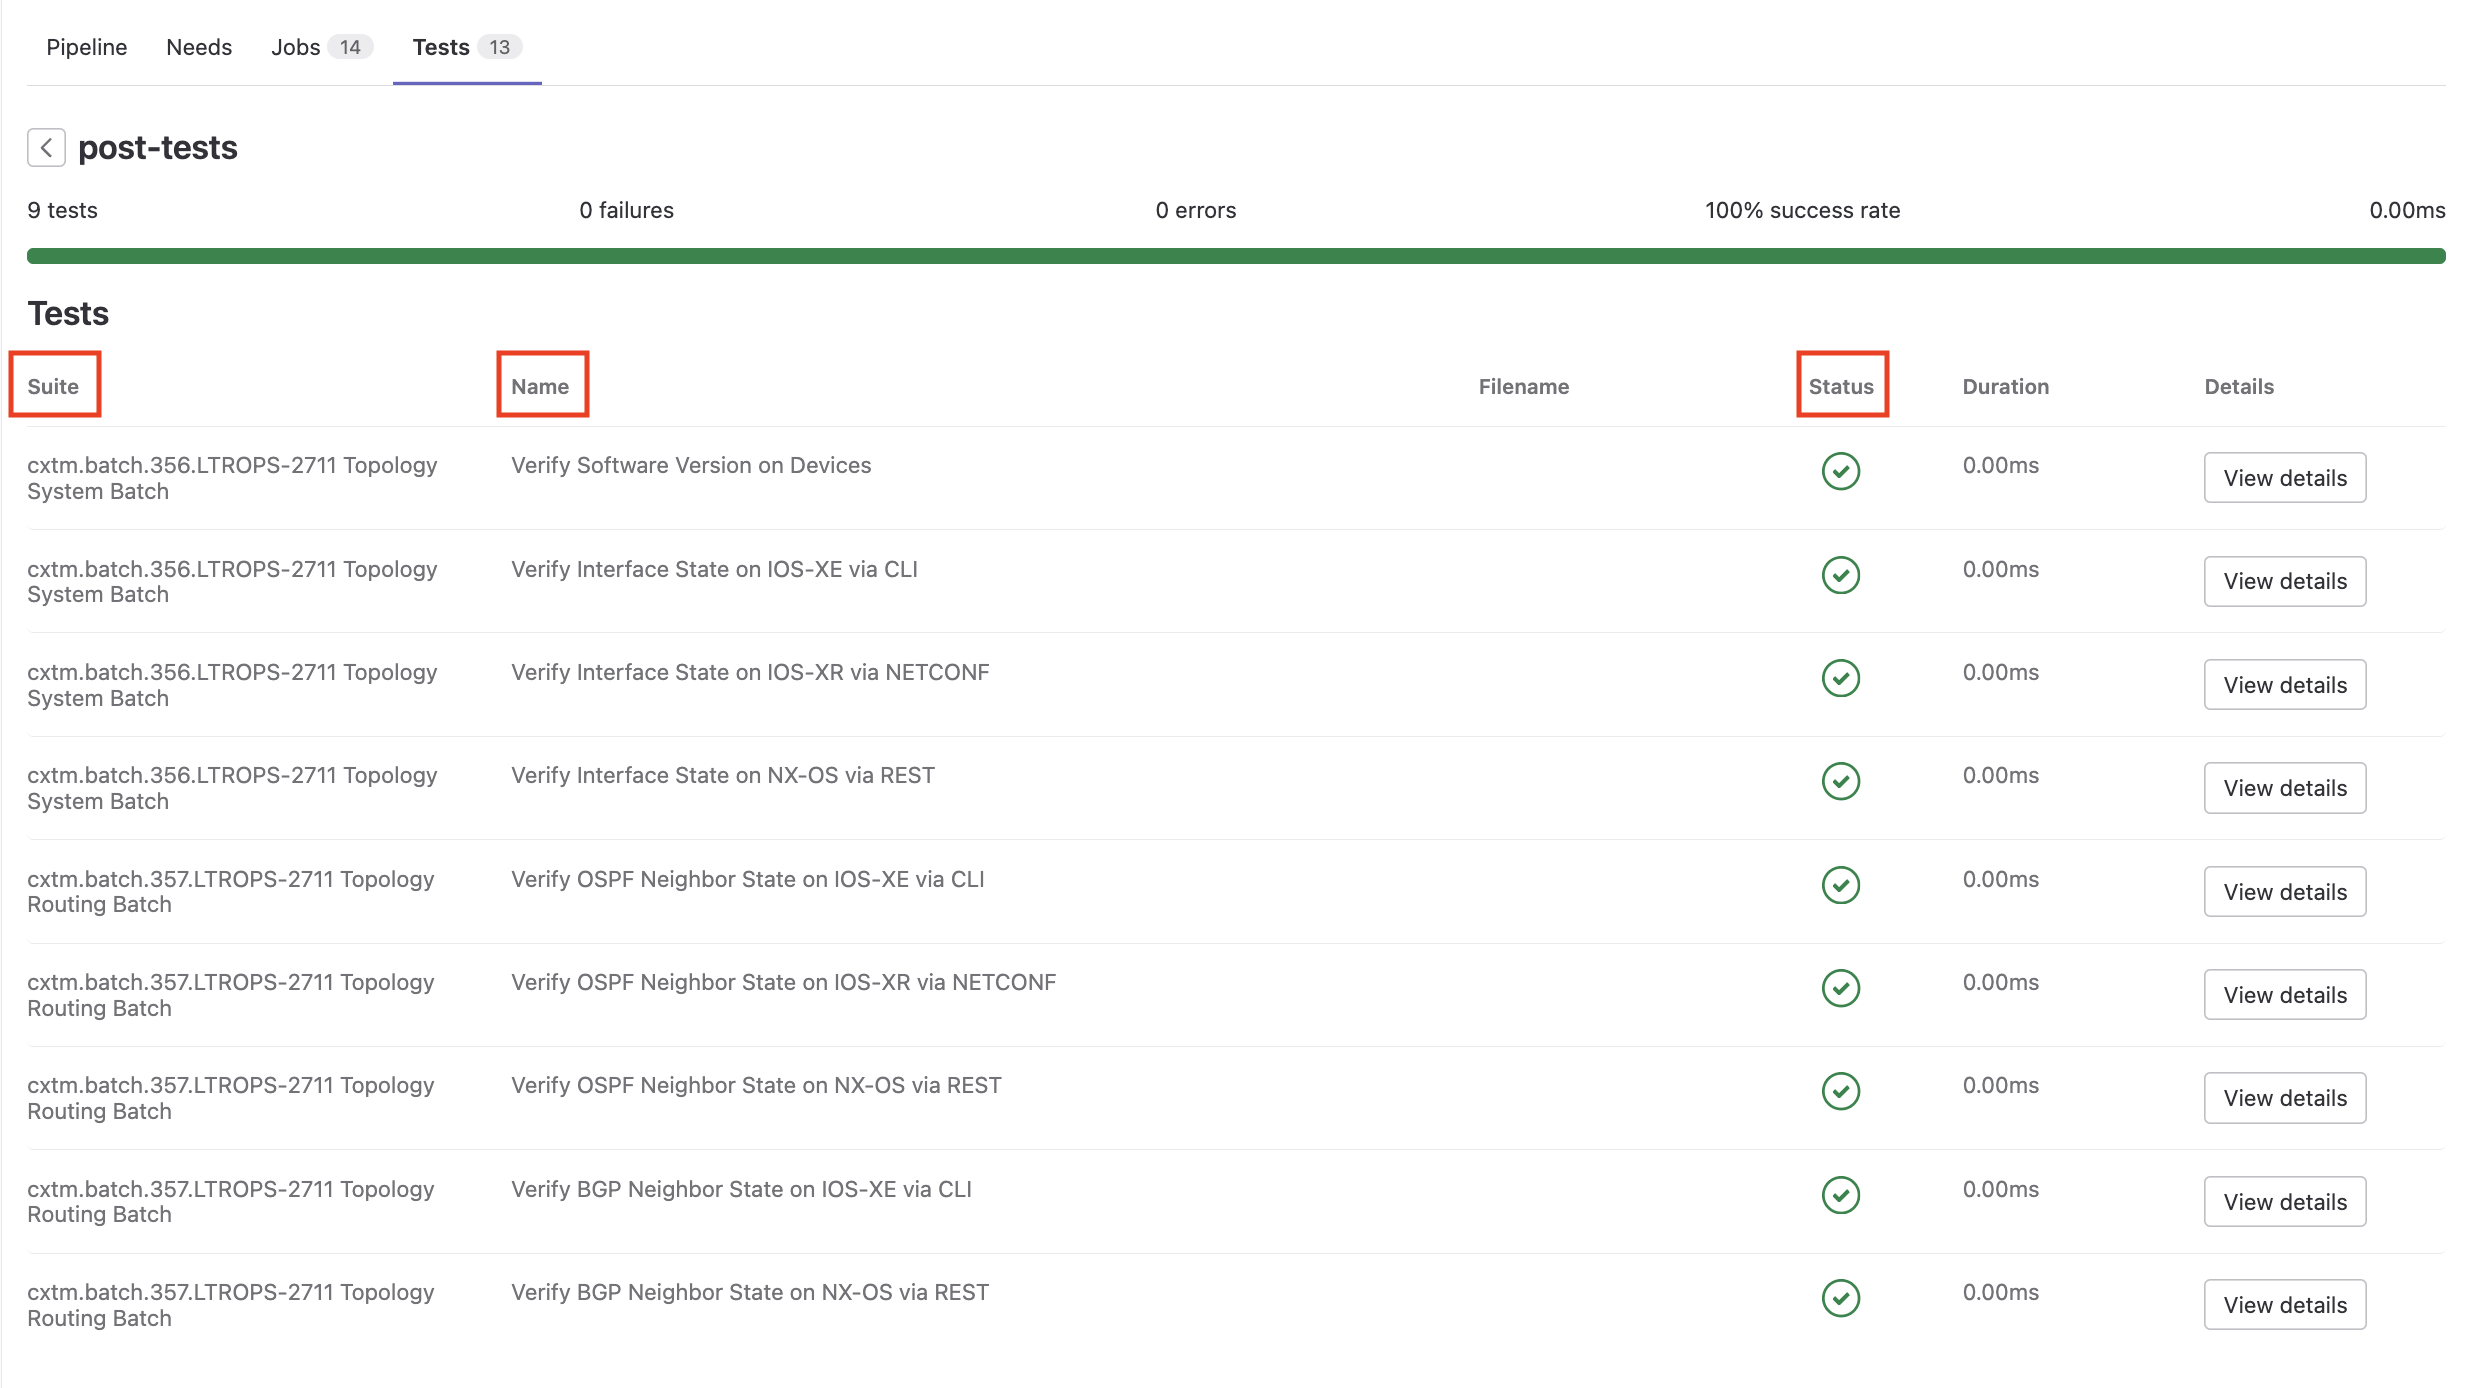
Step 10 - Review post-tests Job
-
This will bring you to the job run completed for your post-tests, that is using your CXTM websocket client to drive the same
first batch of system testcases you ran in the pre-tests stage in addition to the second batch to validate the routing configurations.
-
click the pipeline number on the right-side pane.
Step 11 - Review Tests results from within the pipeline
The CXTM websocket client and your .gitlab-ci.yml file are setup to pass on the test results in JUnit report format to the GitLab runner.
The GitLab runner then uploads the JUnit report format xml files as artifacts to GitLab. Now you can view realtime
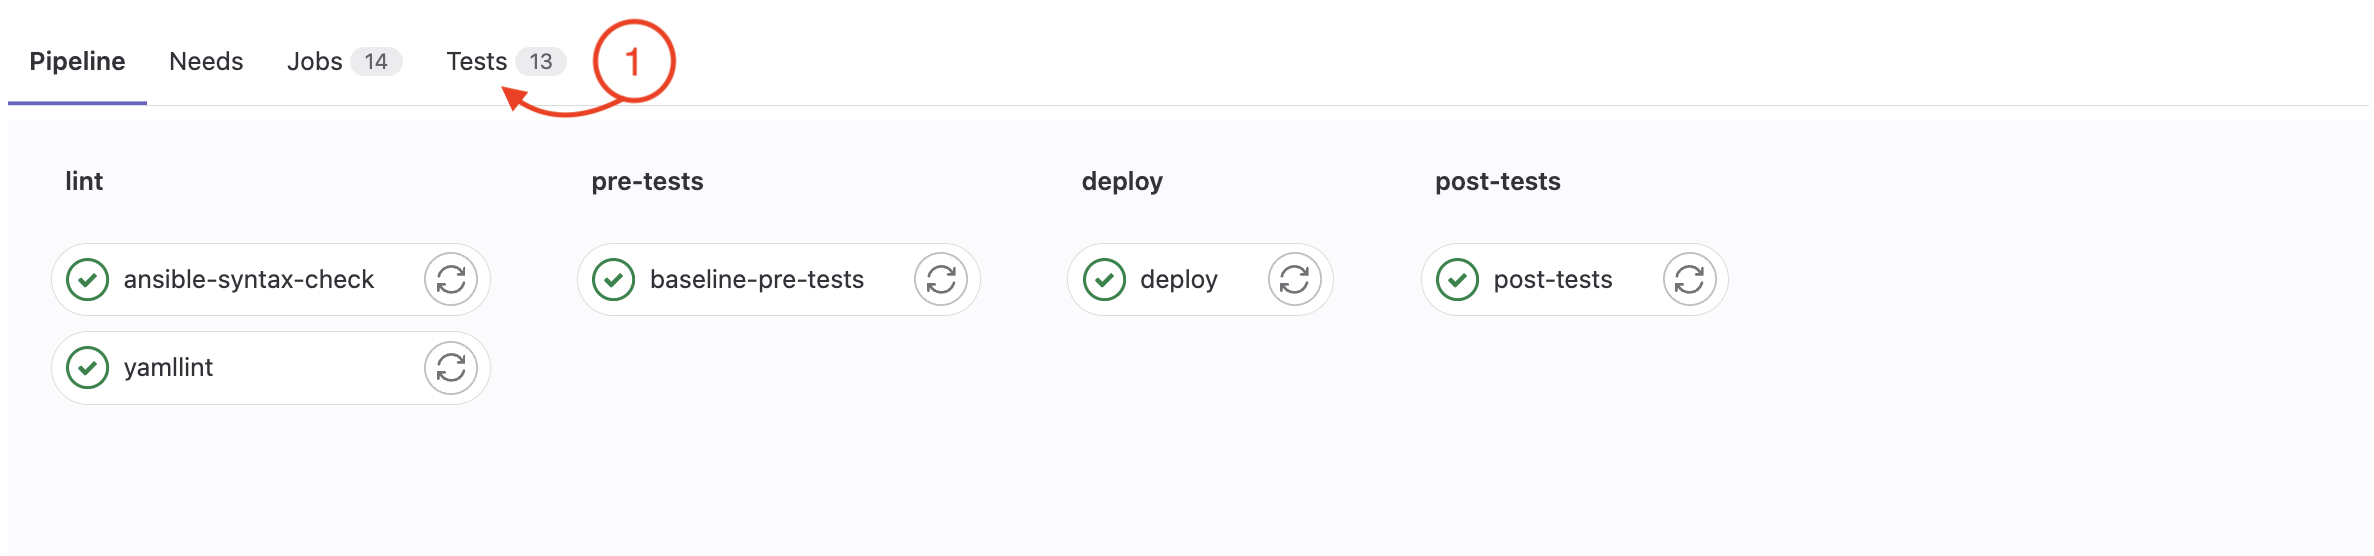
test results from within the pipeline. You will notice a total of 13 tests were executed as a part of the pipeline run.
-
Click on the Tests tab from within the pipeline view.
-
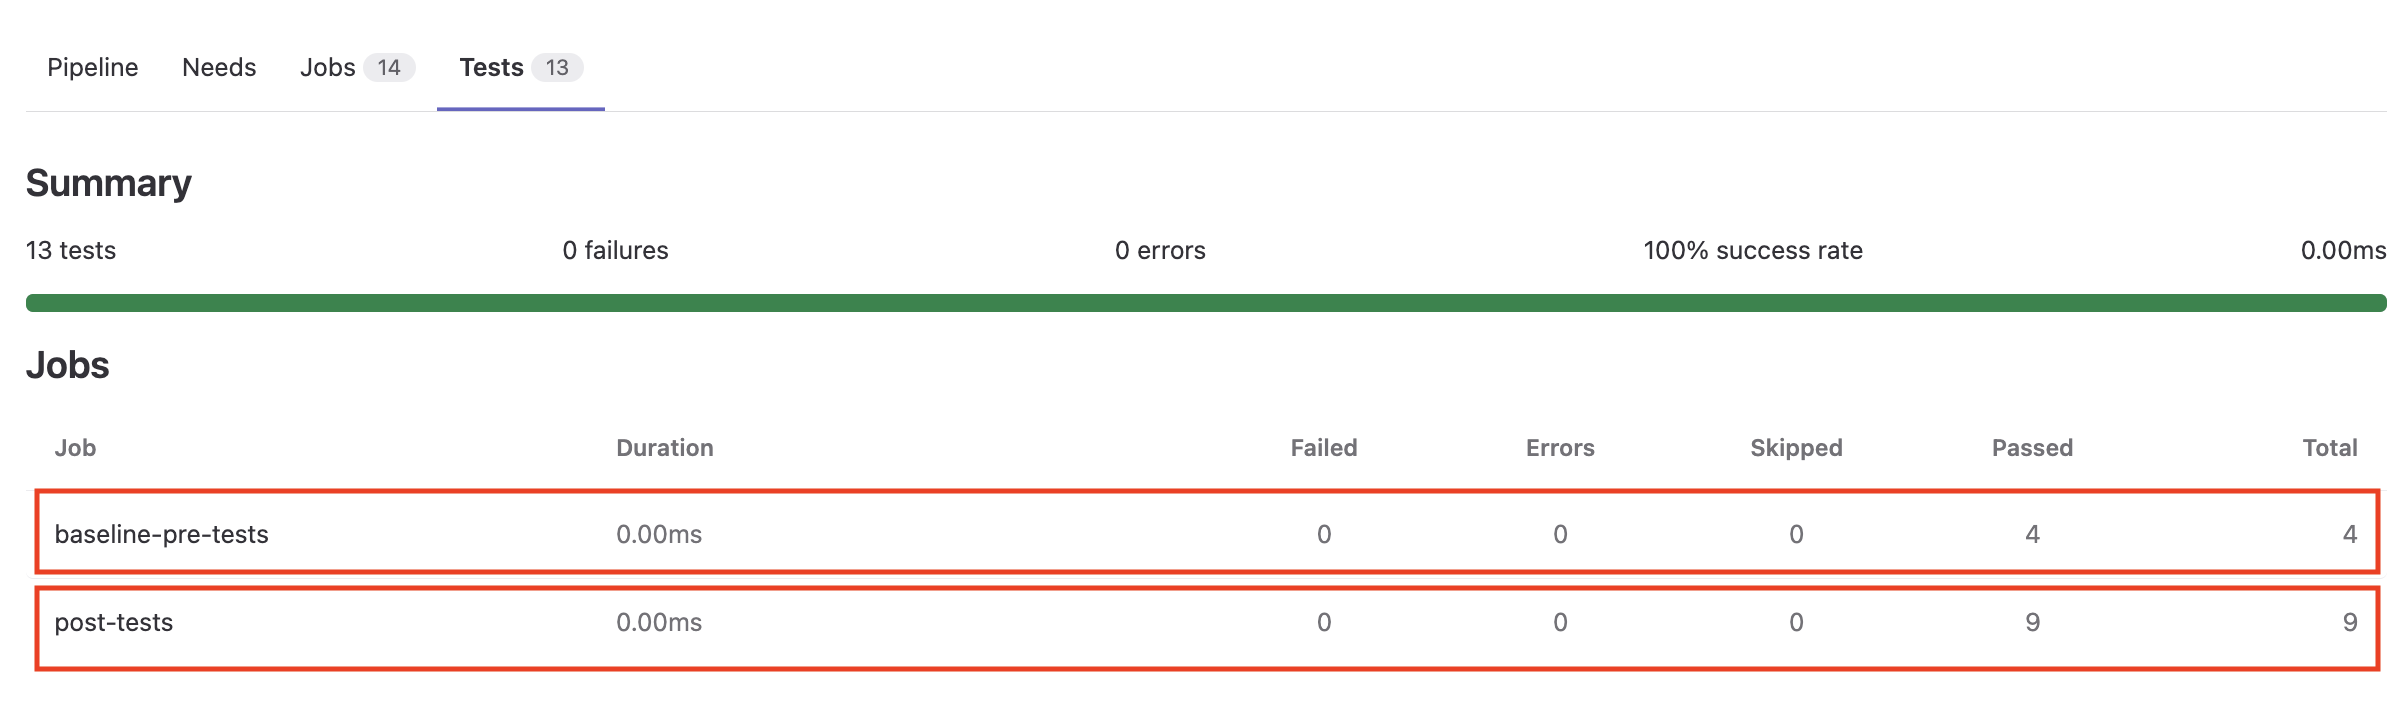
As a part of the baseline pre-tests stage there are 4 test cases run from the LTROPS-2711 Topology System Batch from CXTM.
-
As a part of the post-tests stage there are 9 test cases run from the LTROPS-2711 Topology System Batch and LTROPS-2711 Topology Routing Batch from CXTM.
-
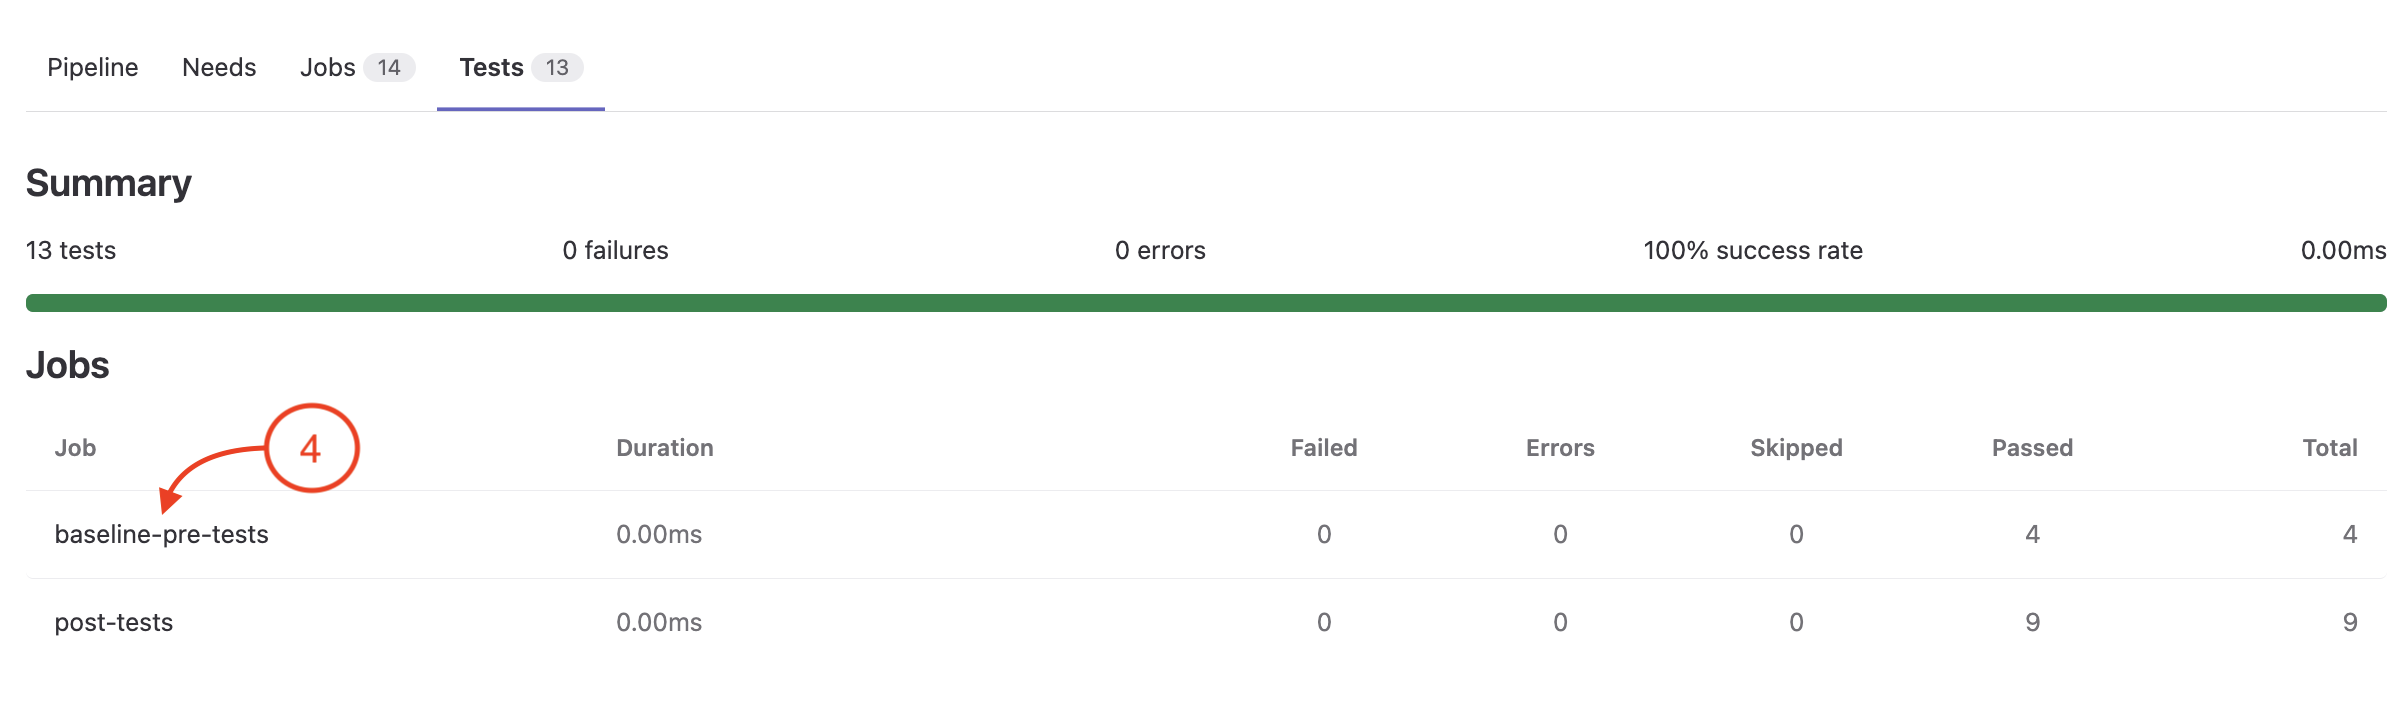
Review test results for the pre-tests stage. Click on the baseline-pre-tests job to view the test results.
-
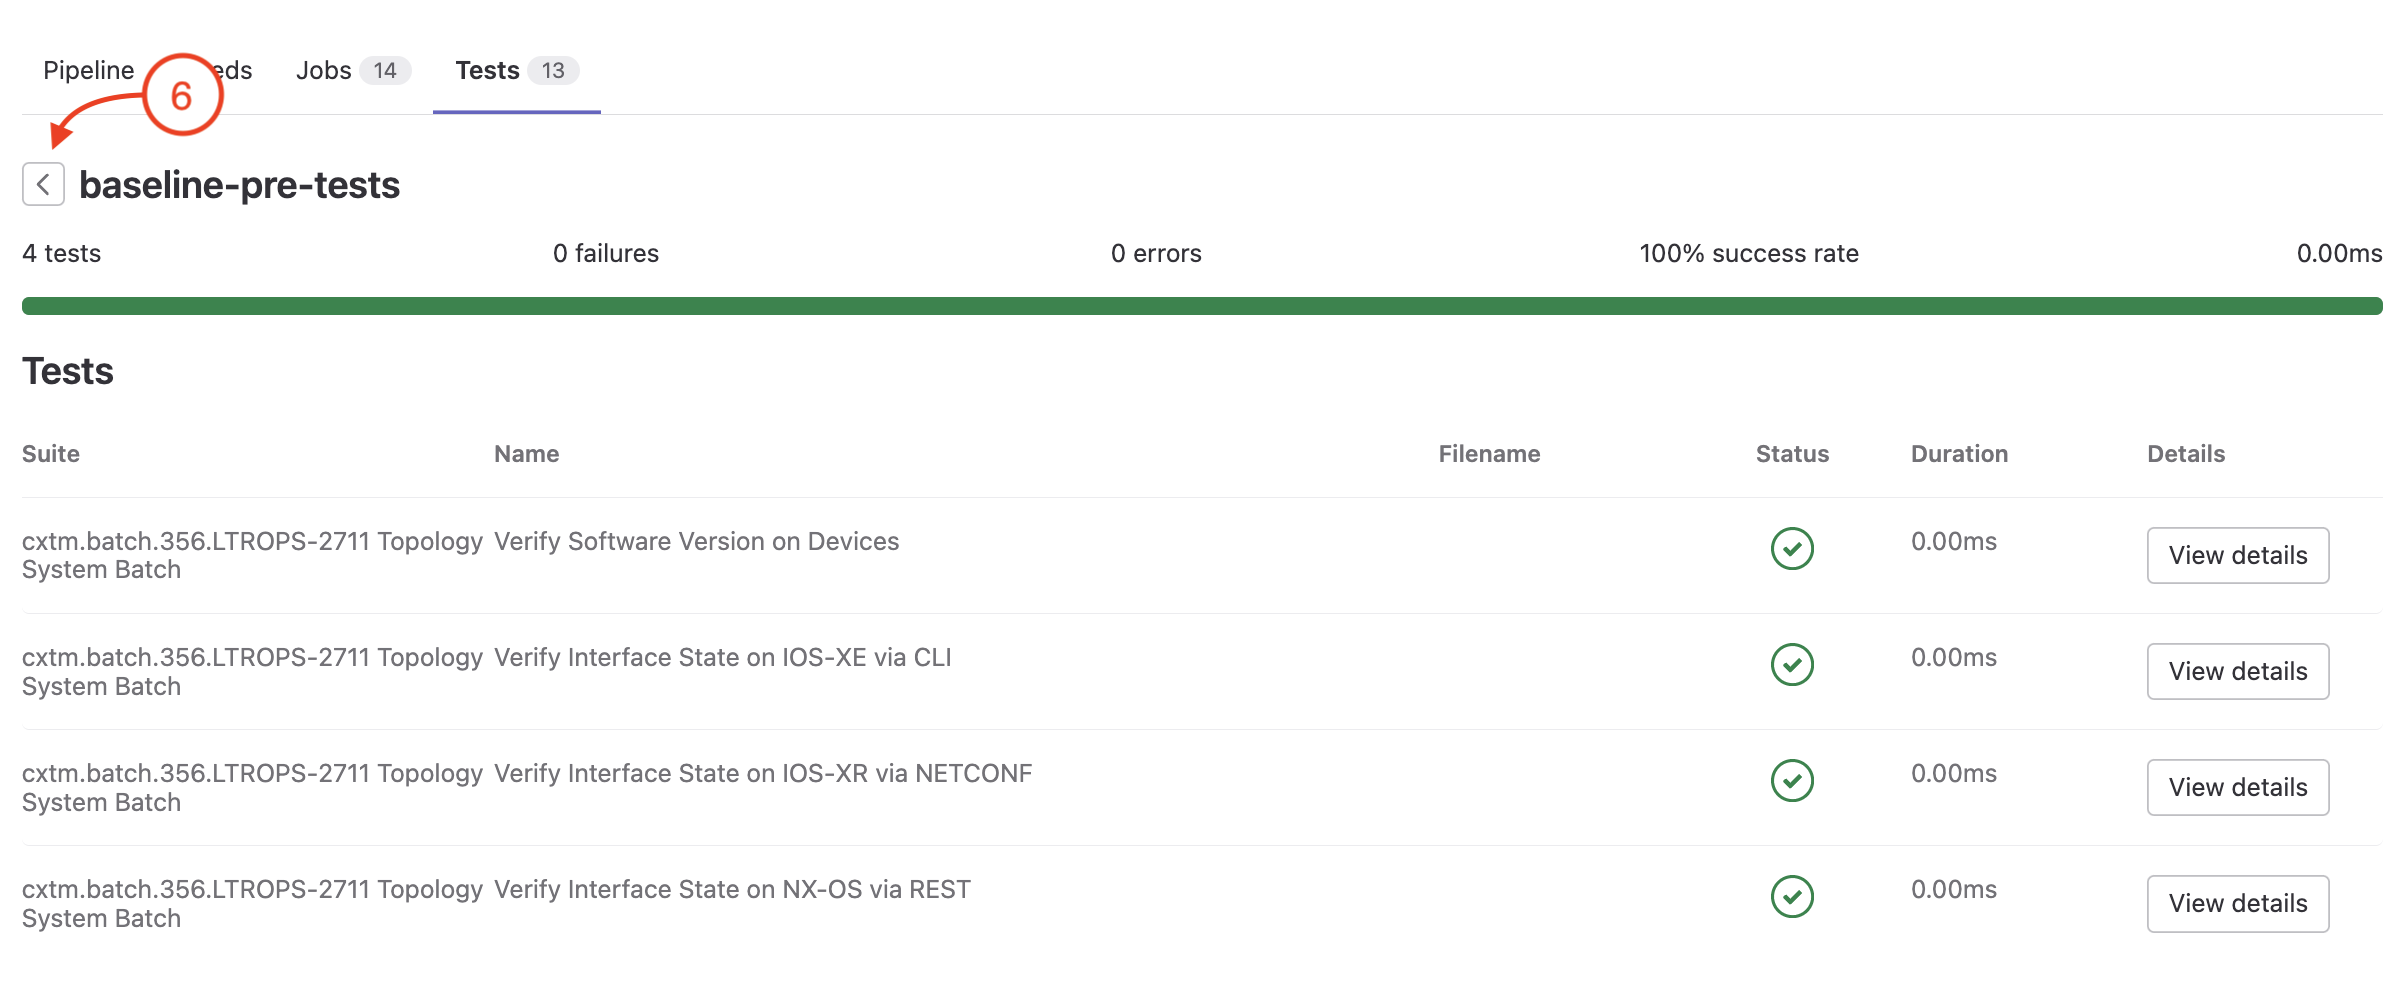
In the expanded view, you can see additional details about the tests run in this stage.
The Suite column displays the batch name, the Name column displays the individual test case name, and the Status column
displays the test case result status. The green check indicates the tests have passed and a red X would indicate the tests have failed.
Please note that the batch name reflects the LTROPS-2711 Topology System Batch triggered as a part of the pre-tests stage.

-
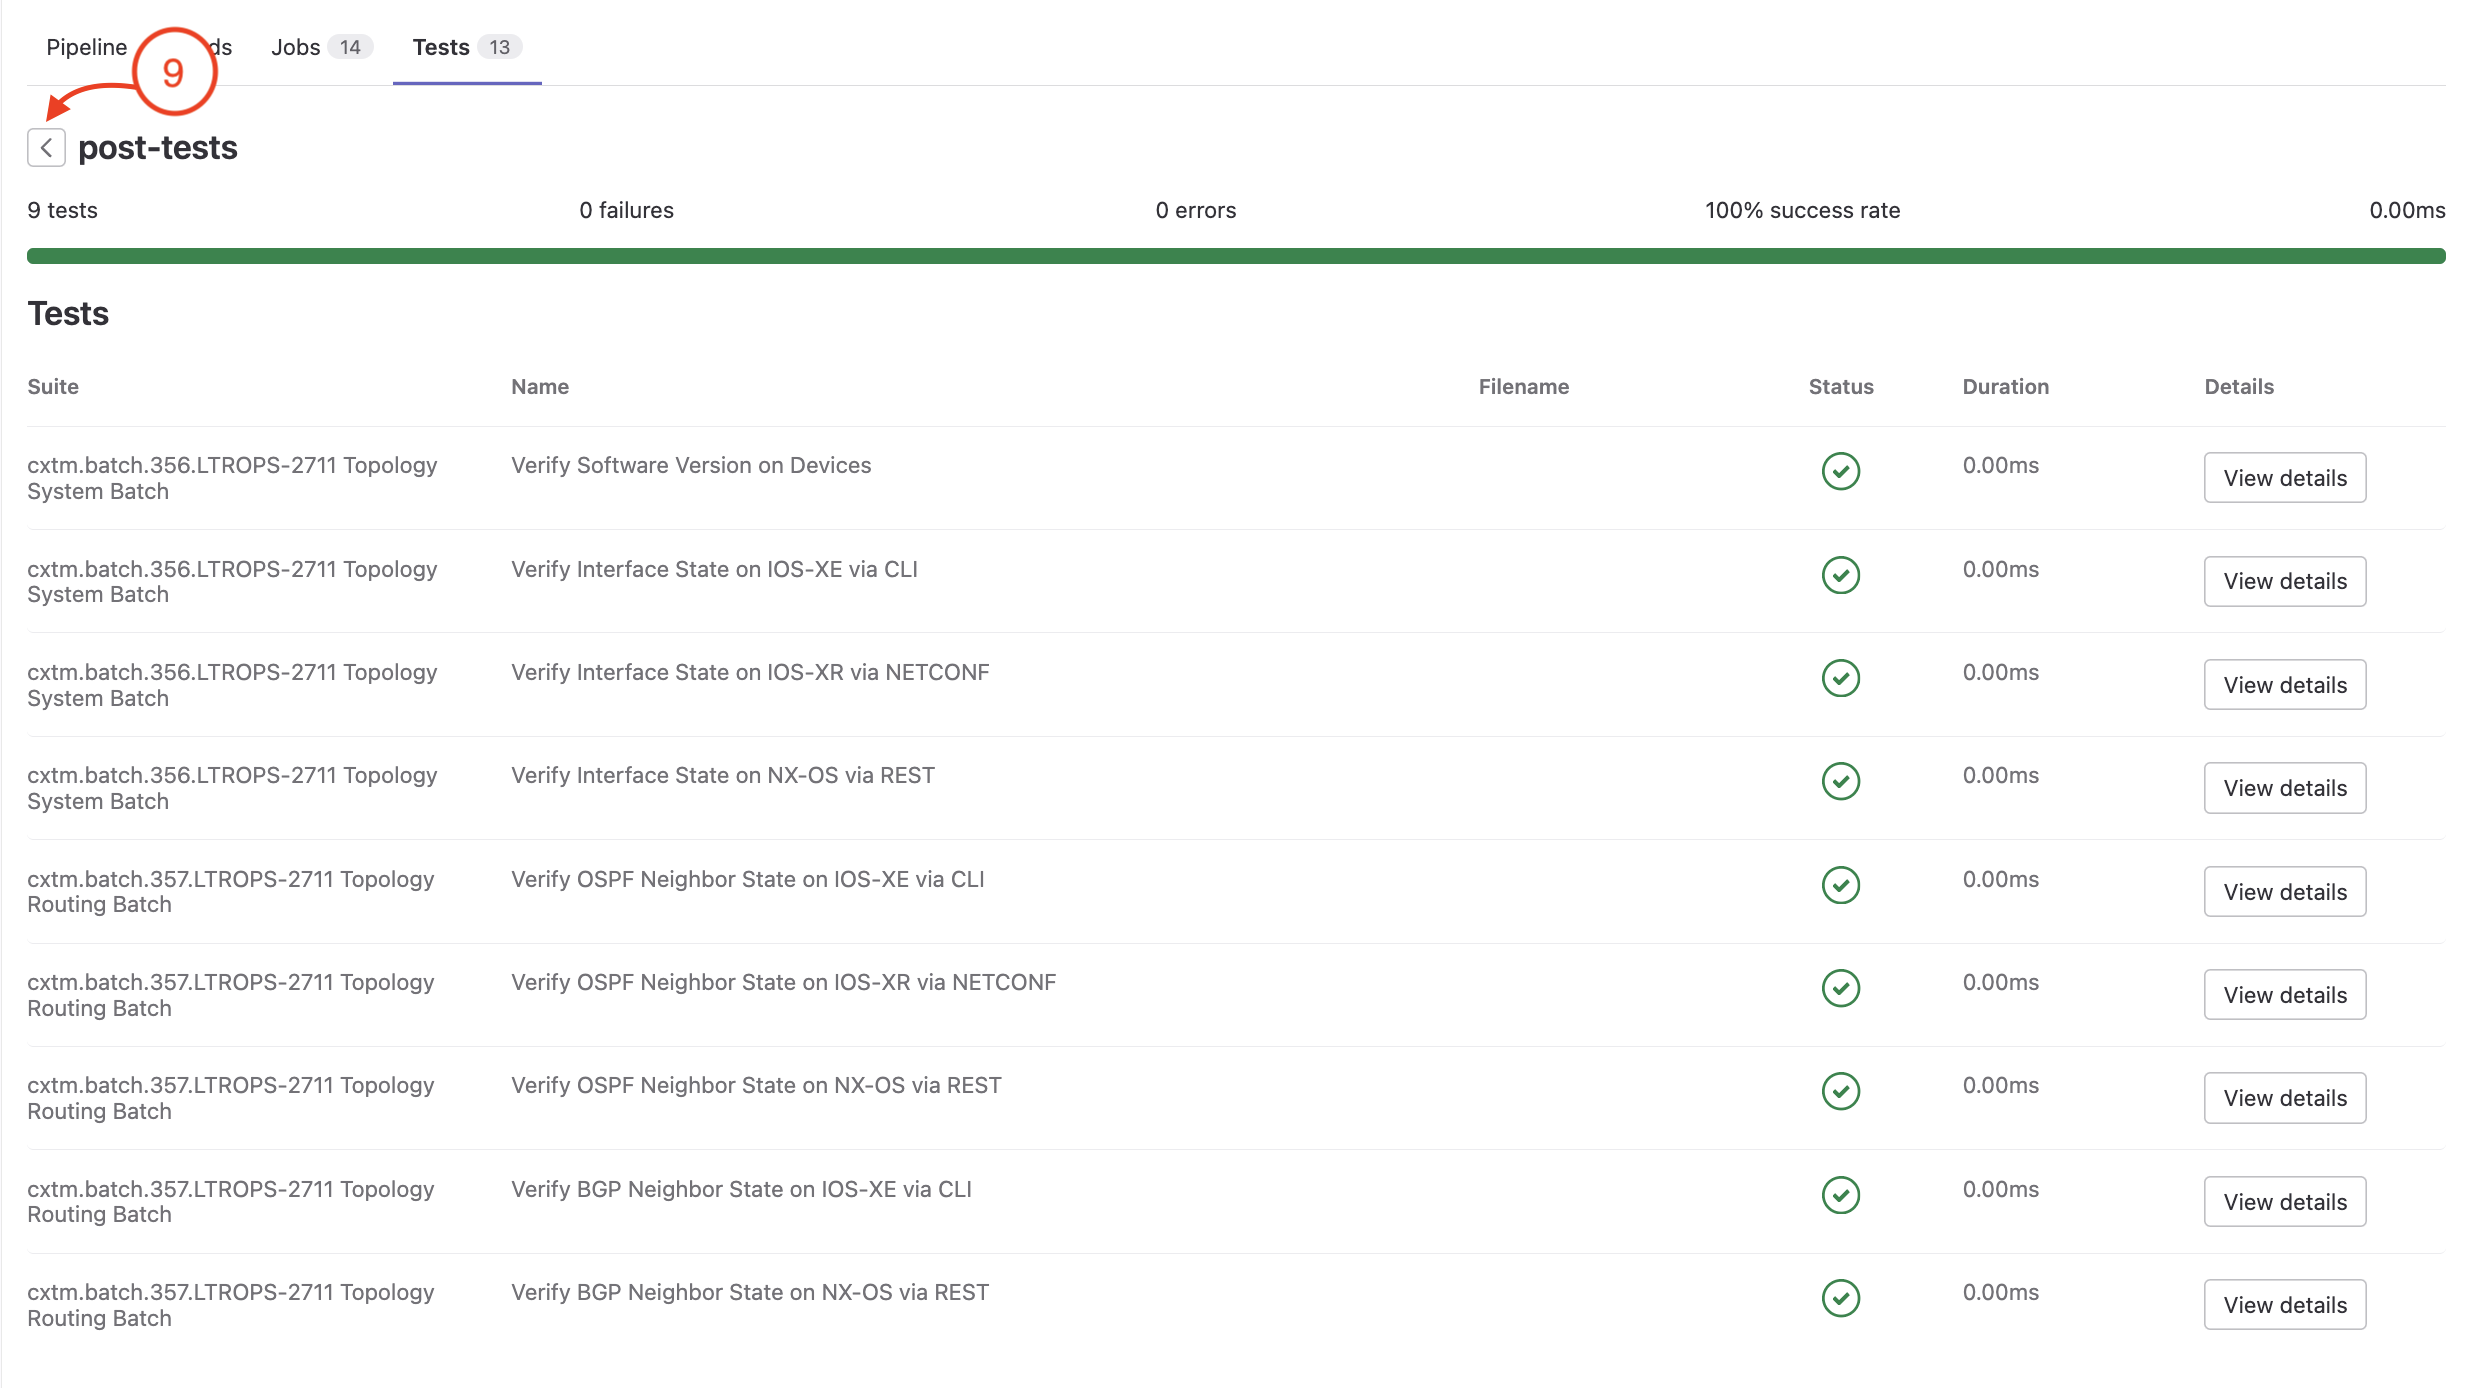
Click on the back button to get back to the tests job view.
-
Review tests results for the post-tests stage. Click on the post-tests job to view the test results.
-
In the expanded view, you can see additional details about the tests run in the post-tests stage.
Again, the Suite column displays the batch name, the Name column displays the test case name, and the Status column
displays the test case result status. The green check indicates the tests have passed and a red X would indicate the tests have failed.
Please note that the batch name reflects both the LTROPS-2711 Topology System Batch and LTROPS-2711 Topology Routing Batch triggered as a part of the post-tests stage.
A test case failure in either the pre-tests or post-tests stage will cause the pipeline to fail. The GitLab view displayed here allows you
to easily identify which test cases from which batches have failed to expedite troubleshooting. With this information, you can quickly locate and review the corresponding detailed
log.html reports in CXTM for root cause analysis of the failure.
-
Click on the back button to get back to the tests job view.
Continue to the next section to review your test case results in more detail from CXTM.