Secret Env Vars
Bonus: Secret Env Variables
  • Introduction
  • CXTM Basics
  • CXTM Projects
  • CXTM Test Cases
  • CXTM Test Automation
  • Revisit Imported Test Cases
  • CXTM Batches
  • CXTM Notifications
  • NetDevOps
  • CXTM Reporting
  • CXTM References
  • Bonus: Project Users
  • Bonus: CXTM REST API
  • Bonus: Secret Env Variables

Secret Environment Variables

In this section, you will use CXTM's secret environment variables feature to see how you can protect sensitive data, like usernames and passwords, passed into your automation execution.

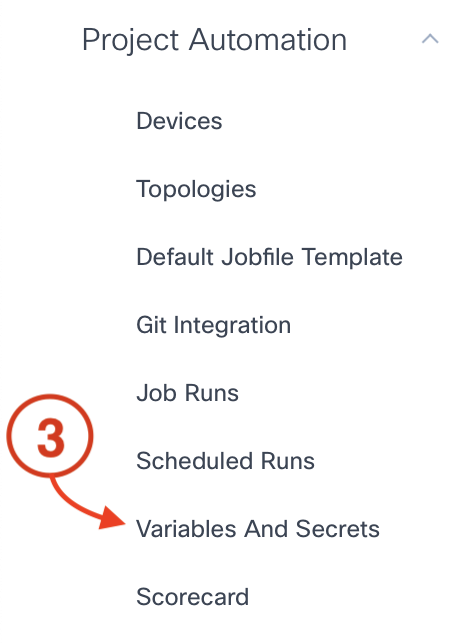
Step 1 - Navigate to your CXTM Project's Variables and Secrets page


Return to your CXTM browser window

  1. Open the sidebar if not already open
  2. Scroll down until you locate the heading Project Automation
  3. Under Project Automation, click Variables and Secrets


Step 2 - Add a secret environment variable


From your project's Variables and Secrets page:

  1. Click on the green "+" button to add a new secret environment variable


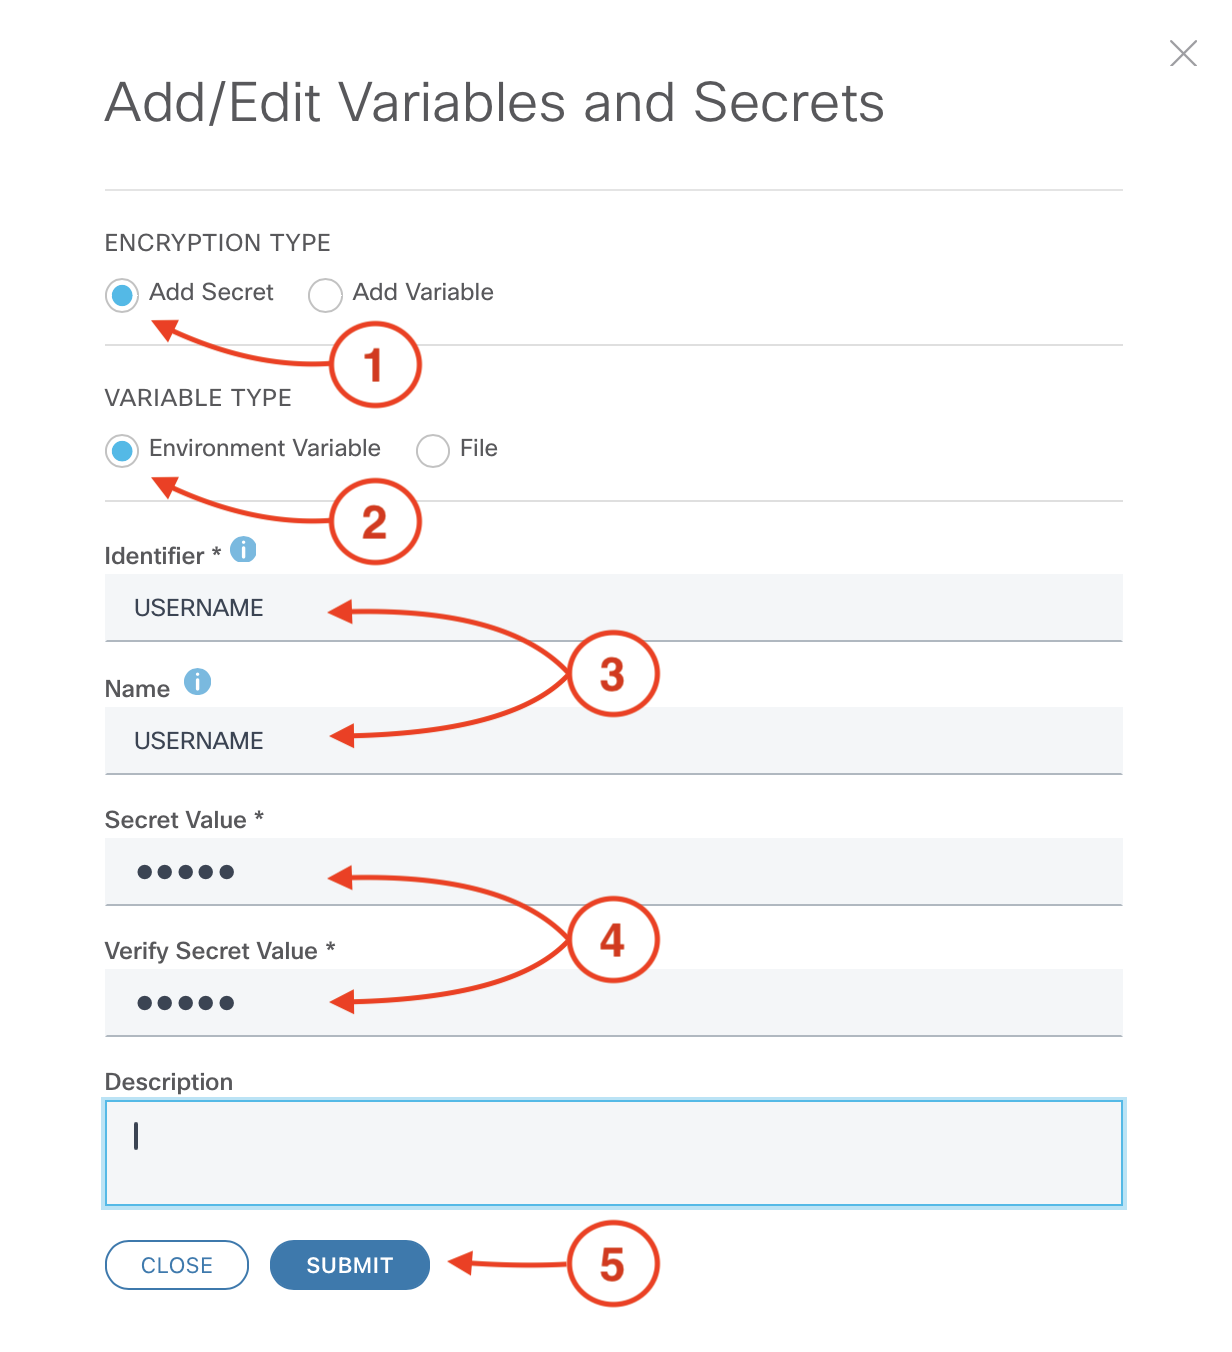
Step 3 - Save the secret environment variable


From the Add/Edit Variables and Secrets menu:

  1. Make sure that Add Secret is selected
  2. Make sure that Environment Variable is selected
  3. Add USERNAME to the Identifier and Name fields
  4. Add admin to the Secret Value and Verify Secret Value fields
  5. Click SUBMIT


Step 4 - Confirm that the secret environment variable was successfully saved


From the Variables and Secrets page:

  1. Confirm that the secret environment variable USERNAME has been saved. Your screen should resemble the following image.


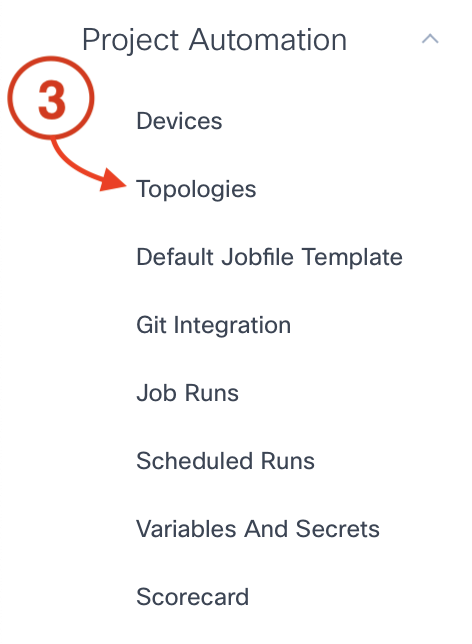
Step 5 - Navigate to your CXTM Project's Topologies page


In your CXTM browser window

  1. Open the sidebar if not already open
  2. Scroll down until you locate the heading Project Automation
  3. Under Project Automation, click Topologies


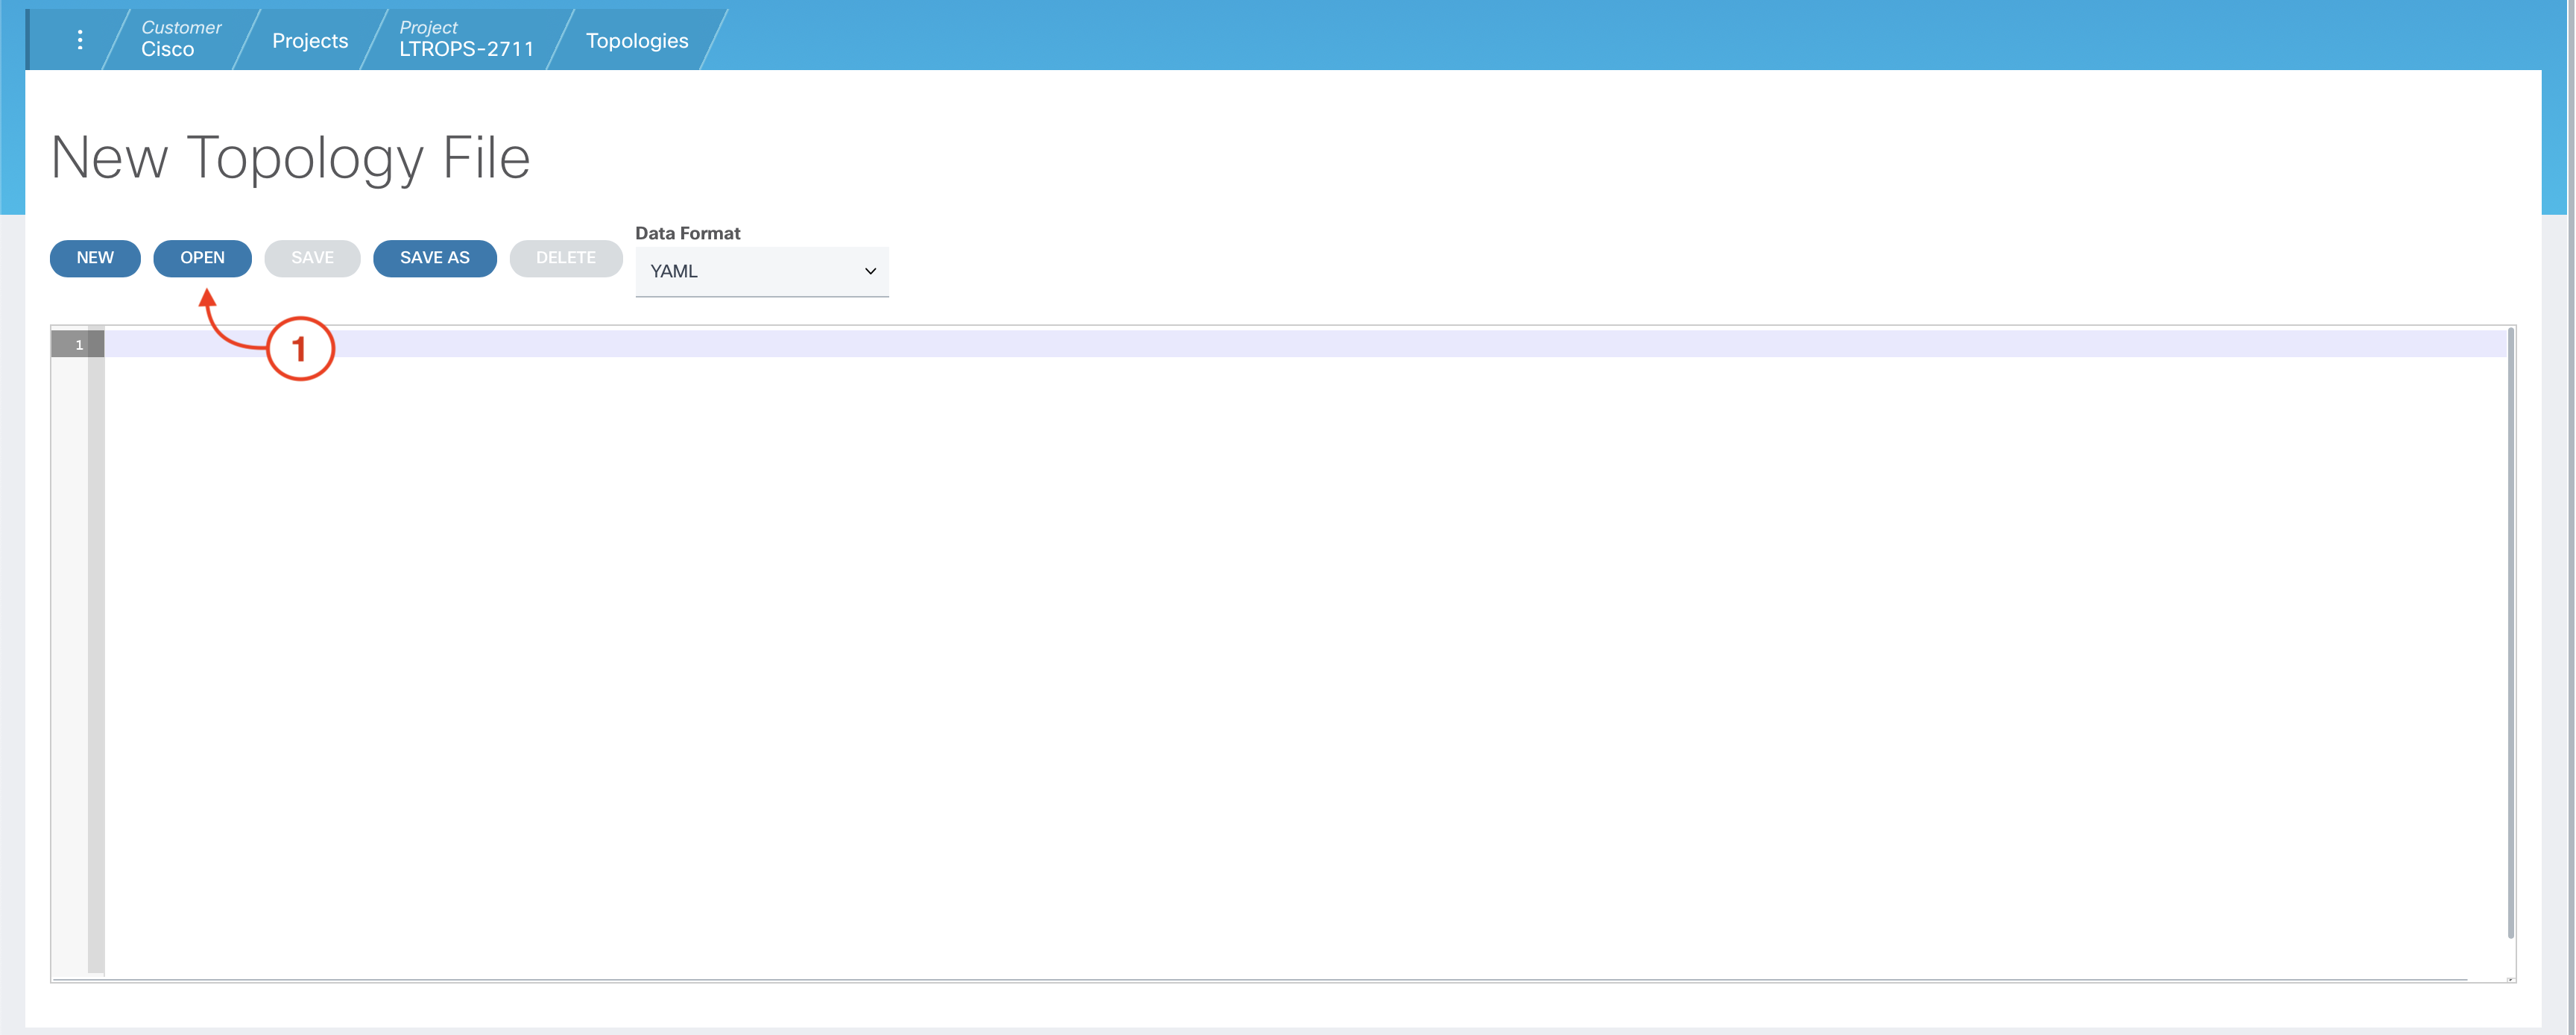
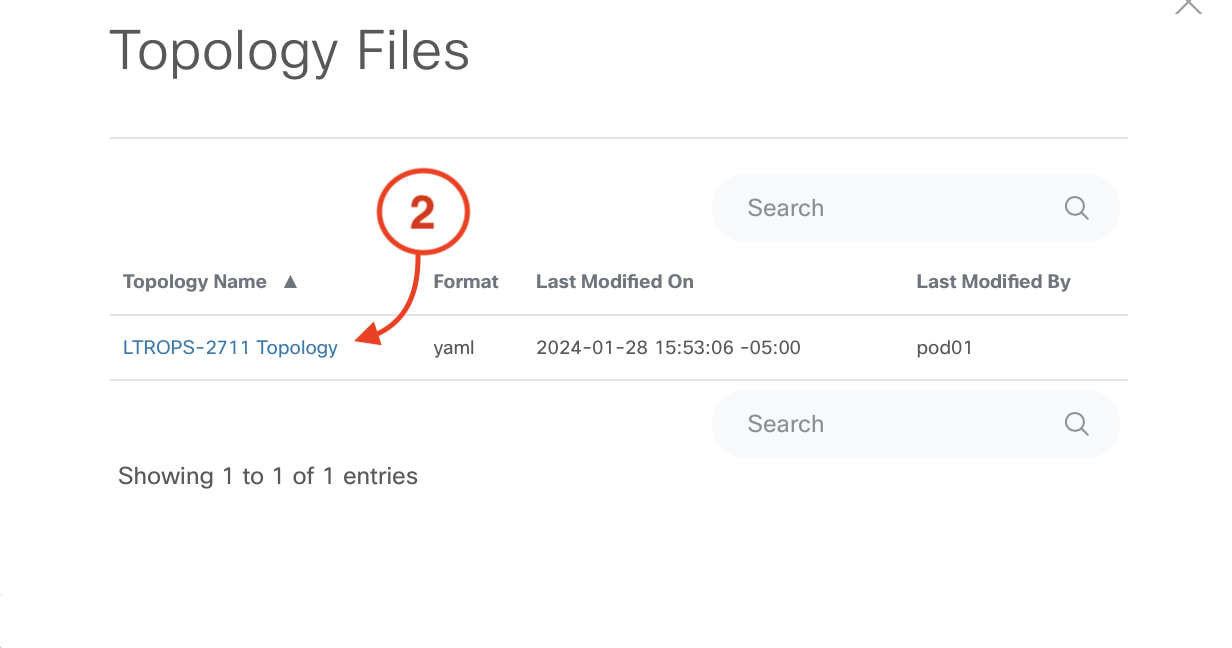
Step 6 - Open and edit the LTROPS-2711 Topology topology file that you created earlier in the lab


From the Topologies page:

  1. Click on the OPEN button.


  2. Click on the LTROPS-2711 Topology link.


  3. Replace line 6 of your LTROPS-2711 Topology file with line 6 from the following code block.

  4.     
    testbed:
    name: LTROPS-2711 Topology
    alias: LTROPS-2711
    credentials:
        default:
          username: '%ENV{USERNAME}'
    

Step 7 - Save the topology file


From the Variables and Secrets page:

  1. Click SAVE to save the topology file.
  2. Click OVERWRITE to overwrite the topology file.


Step 8 - Navigate to your CXTM Project's Test Cases page


Return to your CXTM browser window

  1. Open the sidebar if not already open
  2. Scroll down until you locate the heading Test Cases
  3. Under Test Cases, click Test Cases


Step 9 - Enable the secret env var to be used by the first test case


From your project's Test Cases page:

  1. Locate the first test case (1.01 - Verify Software Version on Devices) and click on the Yes link in the Job File? column


  2. Click on the pencil icon in the upper right-hand corner of the Job File Preview pane to return to the editor


  3. Scroll down the page to the Advanced Settings and slide the Enabled? slider to Enabled for the USERNAME environment variable


  4. Scroll back to the top of the page and click the SAVE AND RUN button to run the test case


  5. Verify that the test case has run successfully, and connected to the devices using the secret environment variable.


Congratulations! You have completed all the bonus sections of this lab. Thanks again, and we hope you have enjoyed Cisco Live!