In this section, you will add the CXTM test automation stage to your GitLab CI/CD pipeline to automatically validate network configurations after deployment. This stage will execute a series of tests using Cisco's CX Test Manager (CXTM) to ensure that the deployed Nexus fabric is functioning as expected and meets the defined requirements. By integrating CXTM into your CI/CD pipeline, you can catch potential issues early in the deployment process and maintain a reliable and consistent network infrastructure.
git checkout -b fabric-expansion
You will now add the cxtm stage to the stages section of your .gitlab-ci.yml file. This stage will run after the deploy stage to execute automated tests that validate the network configuration.
You will now add the cxtm stage to the stages section of your .gitlab-ci.yml file. This stage will run after the deploy stage to execute automated tests that validate the network configuration.
- cxtm
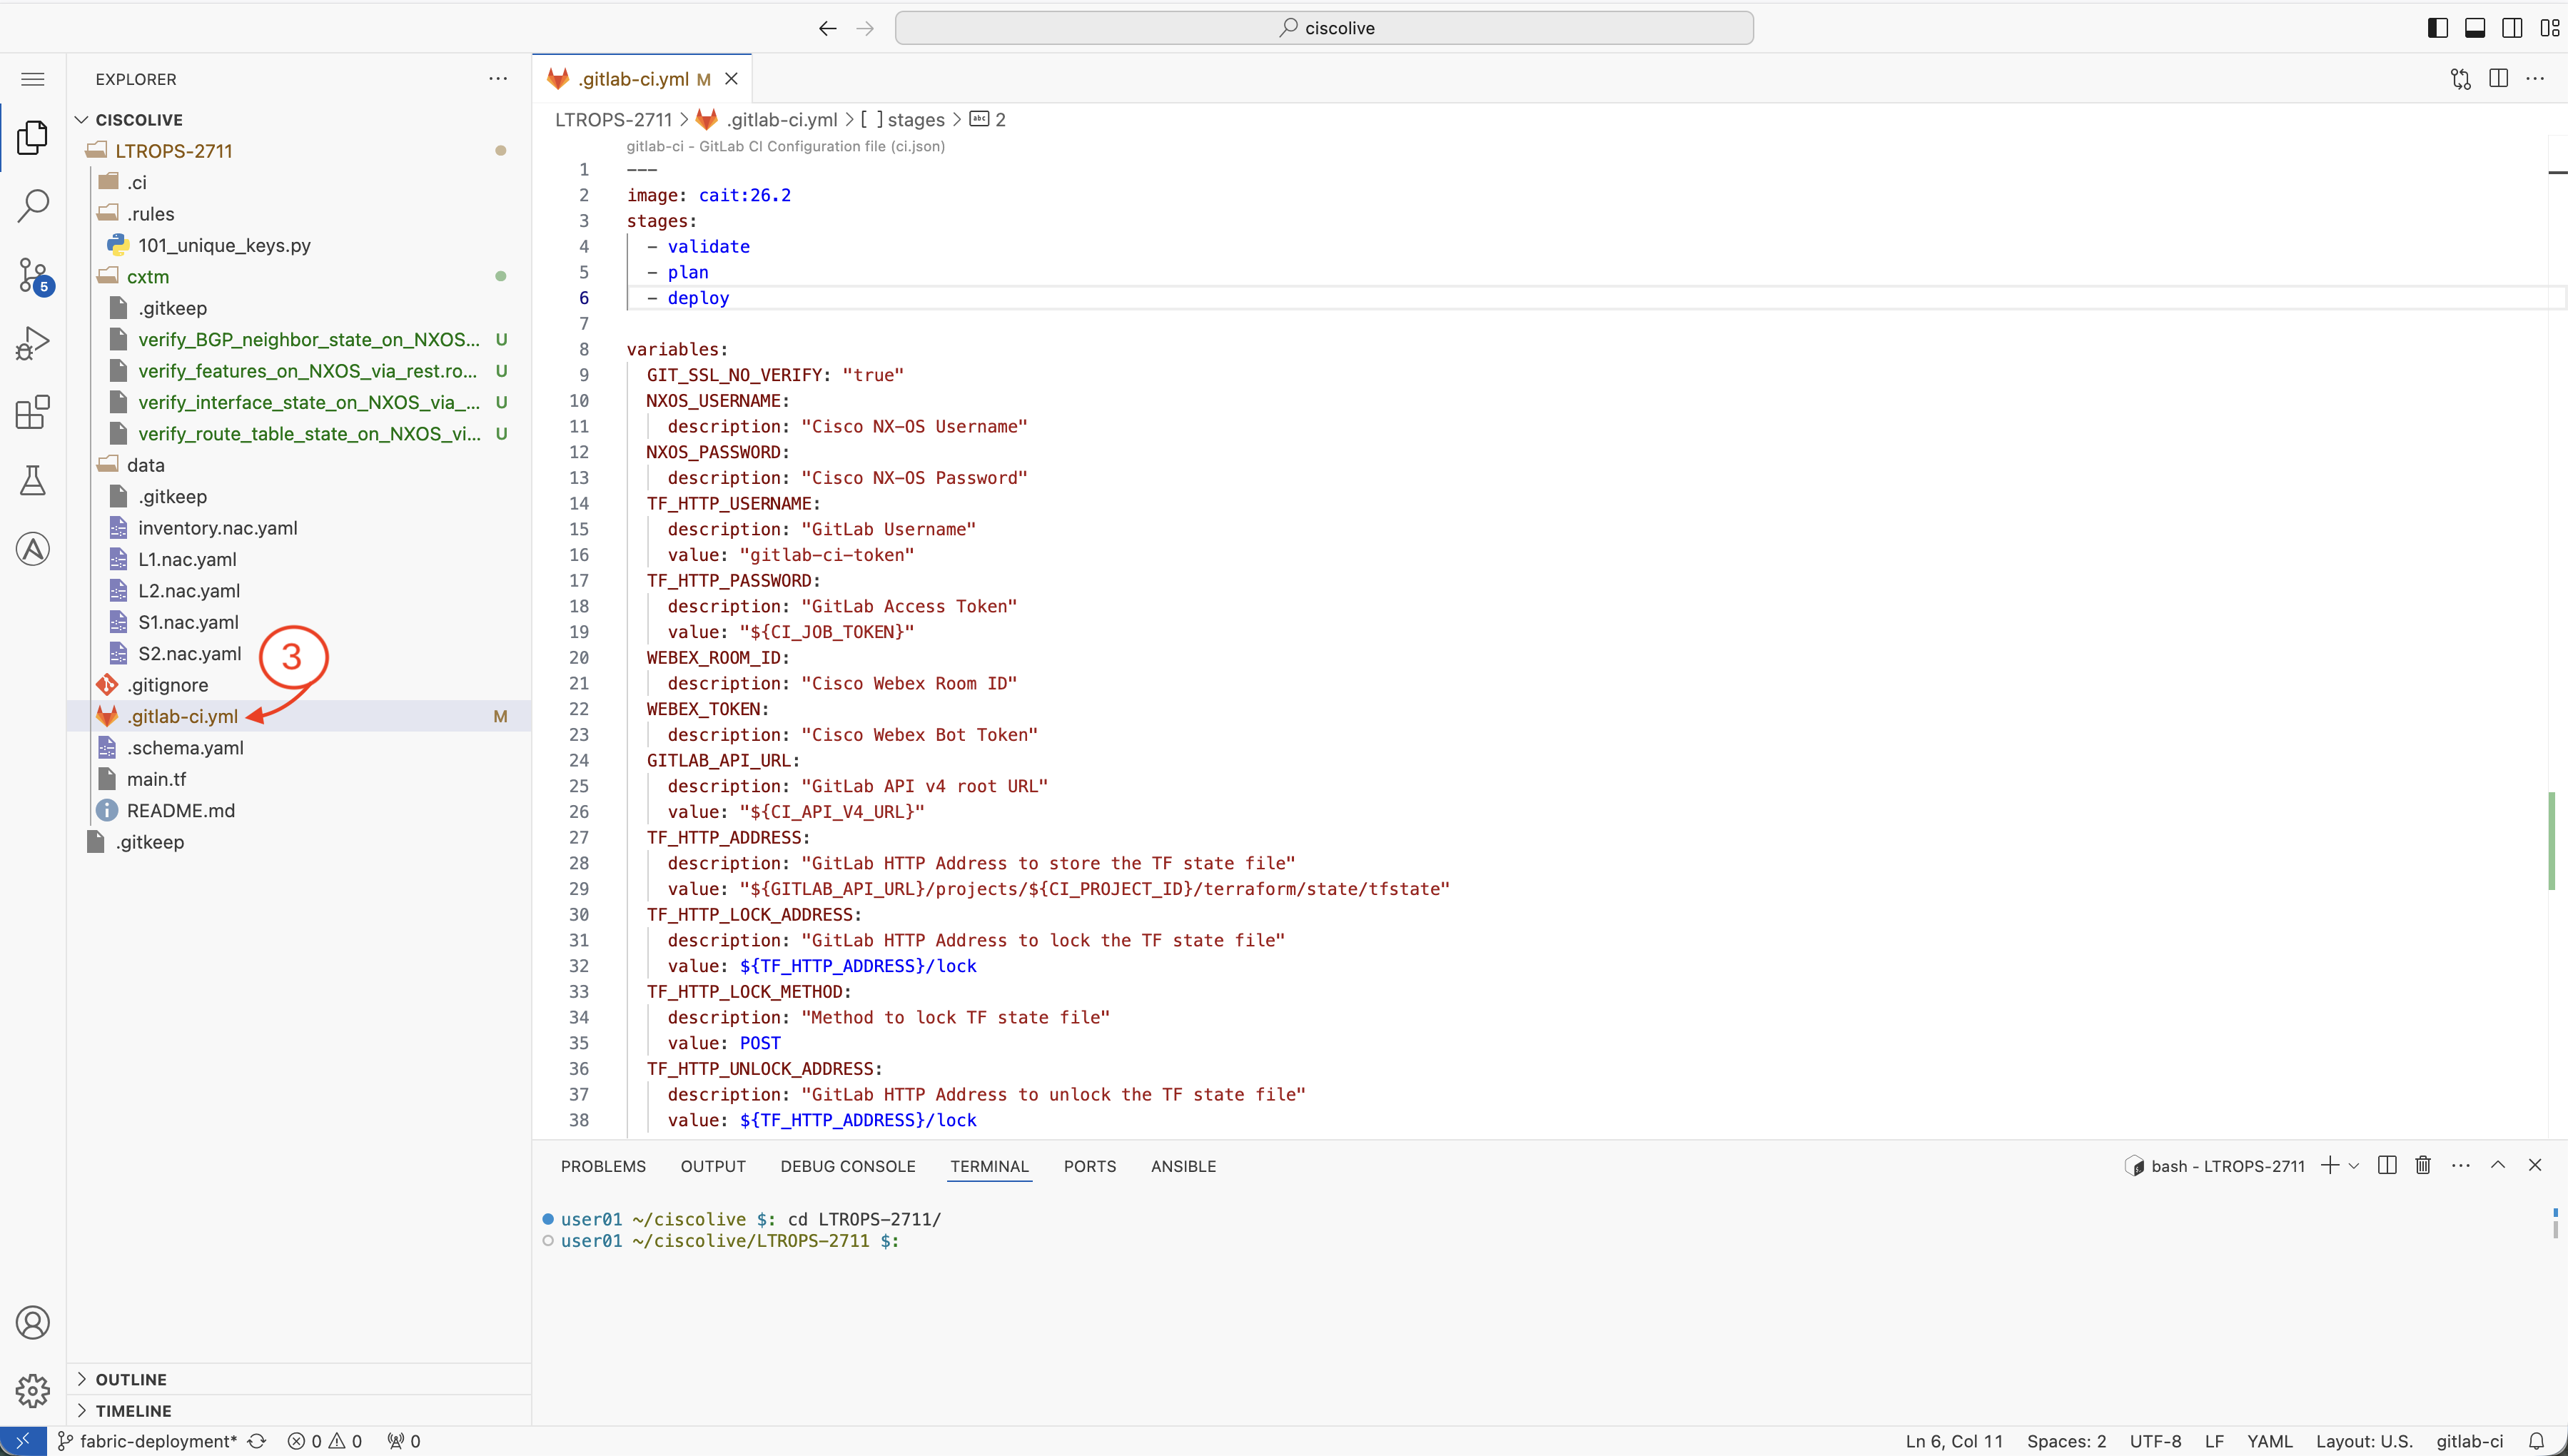
stages:
  - validate
  - plan
  - deploy
  - cxtm
Now you will add the job configuration for the CXTM stage. This job will execute your CXTM test batch after the deployment completes.
cxtm-test:
  stage: cxtm
  script:
    - cxtm-mgr batch --host $CXTM --insecure run --output tests/cxtm.log.xml batch-id
  artifacts:
    paths:
      - tests/cxtm.log.xml
    reports:
      junit:
        - tests/cxtm.log.xml
  dependencies: []
  needs:
    - deploy
  only:
    - merge_requests
<batch id> in the cxtm-test job with your CXTM batch ID from the CXTM Batches section.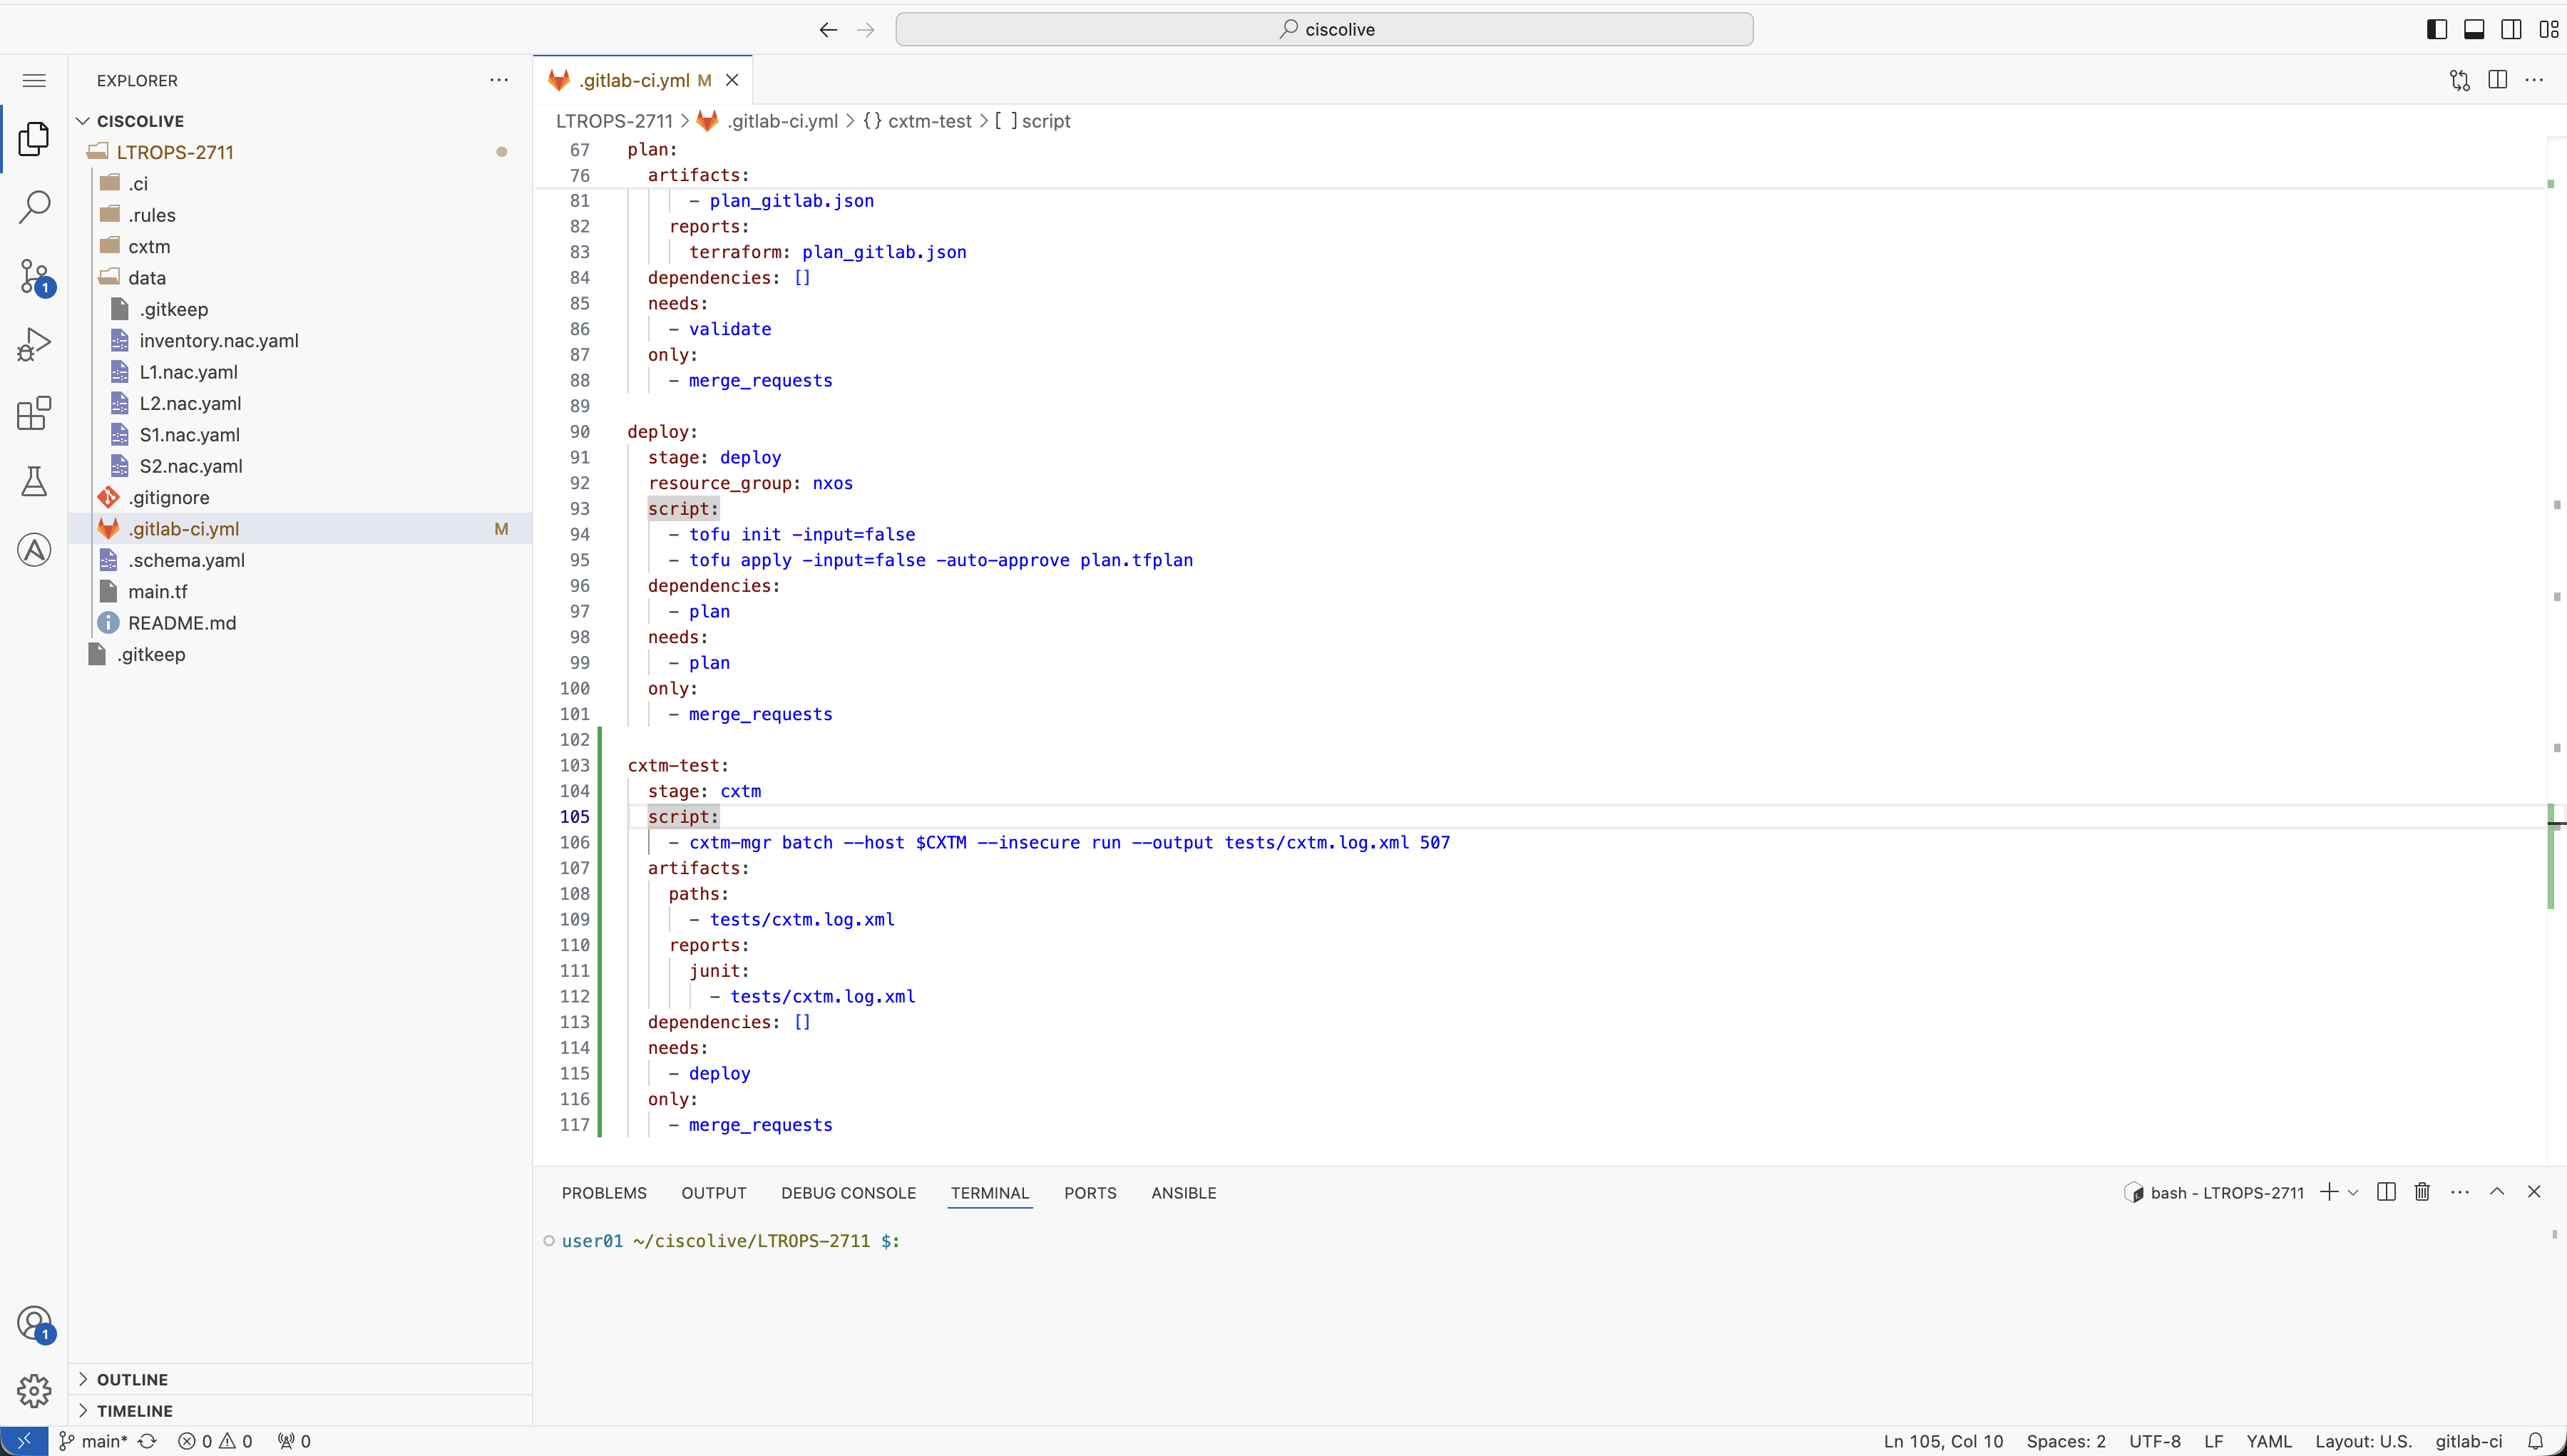
Before your pipeline can execute CXTM tests, you need to configure the CXTM API key and host IP as GitLab CI/CD variables. Start by generating your CXTM API key.
In your browser, return to CXTM:

On the User Settings page, you should see that No API key has been assigned for your CXTM user.
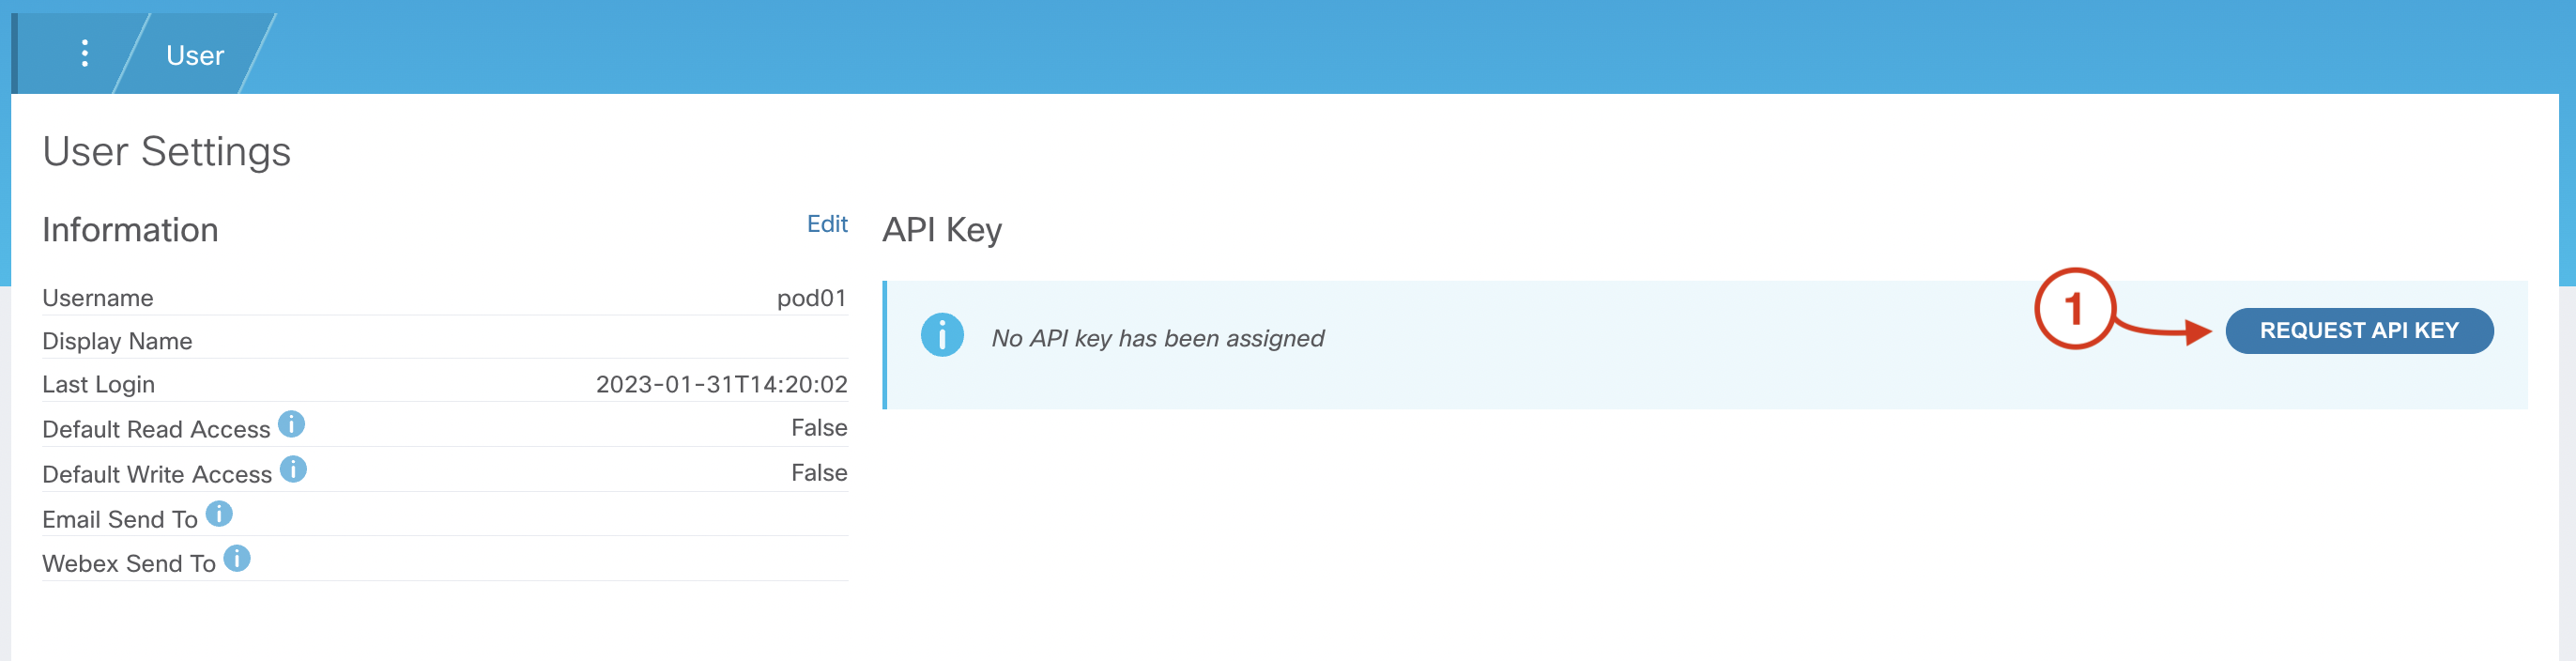
If you find that an API Key has already been assigned, simply click Delete API Key and then Request API Key to create a new key

After generating your CXTM API Key:
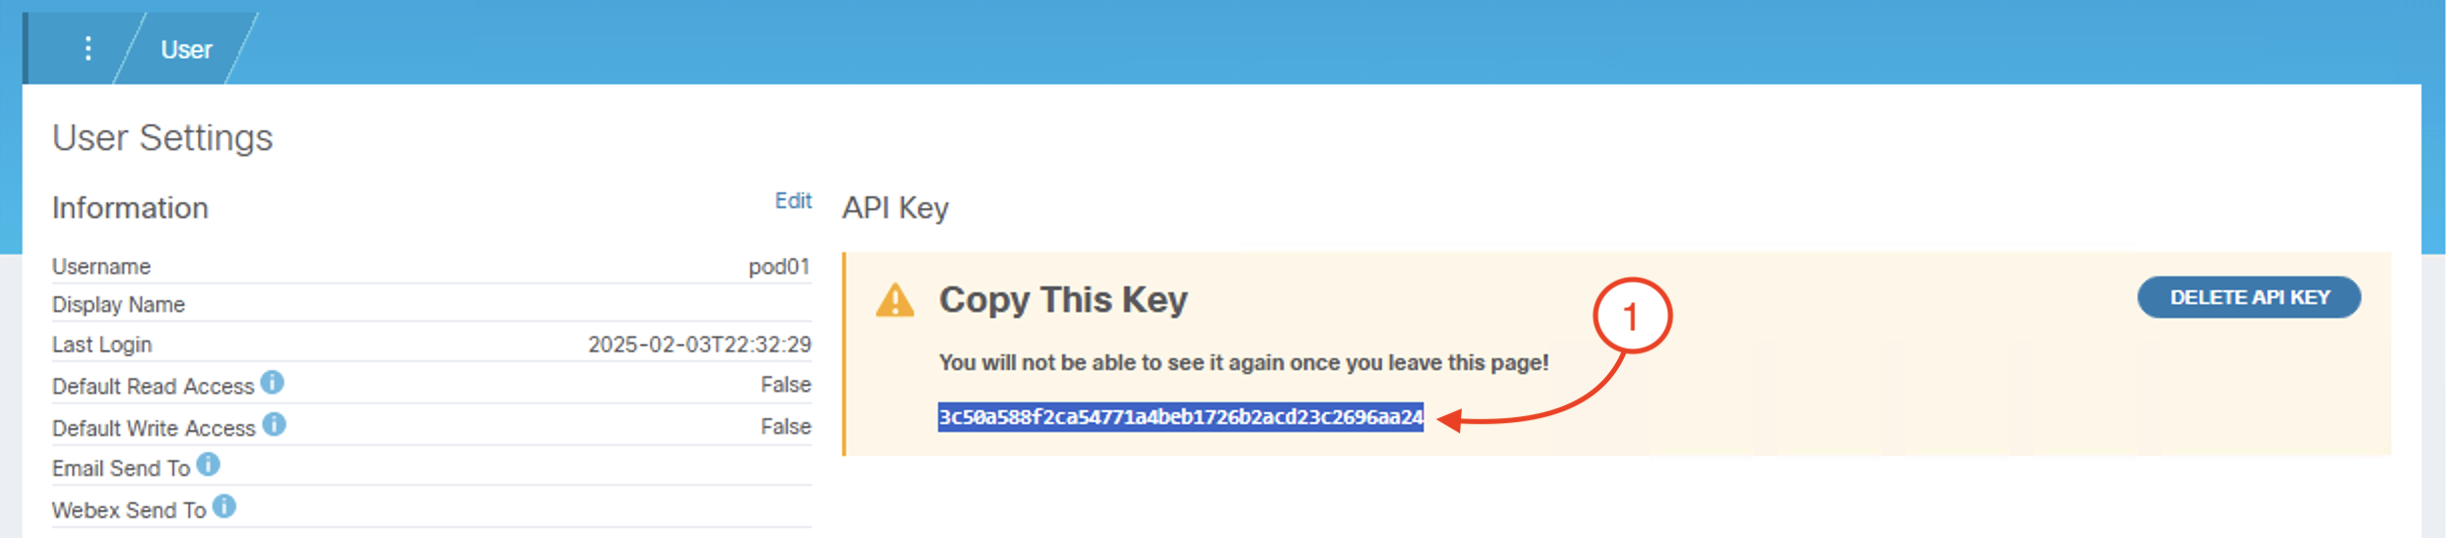
To store your CXTM API key as an environment variable in GitLab, return to your GitLab browser window and navigate to CI/CD settings in your GitLab project.
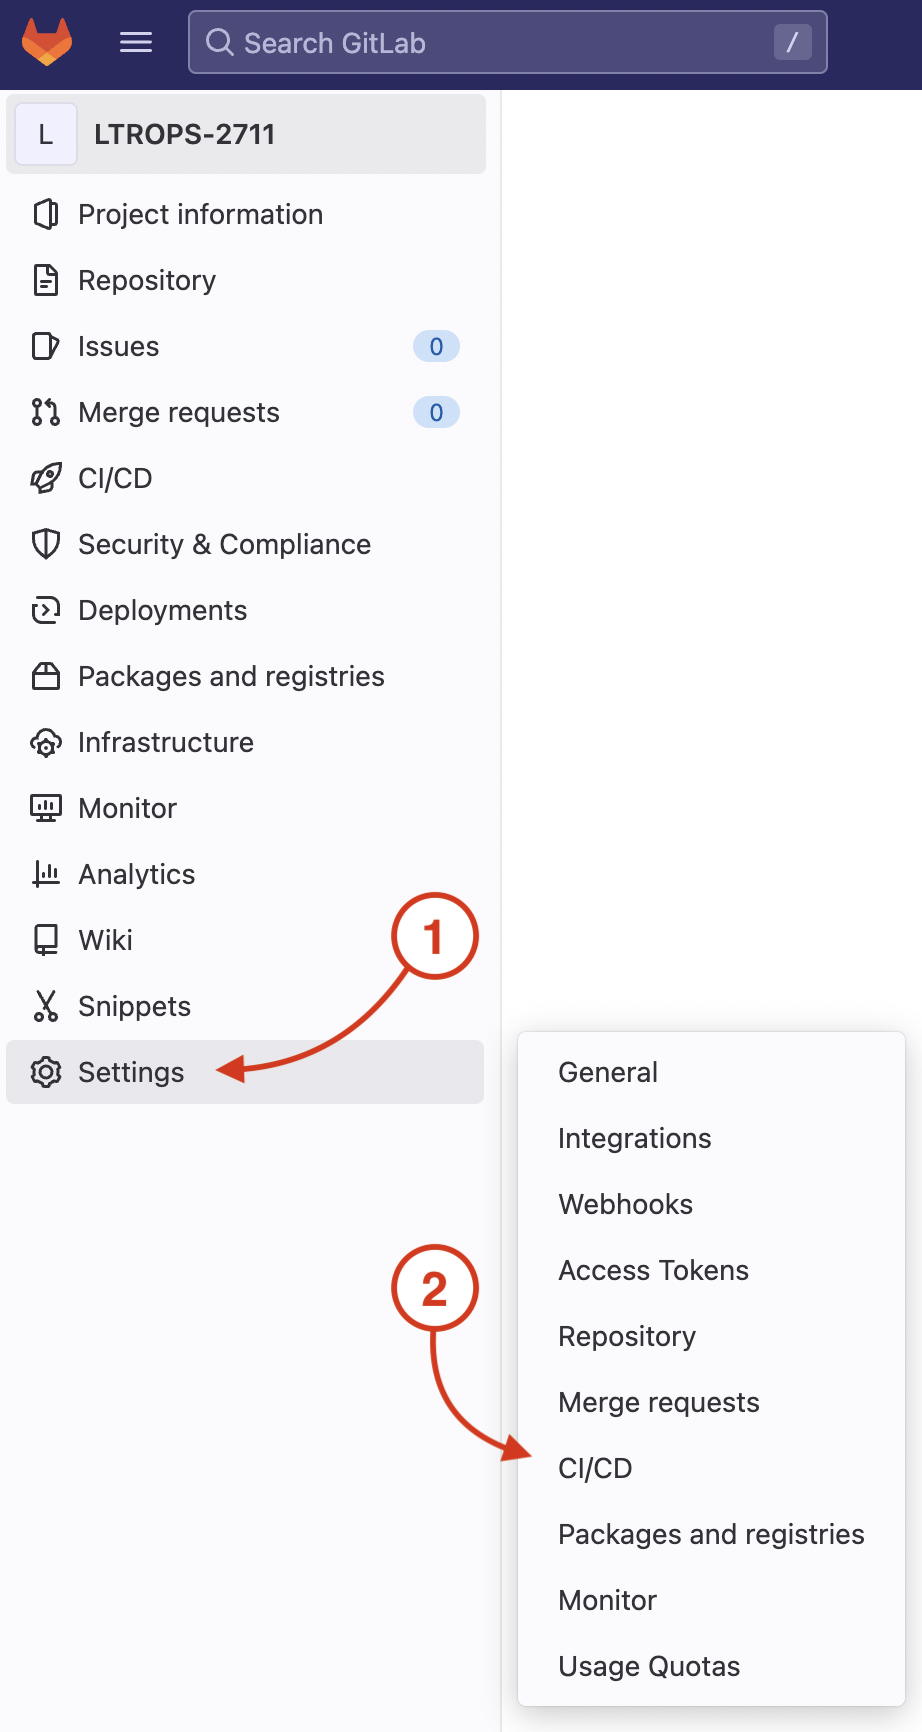
On your GitLab repo's CI/CD Settings page:
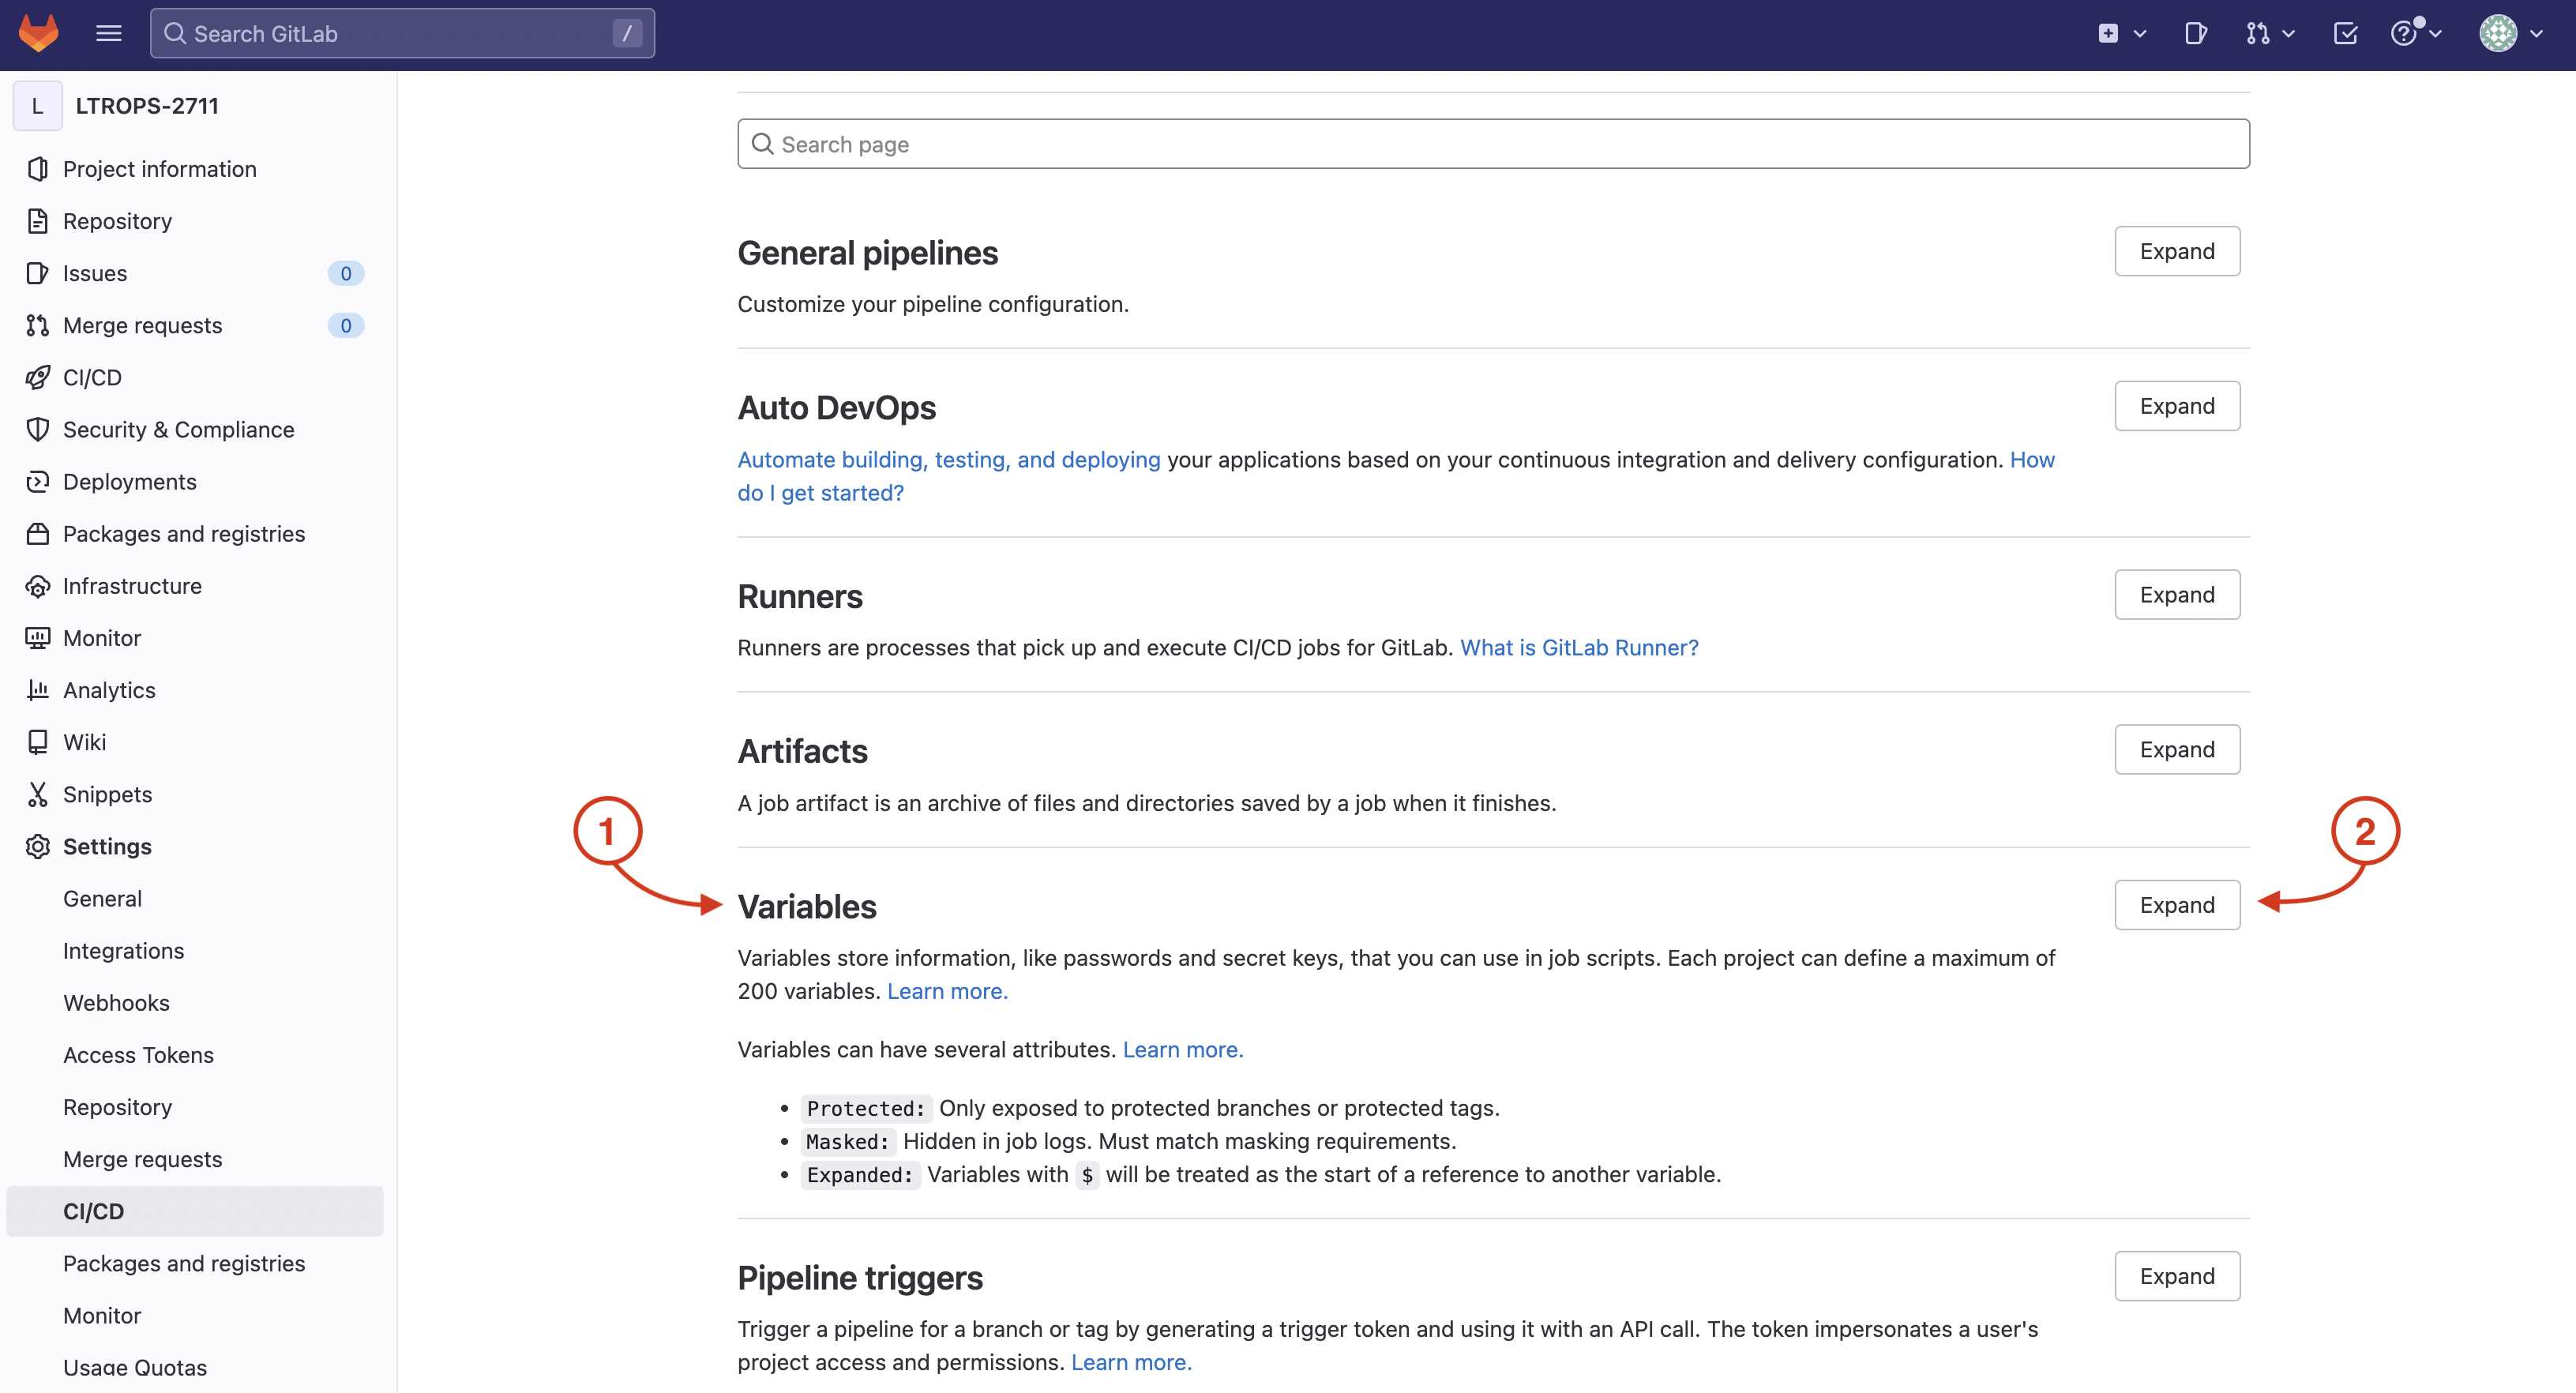
Launch the Add Variable pop-up to add your CXTM API key as a variable:
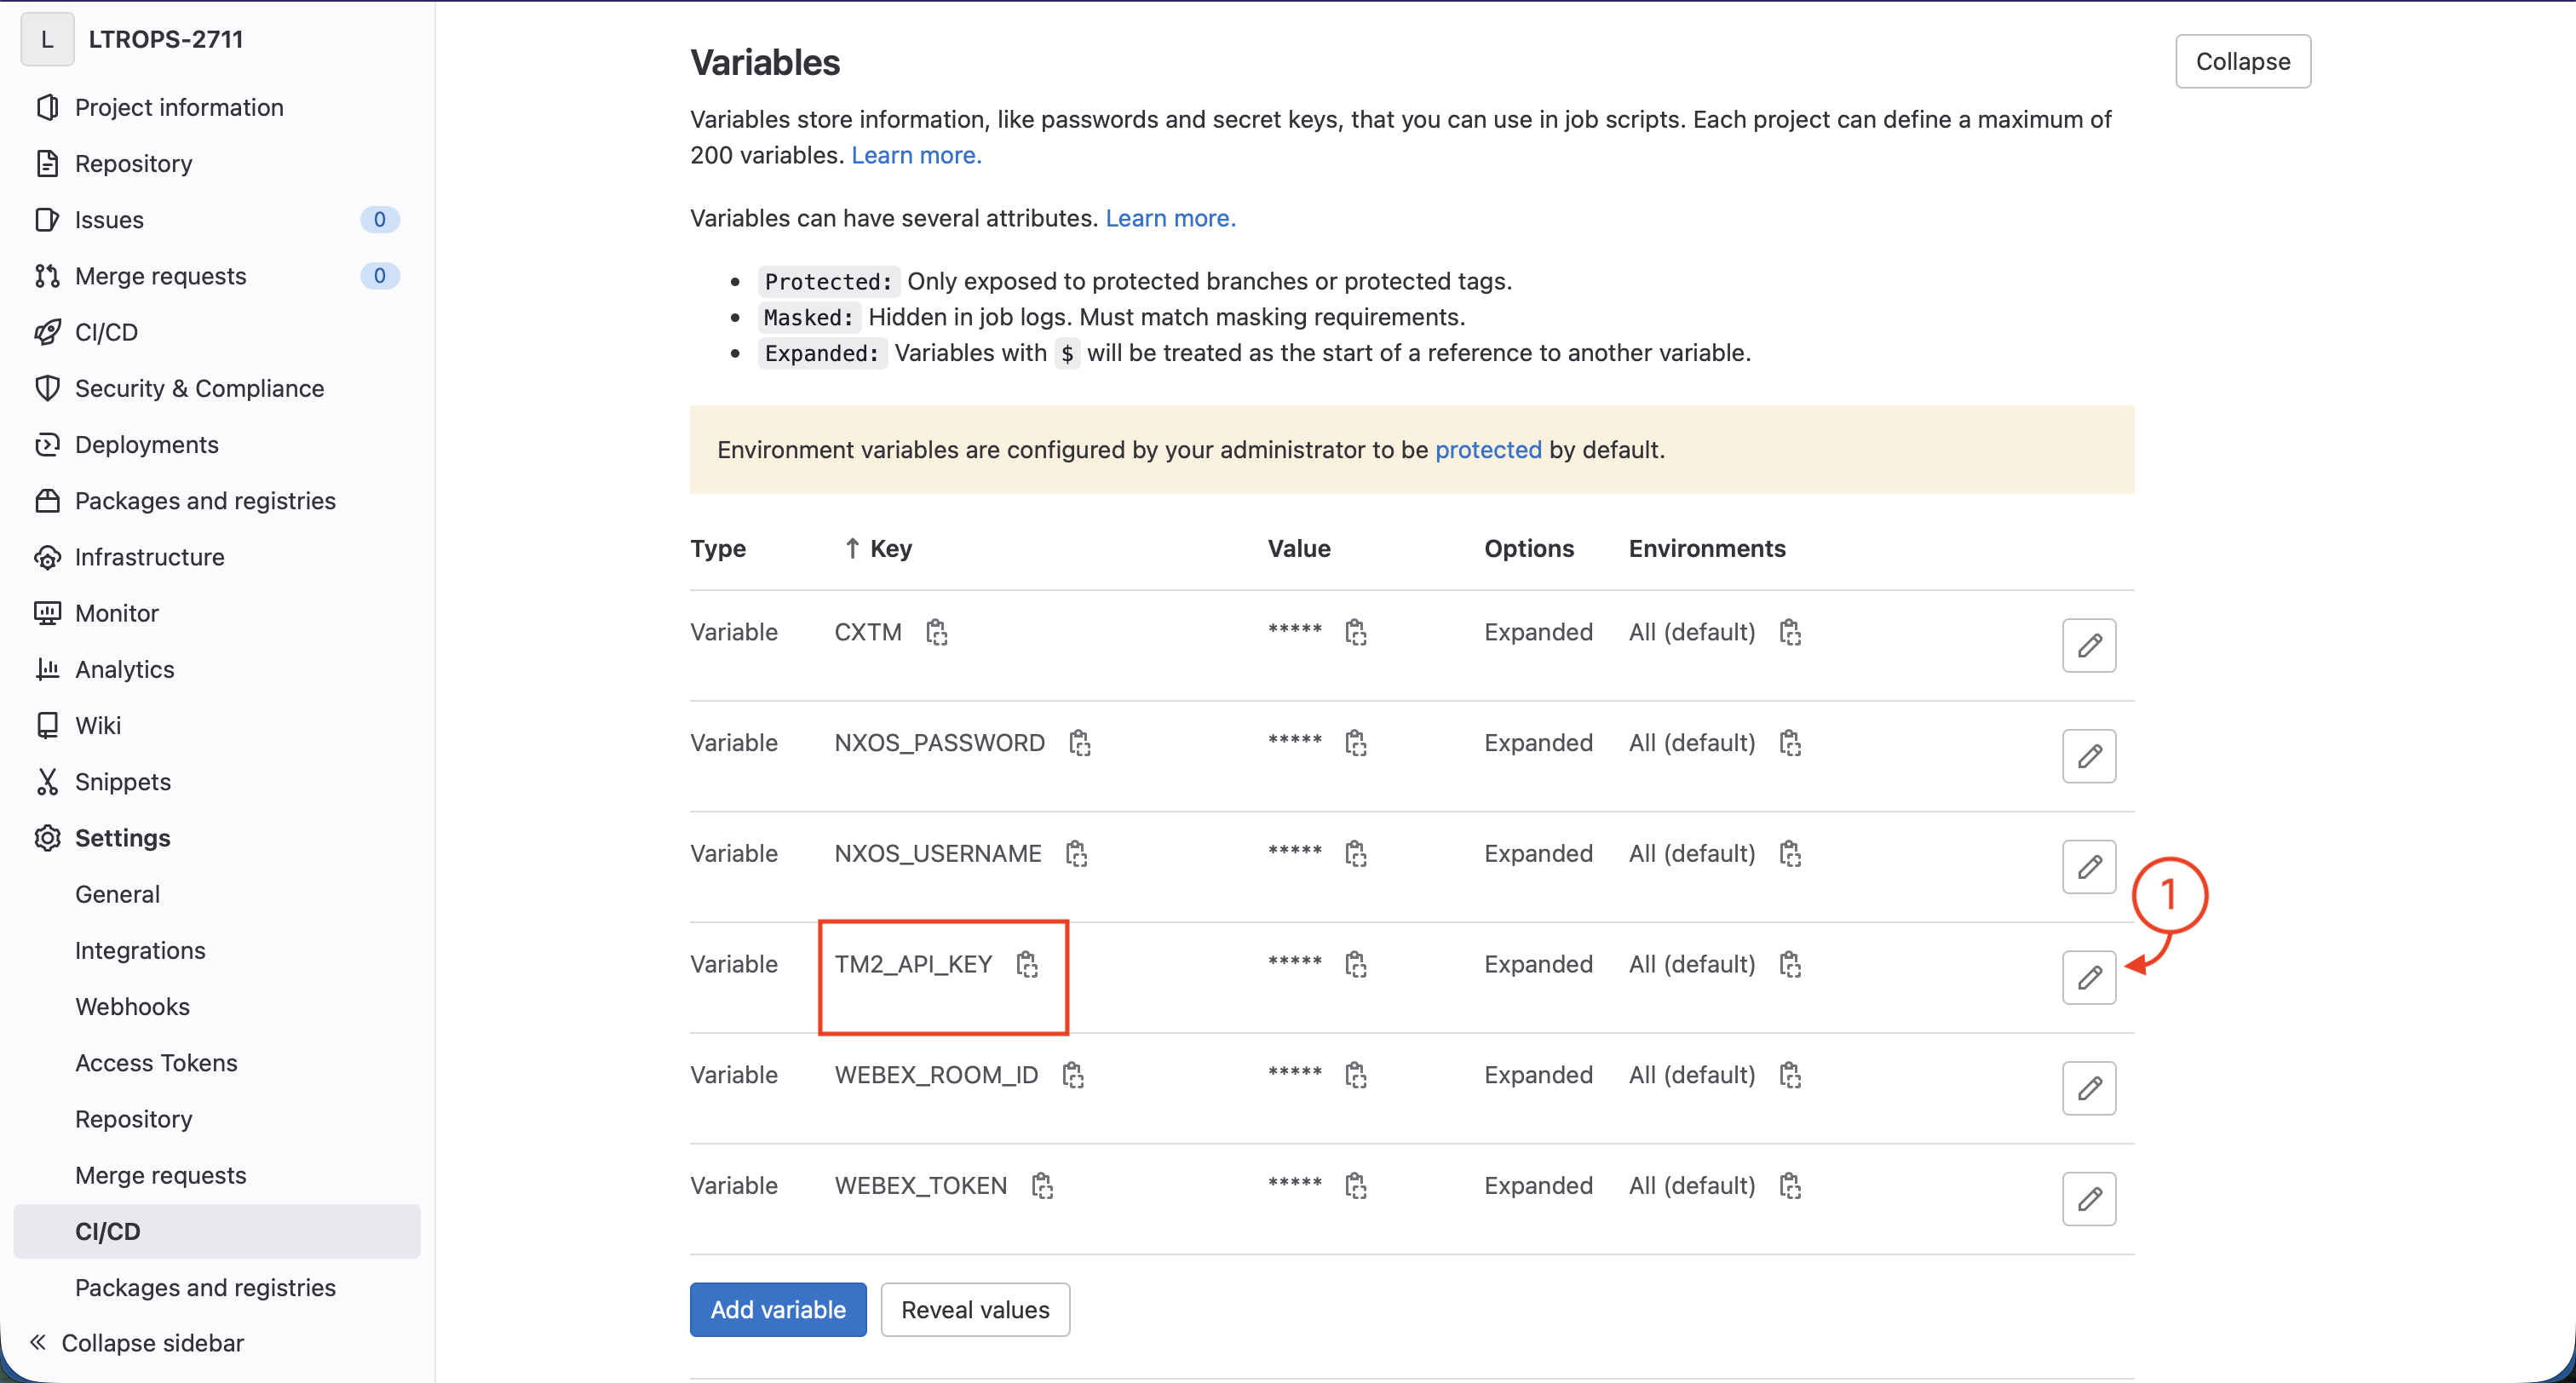
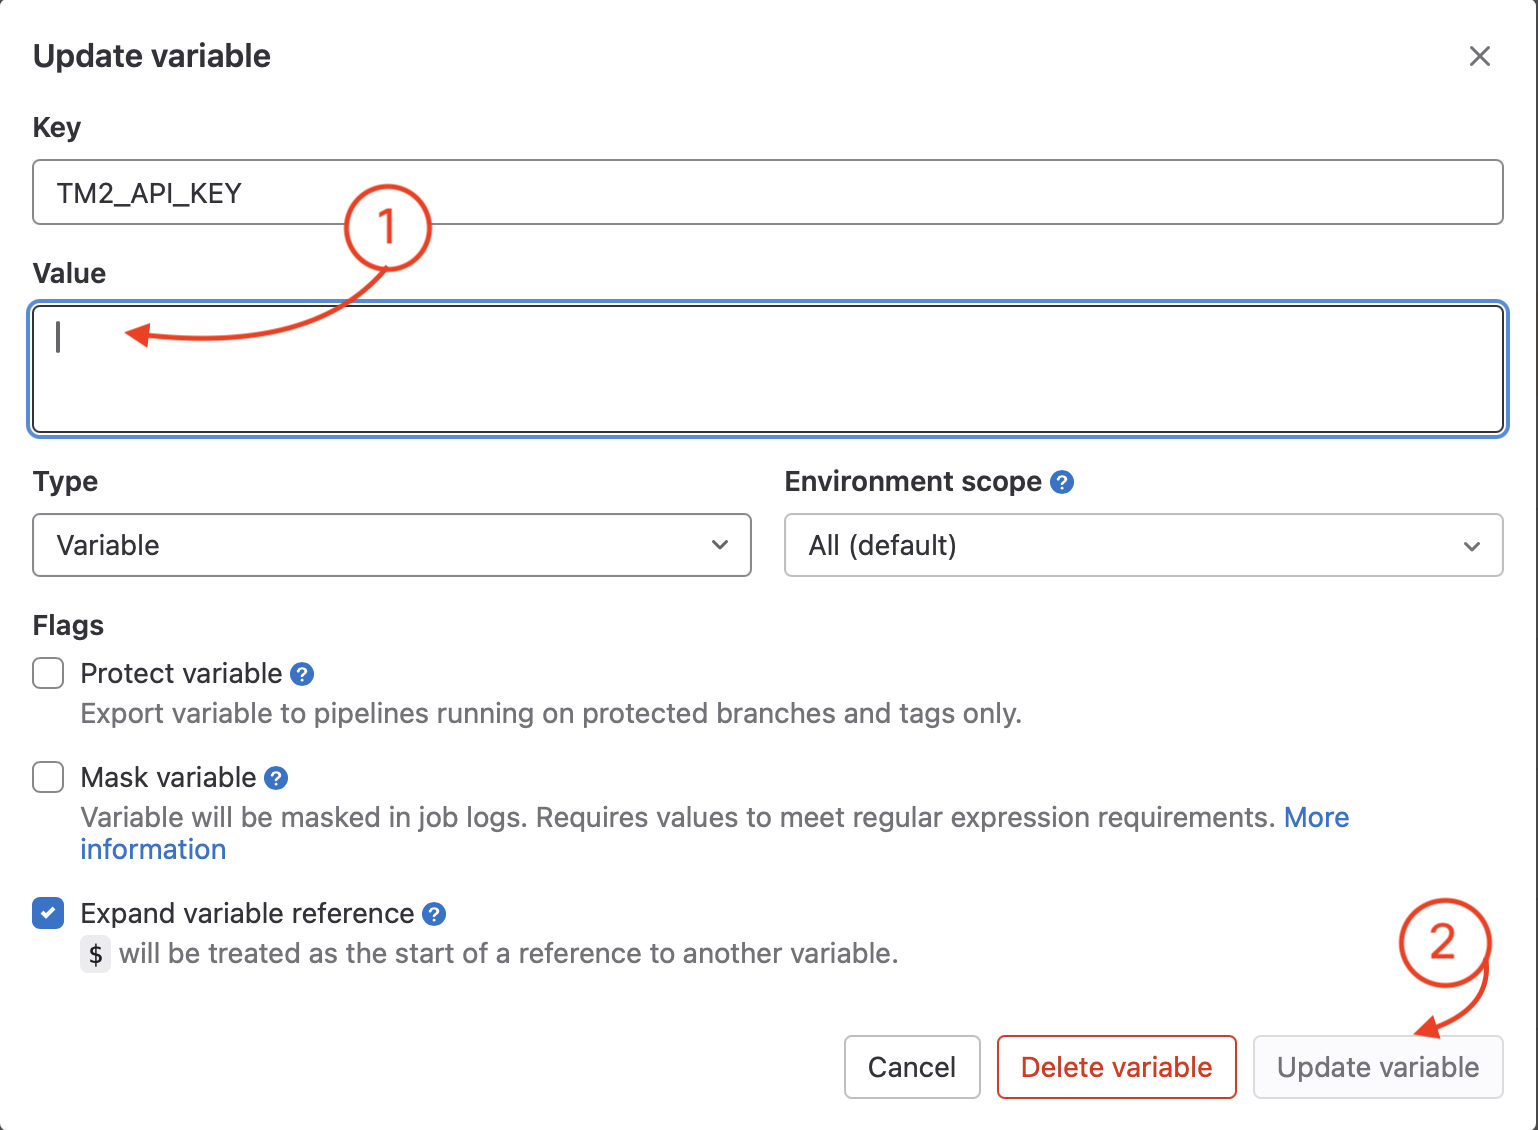
The TM2_API_KEY variable has already been created for you, so you just need to update the existing TM2_API_KEY variable value.
Continue to the next section to add the notification stage to your CI/CD pipeline.